Friendly Seagulls and Storybook Bunnies!
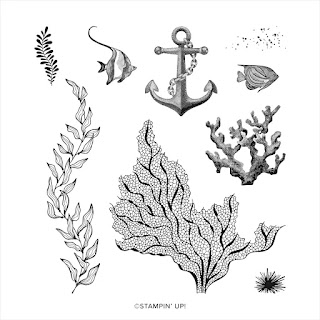
Hello! Today I am sharing a few projects I worked on this week using the Stampin’ Up!® Sale-A-Bration stamp set, Friendly Seagulls (item 164961), and a few of the bunny images from the Storybook Friends Bundle (item 164675) - which includes the Storybook Friends photopolymer stamp set (item 164668) and the co-ordinating Storybook Friends dies (item 164674), each of which are also available separate from the Bundle (however when purchased together using the Bundle item number the 10% Bundled Savings will apply). The Friendly Seagulls stamp set is one of the products that can be selected for FREE with a purchase of $75.00 CDN (before applicable taxes and shipping) of Stampin’ Up!® products during the annual Sale-A-Bration Promotion that is on now until February 28, 2025. The Storybook Friends Bundle is featured in the January-April 2025 Mini Catalogue as part of the Storybook Moments Suite Collection (item 164681).
Just a brief summary of the basic tools and supplies I used to complete my projects this week:
- Paper Trimmer (item 152392) - for trimming cardstock and Designer Series Paper - can also be used for scoring;
- stylus and scoreboard (Simply Scored Scoring Tool - item 122334) for scoring fold lines on cardstock;
- Bone Folder (item 102300) for burnishing scored fold lines;
- Stampin' Cut & Emboss Machine (item 149653) - for all die cutting;
- Paper Snips Scissors (item 103579) - these sharp little scissors are perfect for doing any necessary trimming of die cuts - and of course they make fussy cutting the Friendly Seagulls a whole lot easier too!;
- Take Your Pick Tool (item 144107) - the paper piercer, mini spatula, and tacky putty tips are a great help for picking up and placing small die cuts and embellishments; and
- for the main adhesive, Multipurpose Liquid Glue (item 110755). When gluing DSP panels to a larger base surface, such as the 7" x 7" cardboard backing panel in my first project, I use the Stampin' Brayer (item 162936) to roll over the DSP panel immediately after gluing it to the base surface to ensure even coverage of the liquid glue and good even adhesion of the DSP panel to the base surface.
I used Stazon Jet Black Ink (item 101406) to stamp the images for colouring on watercolour paper, and coloured the images using small paint brushes to apply Classic Stampin' inks/ink refills mixed with a little water. I also used Stazon Jet Black Ink to stamp the sentiments.
To add shading to some of the cardstock die cuts I used Small Blending Brushes (package of three - item 160518) to apply Classic Stampin' inks to the cardstock die cuts, sometimes adding a little additional visual texture (slightly mottled effect) by lightly spritzing the shaded cardstock die cuts with water (Stampin' Spritzers - item 126185) and blotting dry with paper towel - I really like using this technique on foliage die cuts.
On with the projects!
Screeching seagulls flock to the beach to join in the fun - and to ensure that their dulcet tones can be enjoyed by all the bathing beauties!
I applied washes of Misty Moonlight ink (item 153118), Lost Lagoon ink (item 161678), and Crumb Cake ink (item 147116) to a 5" square watercolour paper panel for the sky, water, and sand for the scenic background panel; and applied additional Misty Moonlight and Crumb Cake inks, and Early Espresso ink (item 147114) using Small Blending Brushes. I lightly spritzed the sand portion of the panel with water (Stampin' Spritzers), blotting dry with paper towel. The finished watercolour paper panel was matted with a 5 1/8" square piece of Basic Black cardstock (item 121045) - the edges of which I scraped with the blade of my craft knife.
To complete the project I used the following additional supplies:
- Beach Day stamp set (item 162797) and co-ordinating Beach Day dies (item 162799) to stamp/die cut the lifeguard tower, surfboards, small seagulls, beach balls, umbrella, chair, sandcastles, palm trees, and grass tufts. The palm tree trunks were die cut from Crumb Cake cardstock (item 120953), and shaded with Crumb Cake and Early Espresso inks; the palm tree leaves were die cut from Soft Seafoam cardstock (item 146988) and Old Olive cardstock (item 100702), and shaded with Mossy Meadow ink (item 147111); the grass tufts were die cut from Soft Seafoam cardstock and Mossy Meadow cardstock (item 133676), and shaded with Mossy Meadow ink. I used Crumb Cake ink, Basic Gray ink (item 149165), Real Red ink (item 147084), and Lost Lagoon ink to colour the Beach Day images. Behind the window of the lifeguard tower I first glued a small piece of white tulle and then behind it a small scrap of Pebbled Path cardstock (item 161722);
- Adventurous Sky dies (item 163446) to cut the four clouds from watercolour paper (I used the more pronounced textured side of the watercolour paper as the up-facing side for the die cuts) - clouds shaded with Basic Gray ink;
- Beauty Of The Deep stamp set (item 161233) to stamp the anchor on watercolour paper using Stazon Jet Black Ink; and the Beauty Of The Deep dies (item 161236) to die cut the anchor, and the coral "bush" from Soft Seafoam cardstock (shaded with Mossy Meadow ink);
- Delicate Forest dies (item 162679) to cut two trimmed foliage borders and three tall leafy sprigs from Mossy Meadow cardstock - all shaded with Mossy Meadow ink;
- Country Flowers dies (item 163410) to die cut two leafy clumps from watercolour paper - shaded with Mossy Meadow ink;
- Basic Gray ink, Crumb Cake ink, Daffodil Delight ink (item 147094), and Pumpkin Pie ink (item 147086) to colour the Friendly Seagulls; and
- Stampin' Dimensionals (item 104430) - trimmed as necessary - to attach the central friendly seagull.
I added all the die cuts to build up the scene after I had placed the background DSP panel with matted watercolour paper panel glued to it into the frame.
The Friendly Seagulls stamp set also includes a trio of small fish image - that fits perfectly in the "dog tag" die from the Greetings Of The Season dies (item 164112) to make a pair of earrings!
I made two pairs of earrings this week - using both the fish image, and the small bunny image from the Storybook Friends stamp set, and the display tent cards were constructed in the same manner used for my festive earring cards from my December 13, 2024, blog post (https://archiesatelier.blogspot.com/2024/12/festive-earring-cards-hello-today-i-am.html). Each card measures 3 3/4" tall x 3" wide, and the brace measures just slightly less than 3" x 2 1/2", scored on the 2 1/2" side at 1/2" (valley fold), 1 1/4" (mountain fold), and 2" (valley fold).
For each pair of earrings I cut backing "dog tags" from cardstock to glue to the back of the watercolour paper image "dog tags", wrong sides together.
Additional supplies used to complete the fishy earrings and tent card:
- Night Of Navy cardstock (item 100867) for the card base, brace, and wave (cut using the Beach Day dies);
- Basic Black cardstock (item 121045) for the earring backing "dog tags";
- Basic White Thick cardstock (item 159229) for matting panels;
- Azure Afternoon cardstock (item 161719) for matting panel;
- Pumpkin Pie and Azure Afternoon patterned papers from the 6" x 6" Designer Series Paper Assortments-Brights (item 163775) for front and back panels and strips;
- Misty Moonlight ink (item 153118) and Pumpkin Pie ink (item 147086) to colour the earring image tags - I used a small paint brush and clean water to dab over the Misty Moonlight inked areas; and
- Basic Gray ink (item 149165), Crumb Cake ink (item 147116), Daffodil Delight ink (item 147094), and Pumpkin Pie ink to colour the Friendly Seagulls image added to the card's back panel - frustrated because he can smell but can't see or reach the fish!
Additional supplies used to complete the bunny earrings and tent card:
- Lost Lagoon cardstock (item 133679) for the card base, and the earring backing "dog tags";
- Crumb Cake cardstock (item 120953) for the brace, and card back's matting panel (edges sponged with Crumb Cake ink - item 147116);
- Basic White Thick cardstock (item 159229) for back panel, and matting panel for card front;
- two Lost Lagoon patterns of paper from the Timeless Plaid 6" x 6" Designer Series Paper (item 164678) for panel and strips (the two patterns are the flip sides of one sheet) - all edges sponged with Crumb Cake ink;
- Crumb Cake ink, Lost Lagoon ink (item 161678), and Real Red ink (item 147085) to colour the earring image tags; and
- Storybook Garden Patch stamp set (item 164663) and co-ordinating Storybook Garden Patch dies (item 164666) to stamp and die cut the carrot added to the back panel - Lemon Lime Twist ink refill (item 144092), Mossy Meadow ink (item 147111), Pumpkin Pie ink (item 147086), and Pecan Pie ink (item 161665) used to colour the carrot. *To take advantage of the 10% Bundled Savings the Storybook Garden Patch stamp set and Storybook Garden Patch dies are also available together in the Storybook Garden Patch Bundle (item 164667).*
A few cards . . .
Additional supplies used to complete this 4 1/4" x 4 1/2" top-fold card:
- Basic White Thick cardstock (item 159229) for the card base, and the sentiment banner (cut using the Stylish Shapes dies - item 159183);
- Basic Black cardstock (item 121045) for 4 1/8" x 4 3/8" matting panel, and the inside panel's 1/4" x 4 1/4" strip;
- Coastal Cabana patterned paper from the 6" x 6" Designer Series Paper Assortments-Brights (item 163775) for the 4" x 4 1/4" panel, and the inside panel's 1" x 4 1/2" strip;
- Crumb Cake patterned paper from Timeless Plaid 6" x 6" Designer Series Paper (item 164678) for the front panel's 1 1/2" x just under 3" strip - edges sponged with Crumb Cake ink (item 147116);
- Crumb Cake ink, Basic Gray ink (item 149165), Real Red ink (item 147084), and Lost Lagoon ink (item 161678) to colour the bunny image - die cut bunny was attached and popped up with Stampin' Dimensionals (item 104430) - trimmed as necessary;
- Country Flowers stamp set (item 163405) and Country Flowers dies (item 163410) to stamp and die cut the floral bouquet and the bucket;
- Daffodil Delight ink (item 147094), Real Red ink, Lost Lagoon ink, Pumpkin Pie ink (item 147086), Pecan Pie ink (item 161665), and Mossy Meadow ink (item 147111) to colour the floral bouquet image;
- Basic Gray ink and Pecan Pie ink to colour the bucket (Pecan Pie ink is great for rust!); and
- two small and one large of the Summer Splash dots from the 2024-2026 In Colour Resin Dots (item 163389).
Additional supplies used to complete this 4" x 3" top-fold card:
- Basic White Thick cardstock (item 159229) for the card base;
- Basic Black cardstock (item 121045) for the 3 7/8" x 2 7/8" matting panel, and the inside panel's 1/4" x 3" strip;
- Gray Granite cardstock (item 146983) for the sentiment banner, cut using the Stylish Shapes dies (item 159183). Immediately after stamping the sentiment I rubbed over it lightly with a paper towel to slightly blur/soften the ink;
- two patterns of Poppy Parade paper from the 6" x 6" Designer Series Paper Assortments-Brights (item 163775) for the card front's 3 3/4" X 2 3/4" panel and 1 1/2" x 2 3/4" strip; and the inside panel's 3/4" x 2 3/4" and 1/2" x 2 1/2" strips;
- Crumb Cake ink (item 147116), Basic Gray ink (item 149165), and Real Red ink (item 147084) to colour the bunny image. Before colouring the image I die cut the image tag using the Greetings Of The Season dies (item 164112); and
- two Stampin' Dimensionals (item 104430) to attach and pop up the sentiment banner - the sentiment banner covers the die cut hole in the top of the image tag.
I made three more 4" x 3" top-fold note cards for my garden-themed series of note cards that I began a few weeks ago. I used Basic White Thick cardstock (item 159229) for all three cards, and used Stampin' Dimensionals (item 104430) and Mini Stampin' Dimensionals (item 144108) - all trimmed as necessary - to attach and pop up the die cut bunny images. To colour the bunny bodies I used Crumb Cake ink (item 147116), Basic Gray ink (item 149165), and Real Red ink (item 147084). The bunny dresses were coloured using Daffodil Delight ink (item 147094), Basic Gray ink, and Highland Heather ink refill (item 147167). The two large leafed plants stamped and die cut using the Country Flowers stamp set (item 163405) and Country Flowers dies (item 163410) were coloured using Mossy Meadow ink (item 147111); the bucket, also stamped and die cut using the Country Flowers stamp set and co-ordinating dies, was coloured using Basic Gray ink and Pecan Pie ink (item 161665); the flower pots and small trowel stamped and die cut using the Storybook Garden Patch stamp set and co-ordinating dies were coloured using Pecan Pie and Basic Gray inks; the garden boots stamped and die cut using the retiring Garden Meadow stamp set (item 162736) and Garden Meadow dies (item 162740) were coloured using Daffodil Delight ink; the basket of flowers, also stamped and die cut using the Garden Meadow stamp set and co-ordinating dies, was coloured using Highland Heather ink refill, and Crumb Cake and Mossy Meadow inks.
*As retiring Online Exclusives products the Garden Meadow stamp set and co-ordinating Garden Meadow dies are both Last Chance Products, and as such are available only while supplies last. Unfortunately the Garden Meadow stamp set is now sold out, however, the dies are currently still available and are deeply discounted to $19.60 CDN!*
The leafy clump (used on the Highland Heather bunny dress card) was die cut from Old Olive cardstock (item 100702) using the Country Flowers dies, and shaded using Mossy Meadow ink. The panels trimmed from two patterns of the Perennial Lavender 12" x 12" Designer Series Paper (item 162593) on this card were matted with Basic Black cardstock (item 121045) - the edges of the Crumb Cake gingham patterned paper were sponged with Crumb Cake ink. Strips trimmed from the two patterns of DSP were added to the inside panel.
On the other two cards I used panels trimmed from a Mossy Meadow patterned (little bunny card) and Boho Blue patterned (boots card) paper from the Timeless Plaid 6" x 6" Designer Series Paper (item 164678) - all edges sponged with Crumb Cake ink. To the little bunny card I added two small and one large of the Old Olive shaded dots from the Ombre Matte Decorative Dots (item 161448); and to the boots card I added two small and one large of the Azure Afternoon dots from the Rainbow Adhesive-Backed Dots (item 162758).
Thank you for visiting my blog! I had lots of fun working on these projects!
Stampin' Up! advises that the Stazon Jet Black Ink (item 101406) is still expected to be back in stock and available for ordering the week of January 20, 2025.
If you are interested in purchasing any of the available Stampin’ Up!® products I have used in my projects, and you live in Canada and do not have a Stampin' Up! demonstrator, please do not hesitate to visit my online store found on my website https://archiesatelier.stampinup.net/ at your convenience, or simply click under the "Shop With Me" tab on the right sidebar of my blog, which will take you directly to my website and online store. I very much appreciate your business and would be very pleased to be your demonstrator! If you need any assistance please do not hesitate to contact me (lmccoyarchie@gmail.com) and I will try my best to help! The digital versions of the May 2024-April 2025 Annual Catalogue, January-April 2025 Mini Catalogue, the companion (and digital-only) January 2025 Scrapbooking Brochure, and the Sale-A-Bration Brochure are all available for you to access at your convenience on my website (https://archiesatelier.stampinup.net/). The January 2025 release of new Online Exclusives products are also now available in my online store. If you are shopping during the Sale-A-Bration Promotion don't forget to check out the Last Chance Products - retiring products from both the September-December 2024 Mini Catalogue and the Online Exclusives line that will be available only while supplies last - there are some great bargains to be had!
Have fun creating!
Laurel
*It has come to my attention that quite often email correspondence from me is delivered to the recipient's spam or junk mail folder - if you have corresponded with me I have replied so be sure to check your spam or junk mail folder! Thank you!!


.webp)


Comments
Post a Comment