What A Tool!
(Playing With the Trusty Tools Bundle - Part 1)

Hello! Today I am sharing a few projects I worked on this week using the new Stampin' Up! Trusty Tools Bundle (item 162723) featured in the January-April 2024 Mini Catalogue, and the co-ordinating Sale-A-Bration product - Trusty Toolbox 12" x 12" Designer Series Paper (item 162978). The Bundle includes the Trusty Tools photopolymer stamp set (item 163274) and the co-ordinating Trusty Tools dies (item 162722) - each of which can of course be purchased on their own. However, if you would like both the stamp set and dies be sure to use the Bundle item number when submitting your order to ensure that you receive the 10% Bundled Savings! The Trusty Toolbox Designer Series Paper is one of the products that can be selected for free during Sale-A-Bration (on until February 29, 2024) with an order of $60.00 or more CDN (before taxes and shipping), and includes lots of fun designs - including the iconic red (Poppy Parade) and gray (Gray Granite) tool chest drawer paper!.

.jpg)
Trusty Tools dies - 162722
(Bundle - 162723)
Just a quick summary of the basic tools and supplies I used to complete my projects this week:
- Paper Trimmer (item 152392) - for trimming paper and cardstock - can also be used for scoring;
- stylus and scoreboard (Simply Scored Scoring Tool - item 122334) - for scoring fold lines. For crisp card folds I also burnish all folded scored lines using my Bone Folder (item 102300);
- Stampin' Cut & Emboss Machine (item 149653) - for all die cutting;
- Paper Snips Scissors (item 103579) - these sharp scissors certainly made fussy cutting the truck image from the Trucking Along stamp set, and the pencil from the Trusty Toolbox Designer Series Paper for the Tool Chest Gift Box project easier;
- Take Your Pick Tool (item 144107) - the paper piercer, mini spatula, and tacky putty tips are a great help for picking up and placing small embellishments and die cuts; and
- for the main adhesive, Multipurpose Liquid Glue (item 110755).
I stamped the sentiments and all the Trusty Tools images on watercolour paper using Stazon Jet Black Ink (item 101406), and coloured the images using the following Classic Stampin' inks:
- Crumb Cake (item 147116);
- Pecan Pie (item 161665);
- Basic Gray (item 149165); and
- Daffodil Delight (item 147094).
I used the following Watercolour Pencils to add shading over some of the inked images, or in the case of the "paint" on the paint brushes, to simply add the colour - using the pencils as regular coloured pencils and not adding any water:
- Daffodil Delight, Basic Gray, Early Espresso, Old Olive, and Real Red from Assortment 1 (item 161700); and
- Balmy Blue and Granny Apple Green from Assortment 2 (item 149014).
The additional Trusty Tools die cuts were cut from watercolour paper and coloured using the following Classic Stampin' inks applied with Blending Brushes (item 153611) and Small Blending Brushes (item 160518):
- Crumb Cake;
- Pecan Pie;
- Basic Gray; and
- Sweet Sorbet (item 159216) - plier handles - with additional Basic Gray ink applied around the edges.
After applying the initial layers of ink with Blending Brushes on the "rusty" tools I then pressed the die cuts directly into the Pecan Pie and Basic Gray ink pads - for this technique I found that having these ink pads not too "juicy" was a benefit. It may be a good idea for me to invest in two new ink pads that I can keep for stamping and keep my two current and very well used (and maybe slightly abused!) ink pads strictly dedicated to this technique! I enjoy collecting "rusty" bits and pieces for art projects - at antique/junk shops and just picked up on sidewalks and roads in the spring - and have a lot of fun trying to replicate the "rustiness" in paper projects!
On with the projects!
Tool Chest Gift Box


For this 6" tall (excluding pegboard) x 5" wide x 3" deep gift box that is just the right size to hold a small gift for a favourite handy person - I used the following additional supplies:
- for the box: two 8 1/2" x 9" pieces of Basic Black cardstock (item 121045) - scored on the 8 1/2" side at 3" and 8" (1/2" tab is the glue tab), and scored on the 9" side at 3" (bottom flaps);
- for the lid: an 8 1/16" x 6 1/16" piece of Basic Black cardstock scored at 1 1/2" on all four sides;
- Gray Granite cardstock (item 146983) for matting panels: for the front and back of box - two 5 7/8' x 4 7/8" pieces; for the box's sides - two 5 7/8" x 2 7/8" pieces; for the lid: one 4 15/16" x 2 15/16" piece (top); one 4 15/16" x 1 3/8" piece (front); and two 2 15/16" x 1 3/8" pieces (sides);
- Poppy Parade cardstock (item 119793) for matting panels: for the back of box - one 5 3/4" x 4 3/4" piece; for the box's sides - two 5 3/4" x 2 3/4" pieces; for the lid: two 2 13/16" x 1 1/4" pieces (sides);
- tool chest drawer patterned paper from Trusty Toolbox DSP - a 5 3/4" x 4 3/4" piece for box front; and a 1 1/4" x 4 3/4" piece for the front of the lid - around all edges I sponged Basic Gray ink;
- Basic Black cardstock - a 5 1/8" x 5 1/16" piece to be glued to back of lid (back board), and a 4 3/4" x 2 3/4" piece to be glued to the top of the lid;
- Gray Granite cardstock - a 4 3/4" square piece to be glued to back of Basic Black cardstock back board - I thought this panel could be used to write a little note to the gift recipient;
- 4 3/16" x 2 13/16" piece of Crumb Cake cardstock (item 120953) for the pegboard die cut - I die cut the cardstock and then trimmed it to the finished size (wanted a relatively even boarder around the edges of the die cut holes) - edges sponged with Crumb Cake ink;
- 4 7/16" x 3 1/16" piece of Pecan Pie cardstock (item 161717) for pegboard matting panel - edges sponged with Pecan Pie ink;
- small scrap of Silver Foil (item 156457 - apparently no longer available!) - for die cut nuts and screws;
- 4 3/4" x 3/8" trimmed strip of ruler design paper from Trusty Toolbox DSP;
- grid paper design paper from Trusty Toolbox DSP - I stamped the truck from the Trucking Along stamp set (item 162299) on a small piece, cut out not allowing any borders, sponged with a little Basic Gray ink, and glued to another 2" square piece (edges of which were also sponged with Basic Gray ink); and

- two Stampin' Dimensionals (item 104430) - stacked one on top of the other - to adhere top of measuring tape die cut to pegboard.
I also inked the edges of the fussy cut pencil with Basic Gray ink.
Dad's Toolbox


For this little gift holder I was inspired by several of my Dad's old toolboxes, and it is constructed in the same manner as I used for my Next Destination suitcase card/gift holder - shared in my November 10, 2023, blog post (https://archiesatelier.blogspot.com/2023/11/next-destination-to.html). For this little toolbox, which measures 2 3/4" tall x 4" wide x 1 3/4" deep I used the following additional supplies:
- for the box a 4 1/4" x 12" piece of Gray Granite cardstock (item 161715 - Neutrals 12" x 12") scored on the 4 1/4" side at 1/2" (top flap fold-overs) and 2 1/2" (1 3/4" bottom flaps), and scored on the 12" side at 1 3/4", 5 3/4", 7 1/2", and 11 1/2" (1/2" tab is the side glue tab);
- for the lid a 6 1/2" x 4 1/4" piece of Gray Granite cardstock scored at 1/2" and 1 1/4" on all four sides;
- I wouldn't normally say it was good when cardstock cracked when scored fold lines were burnished - however, since I wanted a distressed look this worked out well and I painted Pecan Pie ink and then heavily sponged Pecan Pie ink along all edges once the box and lid were assembled;
- Gray Granite cardstock for the lid supporting strips (glued to the inside top of the front, back, and sides of the box): two 4" x 1/2" strips (front an back), and two just under 1 3/4" x 1/2" strips - all strips scored at 1/4" on the 1/2" side - these score lines are not folded but are guide lines - when gluing the strips I lined up the top edges of the box flush with the scored lines - I angle cut the corners to allow a smoother fit and sponged the top edges with Pecan Pie ink;
- for the handle a 1/2" x 5 1/2" strip of Gray Granite cardstock scored along the 5 1/2" side at 1/2", 1 1/2", 4", and 5", and scored (for decorative purposes) three times at 1/8" intervals on the 1/2" side - all edges and fold lines sponged with Pecan Pie ink;
- for the matting panels I used Gray Granite patterned paper from the Trusty Toolbox DSP - for the box: two 1 7/8" x 3 7/8" pieces (front and back), and two 1 7/8" x 1 5/8" pieces (sides); and for the lid: one 1 5/8" x 3 7/8" piece (top), two 5/8" x 3 7/8" pieces (front and back), and two 5/8" x 1 5/8" pieces (sides).
- Tailor Made Tags dies (item 155563) to cut small rounded end tag for front fastener from Pebbled Path cardstock (item 161722) - tag edges sponged with Pecan Pie ink;
.jpg)
Tailor Made Tags dies - 155563
- smallest rectangular die from Perennial Postage dies (item 162607) to cut two back hinges from Pebbled Path cardstock - edges sponged with Pecan Pie ink - I scored these two die cut rectangles at 3/4" from one end (this slightly shorter end is glued to the back of the lid);
.jpg)
Perennial Postage dies - 162607
- double circle fastener die from Mini Pocket Envelope dies (item 159167) to cut embellishments for front fastener and back hinges - front cut from Gray Granite cardstock and back cut from Pebbled Path cardstock - all edges again sponged with Pecan Pie ink;
.jpg)
Mini Pocket Envelope dies - 159167
- 8 of the Rustic Metallic Adhesive-Backed Dots (item 159082) - added to handle ends and the centers of the double circle embellishments on the back hinges and front fastener;
- Tailor Made Tags dies to cut the watercolour paper sentiment tag - sponged with Crumb Cake ink, lightly spritzed with water (Stampin' Spritzers - item 126185), blotted dry with paper towel, then edges sponged with Early Espresso ink (item 147114); backing tag from Pecan Pie cardstock (edges sponged with Early Espresso ink), and hole re-enforcer from Early Espresso cardstock (item 119686);
- nuts and screws die cut from watercolour paper that had been coloured with Basic Gray ink (ink applied with Blending Brushes); and
- Gray Granite baker's twine (Baker's Twine Essentials Pack - item 155475) to tie tag to handle (tag also secured to front of lid with dab of Multipurpose Liquid Glue).
After the toolbox was completed I added a few splatters with my Basic Black Stampin' Write Marker (item 162481) by flicking the brush tip against the marker lid.
The two small magnetic discs I used for the closure I purchased at my local scrapbooking shop. I know the tag may be oversized - especially with the addition of the die cut wrench and hammer - but at least there is no mistaking who this toolbox belongs too! And I do like big tags! I coloured the backs of the two die cut tag tools with Early Espresso ink.

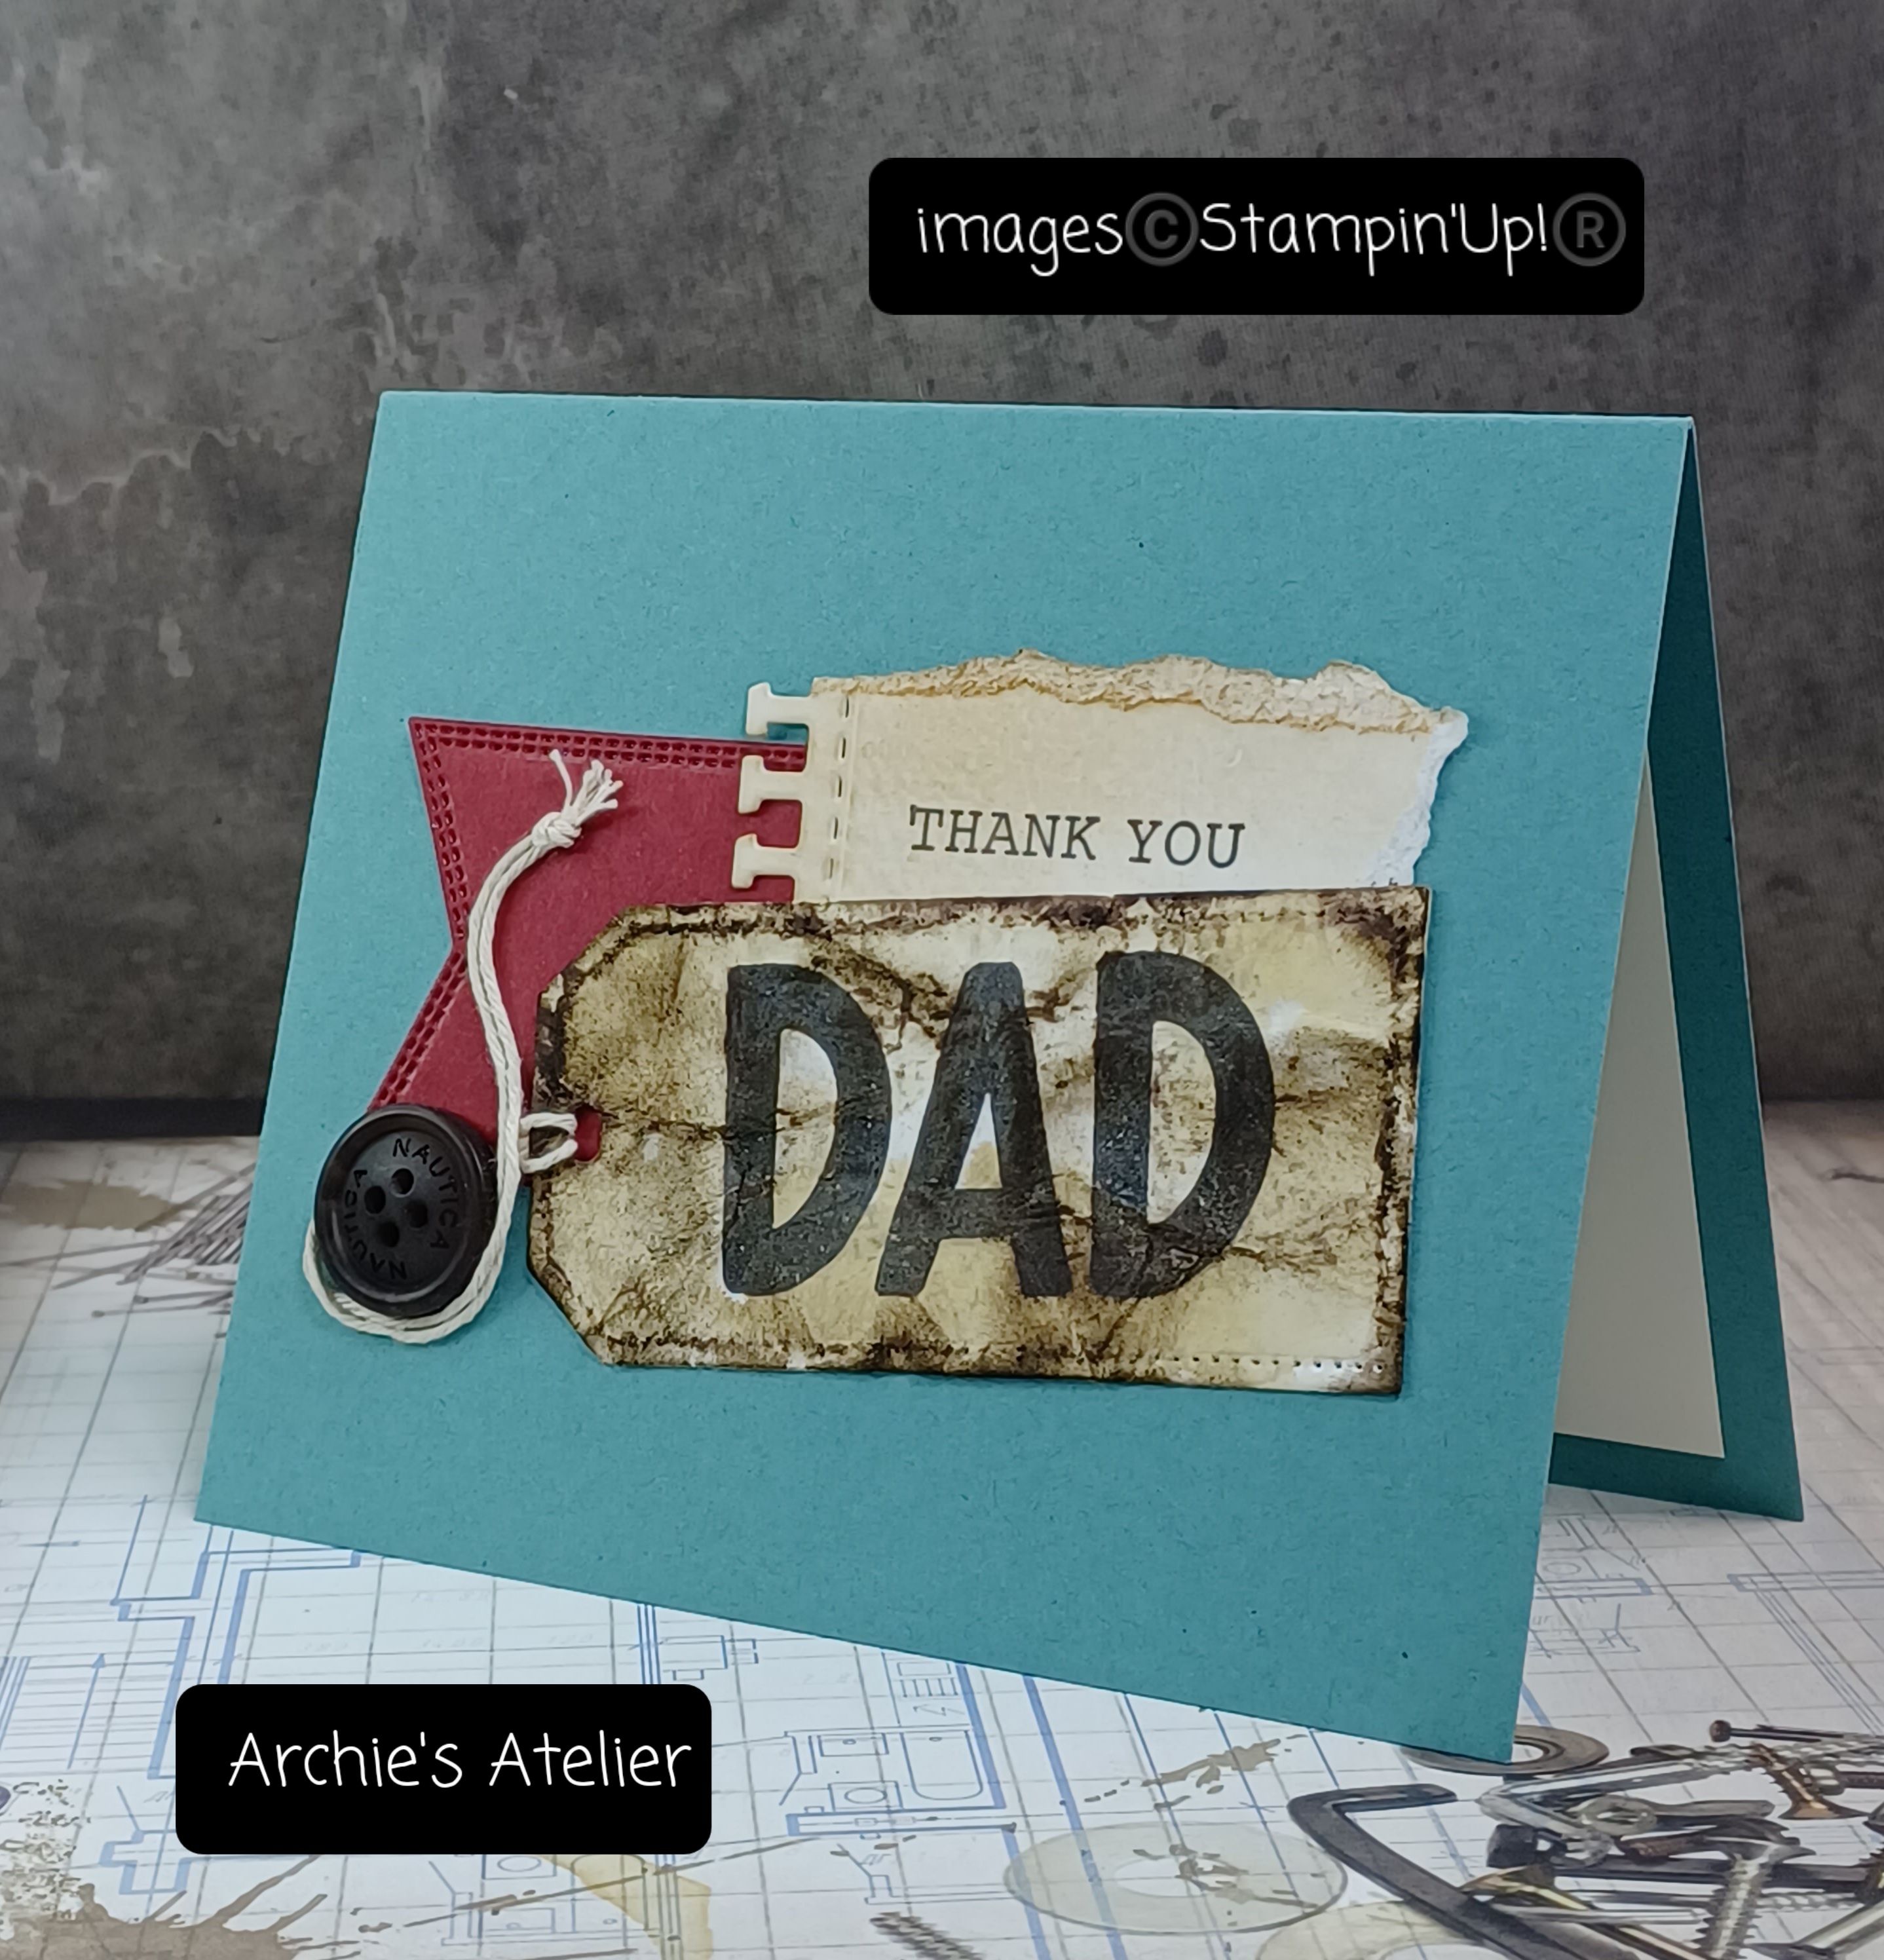

Additional supplies used to complete this 4 1/8" x 5" top-fold card:
- Lost Lagoon cardstock (item 133679) for the card base;
- Cherry Cobbler cardstock (item 119685) for the die cut flag - cut using the Nested Essentials dies (item 161597);
.jpg)
- Very Vanilla Thick cardstock (item 144237) for 3 5/8" x 4 1/2" inside panel;
- Tailor Made Tags dies (item 155563) to cut watercolour paper sentiment tag - tag watercoloured with Crumb Cake and Early Espresso inks, crumpled, ironed, and additional ink blended over tag to accentuate the creases;
- Gorgeously Made stamp set (item 161193) for the "Thank You" sentiment - spiral notebook edge die from the co-ordinating Gorgeously Made dies (item 161202) used to cut the edge of the watercolour paper sentiment panel, top and other side torn and Crumb Cake ink applied with one of the Blending Brushes - (the Gorgeously Made stamp set and co-ordinating dies are also available together as the Gorgeously Made Bundle - item 161203); and

.jpg)
Gorgeously Made dies - 161202
(Bundle - 161203)
- Very Vanilla baker's twine (Baker's Twine Essentials Pack - item 155475) looped through tag) - ends secured with tiny dabs of Multipurpose Liquid Glue.
The "almost Early Espresso" button is from my stash.


Additional supplies used to complete this 4" x 3" top-fold card:
- Poppy Parade cardstock (item 119793) for the card base, and flower (cut using the circle stamen die from Paper Florist dies - item 161284);
.jpg)
- Gray Granite cardstock (item 146983) for the 3 7/8" x 2 7/8" front matting panel, and 3 5/8" x 2 5/8" inside panel;
- Basic Black cardstock (item 121045) for the 3 3/4" x 2 3/4" front panel, 3 3/4" x 2 3/4" inside matting panel, and flower center (cut using the Paper Florist dies);
- screwdriver patterned paper from Trusty Toolbox DSP for front panel's 3 5/8" x 1 5/8" strip, and inside panel's 2 1/8" x 1/2" strip;
- Mini Pocket Envelope dies (item 159167) to cut two leafy sprigs from watercolour paper - Granny Apple Green ink and Mossy Meadow ink (item 147111) applied using one of the Blending Brushes;
- black baker's twine (Baker's Twine Essentials Pack - item 155475) looped through paint brush handle - ends secured with tiny dab of Multipurpose Liquid Glue; and
- four of the Basic Gray dots (two large and two small) from Classic Matte Dots (item 158146) added to Basic Black cardstock front panel.


Additional supplies used to complete this 2 1/2" x 3" top-fold gift card:
- Basic White Thick cardstock (item 159229) for the card base;
- Gorgeously Made stamp set (item 161193) for the sentiment - the trimmed watercolour paper strip was torn at both ends;
- Balmy Blue watercolour pencil (Watercolour Pencils - Assortment 2 - item 149014) to add splatters to card front - with a wet paint brush I flicked against the watercolour pencil's tip;
- white baker's twine (Baker's Twine Essentials Pack - item 155475) looped through paint brush handle - ends secured with - yes! - a tiny dab of Multipurpose Liquid Glue;
- Stampin' Dimensionals (item 104430) to attach the paint brush to card front; and
- to finish the card I added one large and two small of the Azure Afternoon dots from Rainbow Adhesive-Backed Dots (item 162758).
Thank you for visiting my blog! I certainly had a lot of fun starting to play with the Trusty Tools Bundle and Trusty Toolbox Designer Series Paper!
If you are interested in purchasing any of the available Stampin' Up! products I have used in my projects, and you live in Canada and do not have a Stampin' Up! demonstrator, please do not hesitate to visit my online store found on my website https://archiesatelier.stampinup.net/ at your convenience, or simply click under the "Shop With Me" tab on the right sidebar of my blog, which will take you directly to my website and online store. I very much appreciate your business, and if you need any assistance please do not hesitate to contact me (lmccoyarchie@gmail.com) - I would be very pleased to be your demonstrator! The digital versions of the May 2023-April 2024 Annual Catalogue, as well as the January-April 2024 Mini Catalogue, and the Sale-A-Bration Brochure are available for you to access at your convenience on my website (https://archiesatelier.stampinup.net/). When visiting my online store don't forget to check out the great deals on the Clearance Rack, as well as the great selection of products available as Online Exclusives!
Have fun creating!
Laurel
*It has come to my attention that quite often email correspondence from me is delivered to the recipient's spam or junk mail folder - if you have corresponded with me I have replied so be sure to check your spam or junk mail folder! Thank you!!

The best time to test out a new blanket is during a freezing rain event!
Comments
Post a Comment