Next Destination To . . . New Memories and Adventure!

Hello! Today I am sharing a few projects I worked on this week using the Stampin' Up! Next Destination stamp set (item 161427) from the May 2023-April 2024 Annual Catalogue. Although a "stand alone" stamp set I think there are definitely lots of possibilities for this stamp set!

Just a quick note about the standard tools and supplies I used to complete my projects this week:
- Paper Trimmer (item 152392) - for trimming paper and cardstock - can also be used for scoring;
- stylus and scoreboard (Simply Scored Scoring Tool - item 122334) - for scoring fold lines and decorative raised lines (suitcase handle and straps) - for crisp folds I also burnished the fold lines using my Bone Folder (item 102300);
- Stampin' Cut & Emboss Machine (item 149653) - for all die cutting and embossing;
- Paper Snips Scissors (item 103579) - for fussy cutting images that do not have co-ordinating dies a nice sharp pair of scissors are essential!;
- Take Your Pick Tool (item 144107) - the paper piercer, mini spatula, and tacky putty tips are a great help for picking up and placing small embellishments and die cuts; and
- for the main adhesive, Multipurpose Liquid Glue (item 110755) - I transfer the glue into a small fine-tipped plastic bottle that has a pin stopper, and I have found that the fine-tip really helps when applying glue to small areas (i.e. narrow frames) or when I need a tiny dab of glue to adhere a Linen Thread knot!
To stamp the images and sentiments that have been coloured I used watercolour paper and Stazon Jet Black Ink (item 101406) - colouring the images using ink from Classic Stampin' Pads applied using paint brushes and a little water. By pressing against the lid and bottom of the closed ink pad I am able to transfer ink to the inside of the pad's lid, which then serves as the ink palette (an alternative method would be to press ink from the pad - or squeeze a drop or two from an ink refill - onto a clean acrylic stamp block or other clean and smooth plastic surface).

On with the projects!


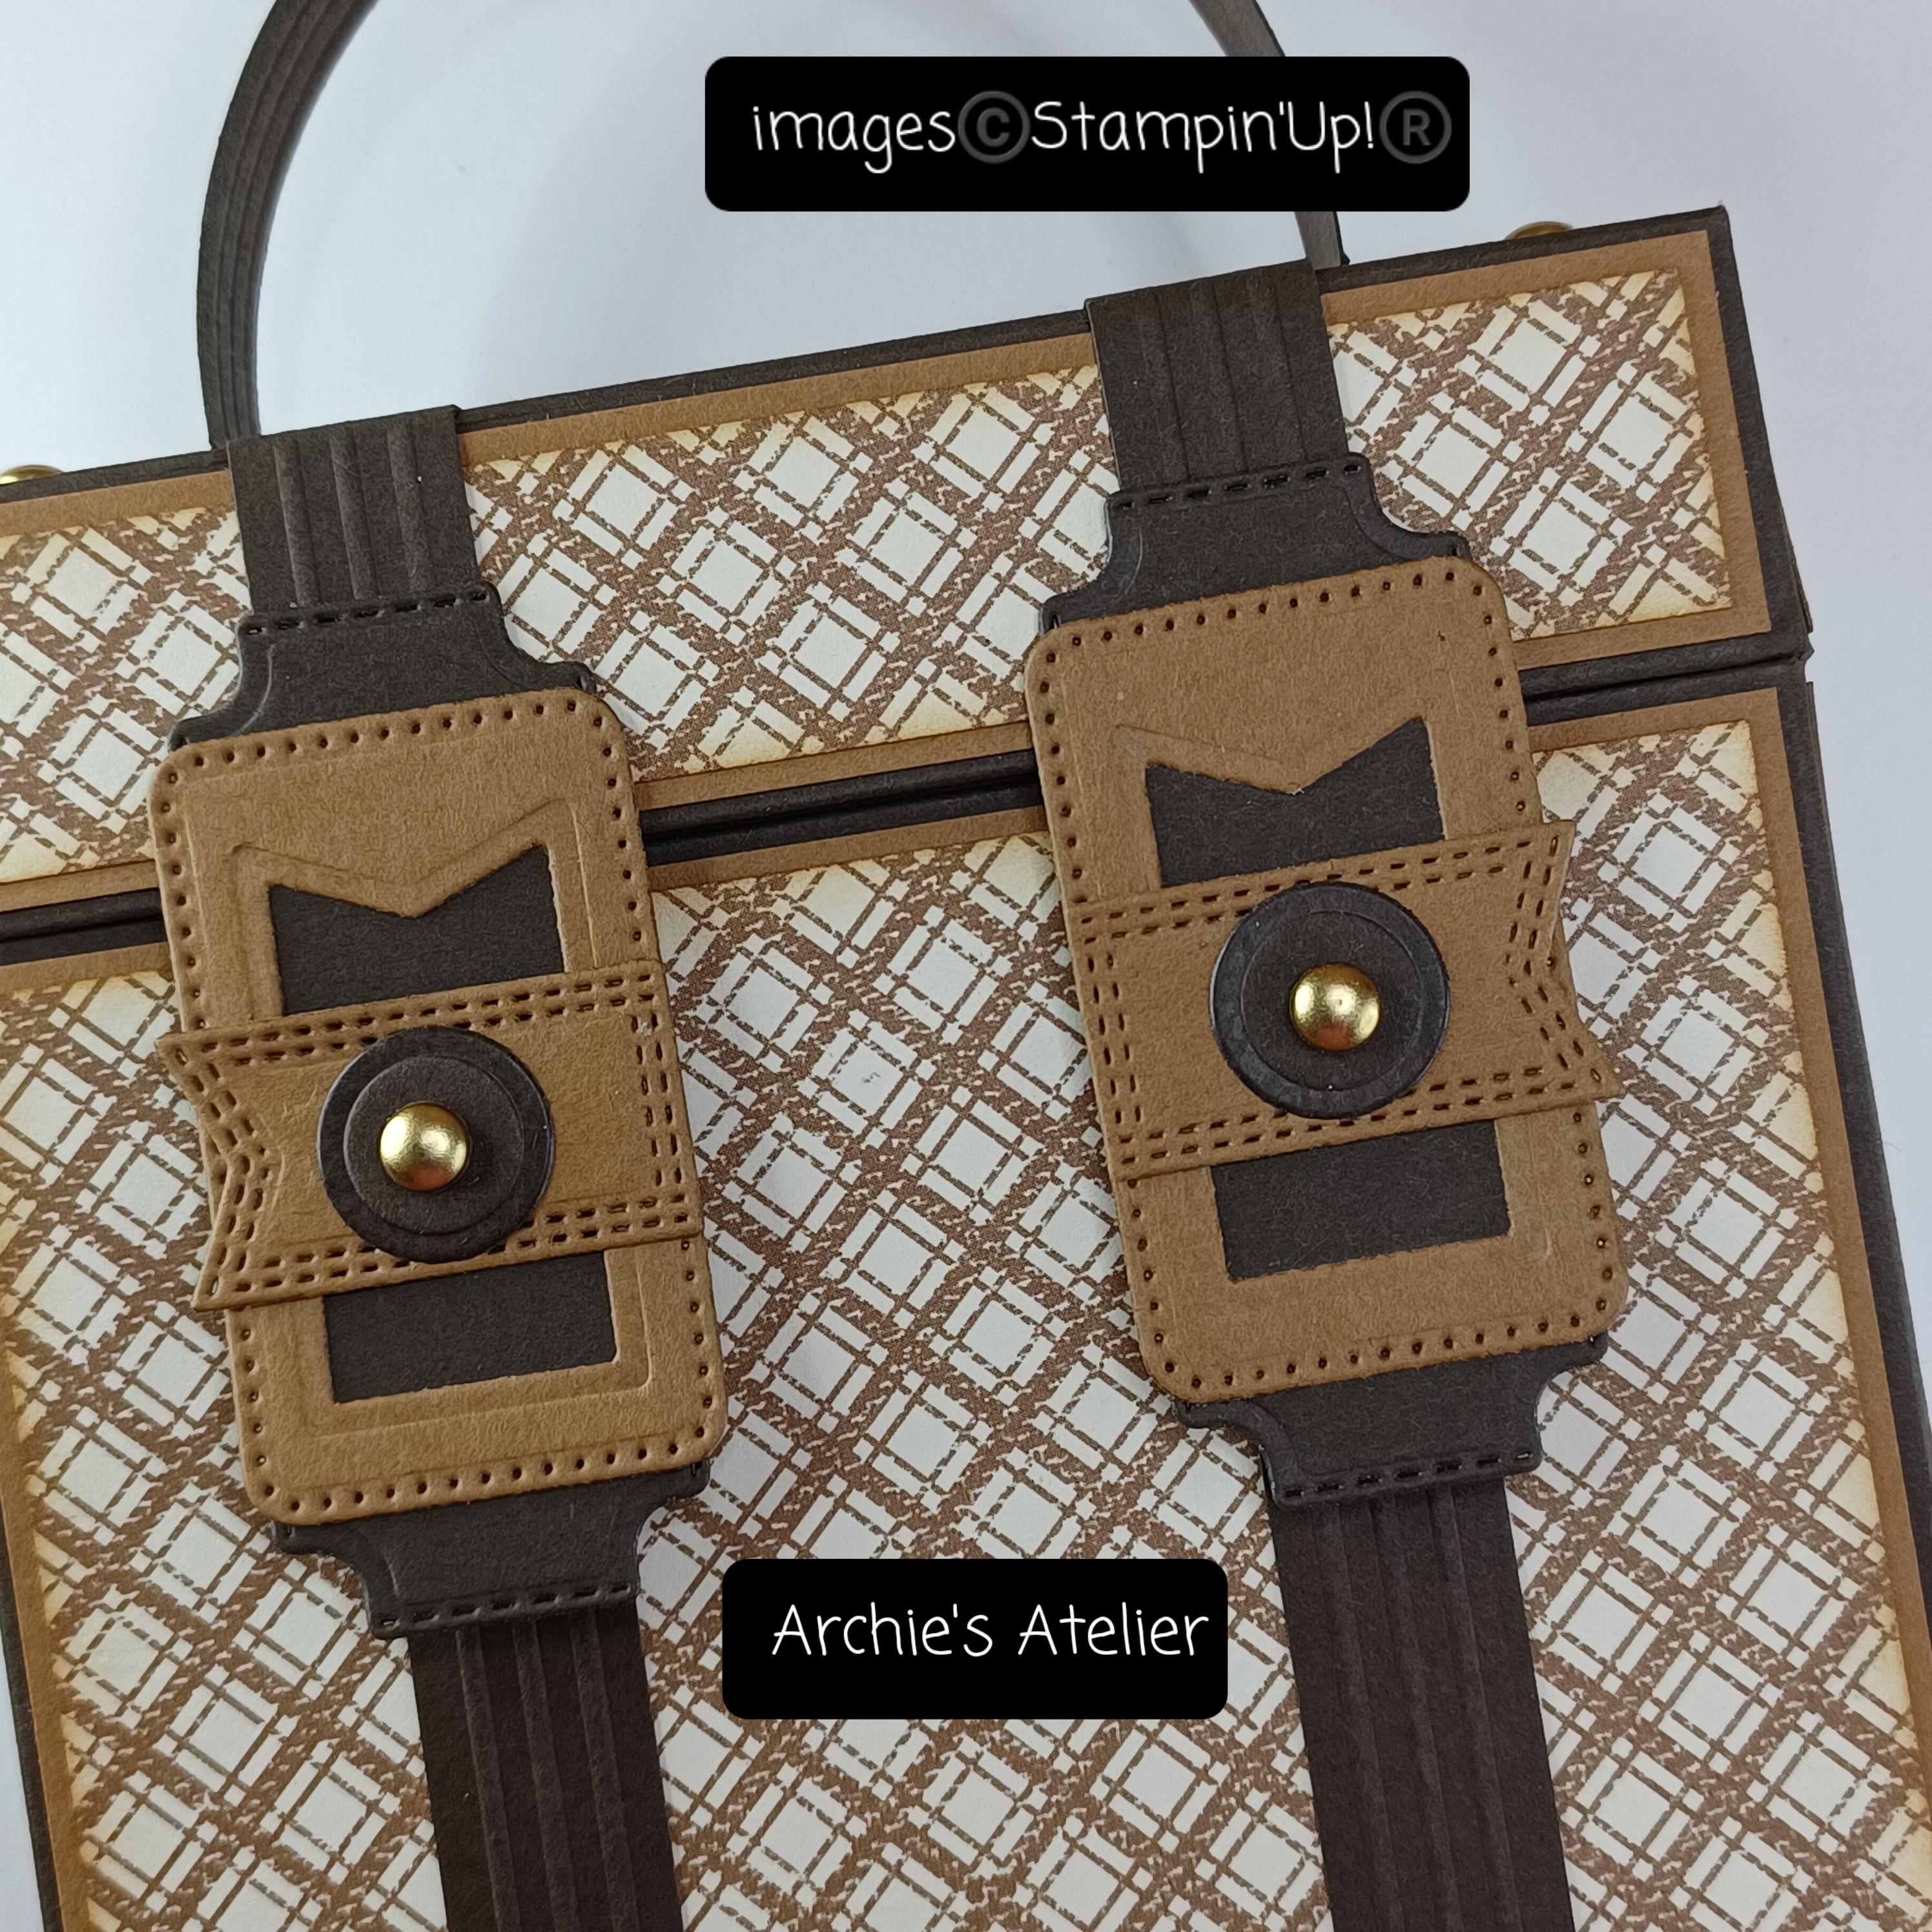


For this suitcase card/small gift holder, which measures 3 1/4" tall (box portion - the lid adds an extra 1" to the height) x 4 1/4" wide x 1" deep, I used the following supplies:
- for the box: an 11" x 4 3/4" piece of Early Espresso cardstock (item 119686) - scored on the 11" side at 1", 5 1/4", 6 1/4", and 10 1/2" (1/2" tab is the glue tab); and scored on the 4 3/4" side at 1" (bottom flaps) and 4 1/4" (1/2" tabs are folded over and glued to the inside of the front, back, and sides of the box);
.jpg)
.jpg)
- for the box: two 1/2" wide x just under 4 1/4" and two 1/2" wide x just under 1" long strips of Early Espresso cardstock - scored (but not folded) at 1/4" on the 1/2" side - the score line is just used as a guide for gluing the strips to the inside of the front, back, and sides of the box - these strips ensure a proper fit for the lid, and I made slight angle cuts on both ends of the top edge of all strips;
- for the lid: a 7 1/4" x 4" piece of Early Espresso cardstock - scored at 1/2" and 1 1/2" on all four sides (the 1/2" tabs are folded over and glued to the inside of the front, back, and sides of the lid);

- for the handle: a 6" x 1/2" strip of Early Espresso cardstock - scored at 3/4" from each end on the 6" side, and then scored on the 1/2" side three times at 1/8" intervals between the two end score lines (I scored on the under side of the handle strip so that the decorative score lines would be raised on the top side);

- label die from Cheerful Daisies dies (item 161296) to cut two lid "hinges" and two front "buckle" backers from Early Espresso cardstock. The "hinges" are scored at 7/8" from one end - the 7/8" tab glued to the back of the completed lid with the scored fold lined up with the bottom edge of the lid;
.jpg)
Cheerful Daisies dies - 161296
- for the lid straps: two 1/2" x 3 3/4" strips of Early Espresso cardstock - these strips are scored three times at 1/8" intervals on the 1/2" side as per the handle, and glued over the completed lid section allowing enough to cover the top of the back hinges and to fold under the front edge of the lid;
- for the box straps: two 1/2" x 3 1/4" strips of Early Espresso cardstock - these strips scored as per lid straps. [To make things a little easier I cut long 1/2" strips - did the vertical scoring and then trimmed to make the lid and box straps];
- Pecan Pie cardstock (item 161717) for matting panels (for the box: 2 @ 4 1/8" x 3 1/8" for front and back panels; 2 @ 7/8" x 3 1/8" for the side panels; and for the lid: 3 @ 4 1/8" x 7/8" for front, back and top panels; and 2 @ 7/8" square for the side panels); front buckles, buckle and hinge "flags" (all cut using the Nested Essentials dies - item 161597); decorative circle die cuts for handle and bottom of hinges (these and the Early Espresso cardstock decorative circles used on the top of the hinge flags were cut using the small plain circle die from Paper Florist dies - item 161284); and luggage tag (frame cut using the Nested Essentials dies and small label die from Mini Pocket Envelope dies - item 159167, and, for the loop, the small narrow banner die from Stylish Shapes dies - item 159183) - for the luggage tag I cut one frame and one solid backing piece between which I sandwiched a small piece of acetate [for this tag and the three larger tags I actually used pieces of HP Transparency Film - a thrift store find!] and the portion of the stamped image that had been coloured with a light wash of Pecan Pie ink (item 161665);

.jpg)
Nested Essentials dies - 161597
.jpg)
Paper Florist dies - 161284


.jpg)
Mini Pocket Envelope dies - 159167 (Online Exclusive)

Stylish Shapes dies - 159183
- Pecan Pie/Very Vanilla patterned paper from Let's Go Fishing 12" x 12" Designer Series Paper (item 161534) for the decorative paper panels: for the box: 2 @ 4" x 3" for the front and back panels; and for the lid: 3 @ 3/4" x 4" for the front, top and back panels, and 2 @ 3/4" square for the side panels;
- Pecan Pie ink - sponged around all edges of the DSP panels;
- for the box side panels: two 3/4" x 3" strips of Early Espresso cardstock embossed using the Stripes Embossing Folder from the Stripes & Splatters 3D Embossing Folders (item 157980);
- Early Espresso ink (item 147114) - sponged around all edges of the luggage tag and loop; and
- eight large gold dots from Brushed Metallic Dots (item 156506) added to the centers of the decorative circle die cuts, and one small gold dot added to the luggage tag loop.
In addition to the small ball chain used to attach the luggage tag to the handle I used four small Basic Grey magnetic discs - all of which I picked up at my local scrapbooking shop.


Although the suitcase holder will hold several 4" square cards I made a 3 3/4" square top-fold card using the following additional supplies:
- Early Espresso cardstock (item 119686) for the card base;
- Very Vanilla Thick cardstock (item 144237) for 3 1/2" square inside panel;
- a 3 5/8" x 3 1/8" piece of Pecan Pie cardstock (item 161717) embossed using the Timber 3D Embossing Folder (item 156406). Prior to embossing I dragged my Early Espresso ink pad (item 147114) over the raised design on one inside panel of the embossing folder. After embossing, and trimming the cardstock to final size I sponged the panel with additional Early Espresso ink;
- two 1/2" x 2 7/8" strips (card front) and one 1/2" x 2" strip (inside panel) of Pecan Pie/Very Vanilla patterned paper from Let's Go Fishing 12" x 12" Designer Series Paper (item 161534) - edges sponged with Pecan Pie ink (item 161665);
- Beary Cute stamp set (item 162016) for the small bear image - coloured using Pecan Pie ink;

- Around The Bend dies (item 160649) to die cut the two leafy stems from Mossy Meadow cardstock (item 133676);
.jpg)
Around The Bend dies - 160649
- Misty Moonlight ink (item 153118), Pecan Pie ink, and Basic Gray ink (item 149165) to colour backpack image - panel cut using Nested Essentials dies (item 161597);
- Pecan Pie and Early Espresso inks to colour wash sentiment tag, which was cut using the Tailor Made Tags dies (item 155563); and
.jpg)
Tailor Made Tags dies - 155563
- four Rustic Metallic Adhesive-Backed Dots (item 159082) added to card front - two of each size.
For the loop on the sentiment tag I used six strands of DMC 3021 embroidery floss - a pretty close match to Early Espresso!


For this 5" square traveler junk journal/note book I used the following additional supplies:
- a 10 1/4" x 7" piece of Early Espresso cardstock (item 119686) for the cover: on the 10 1/4" side scored at 5" and 5 1/4" (to form the 1/4" spine), and scored on the 7" side at 2" to form bottom inside pockets. To eliminate some bulk at the spine I angle cut the inside edges of the pockets - on the bottom edges of the front and back panels I marked a point 1/2" in from the spine fold lines, making the cuts using a craft knife and ruler - also making the straight 1/4" cut along the bottom edge of the spine. To secure the pockets to the covers - after the covers were stamped - I only added glue (a narrow line) to the outside edges of the pockets;
- a 5" x 1" strip of Pecan Pie cardstock (item 161717), scored on the 1" side at 3/8" and 5/8" - I sponged all edges with Early Espresso ink (item 147114) and glued the strip over the spine and to the front and back covers after the signature was sewn in;
- Early Espresso ink to stamp images and sentiments on the covers - the small "dotty" stamp used on the outside covers is from the Beauty of The Deep stamp set (item 161233); the large splatter stamp used on the inside of the front cover is from the Nature's Prints stamp set (item 158793). I also sponged all edges of the cover with Early Espresso ink;


- for the inside cover's pocket panel a 4 7/8" x 1 7/8" piece of Pecan Pie/Very Vanilla patterned paper from Let's Go Fishing 12" x 12" Designer Series Paper (item 161534) trimmed to fit the angle cut of the pocket, and edges sponged with Pecan Pie ink (item 161665); and
- for the signature I used four sheets of coffee dyed copier paper, and three sheets of one-sided travel themed patterned paper I picked up at Dollarama - all sheets were trimmed to 4 3/4" x 9 1/2", folded in half to make a total of twenty-eight 4 3/4" square pages, and all edges were sponged with Pecan Pie ink. The signature was secured to the cover using the three-hole pamphlet stitch and six strands of DMC 3829 embroidery floss - a pretty close match to Pecan Pie!
For the pocket's decorative cluster I used the following supplies:

- Paper Florist dies (item 161284) to cut flower petals, flower centers, and leaves - Misty Moonlight cardstock (item 153081) for flower petals, and circular stamen; Pecan Pie cardstock for flower centers; and Early Espresso cardstock for leaves, circular stamen, and flower center;
- Misty Moonlight ink (item 153118), and Pecan Pie and Early Espresso inks to colour the images - Pecan Pie and Early Espresso inks for the sentiment tag;
- Early Espresso ink sponged around edges of fussy cut images;
- Tailor Made Tags dies (item 155563) to cut sentiment tag; and
- Linen Thread (item 104199) looped through tag - ends secured with tiny dab of Multipurpose Liquid Glue.
And finally . . .

When I first got the Nested Essentials dies (item 161597) I thought the rounded rectangle dies would be perfect for making decorative luggage tags! Although not a traveler I am fascinated with luggage tags - lots of creative possibilities! These little projects - which can be used as gift tags or to decorate the traveler junk journal/note book - are a great way to make use of some leftover pieces from other projects too!
For the tags and loops I used Pecan Pie cardstock (item 161717). The tags were made using a double top frame - each cut using two of the rounded corner rectangle dies - and a solid finished edge back panel (providing a place for a short message to a gift recipient or some journaling). *As previously noted the inside opening of the frame for the small tag used on the suitcase was cut using the small tag die from the Mini Pocket Envelope dies.* Between the frame and back panel layers I sandwiched a piece of acetate (using again the thrift store transparency film) and an image/sentiment/DSP panel. The loops were made using the long narrow banner die from Stylish Shapes dies (item 159183) - slightly curled and the ends glued together and then glued to the front of the tag. I sponged all edges of the tags and loops with Early Espresso ink (item 147114), and added one of the large gold dots from Brushed Metallic Dots (item 156506) to the secured loops.
When cutting the frames I secured the two dies with low tack tape to prevent any slipping and mis-alignment while passing through the Stampin' Cut & Emboss Machine.
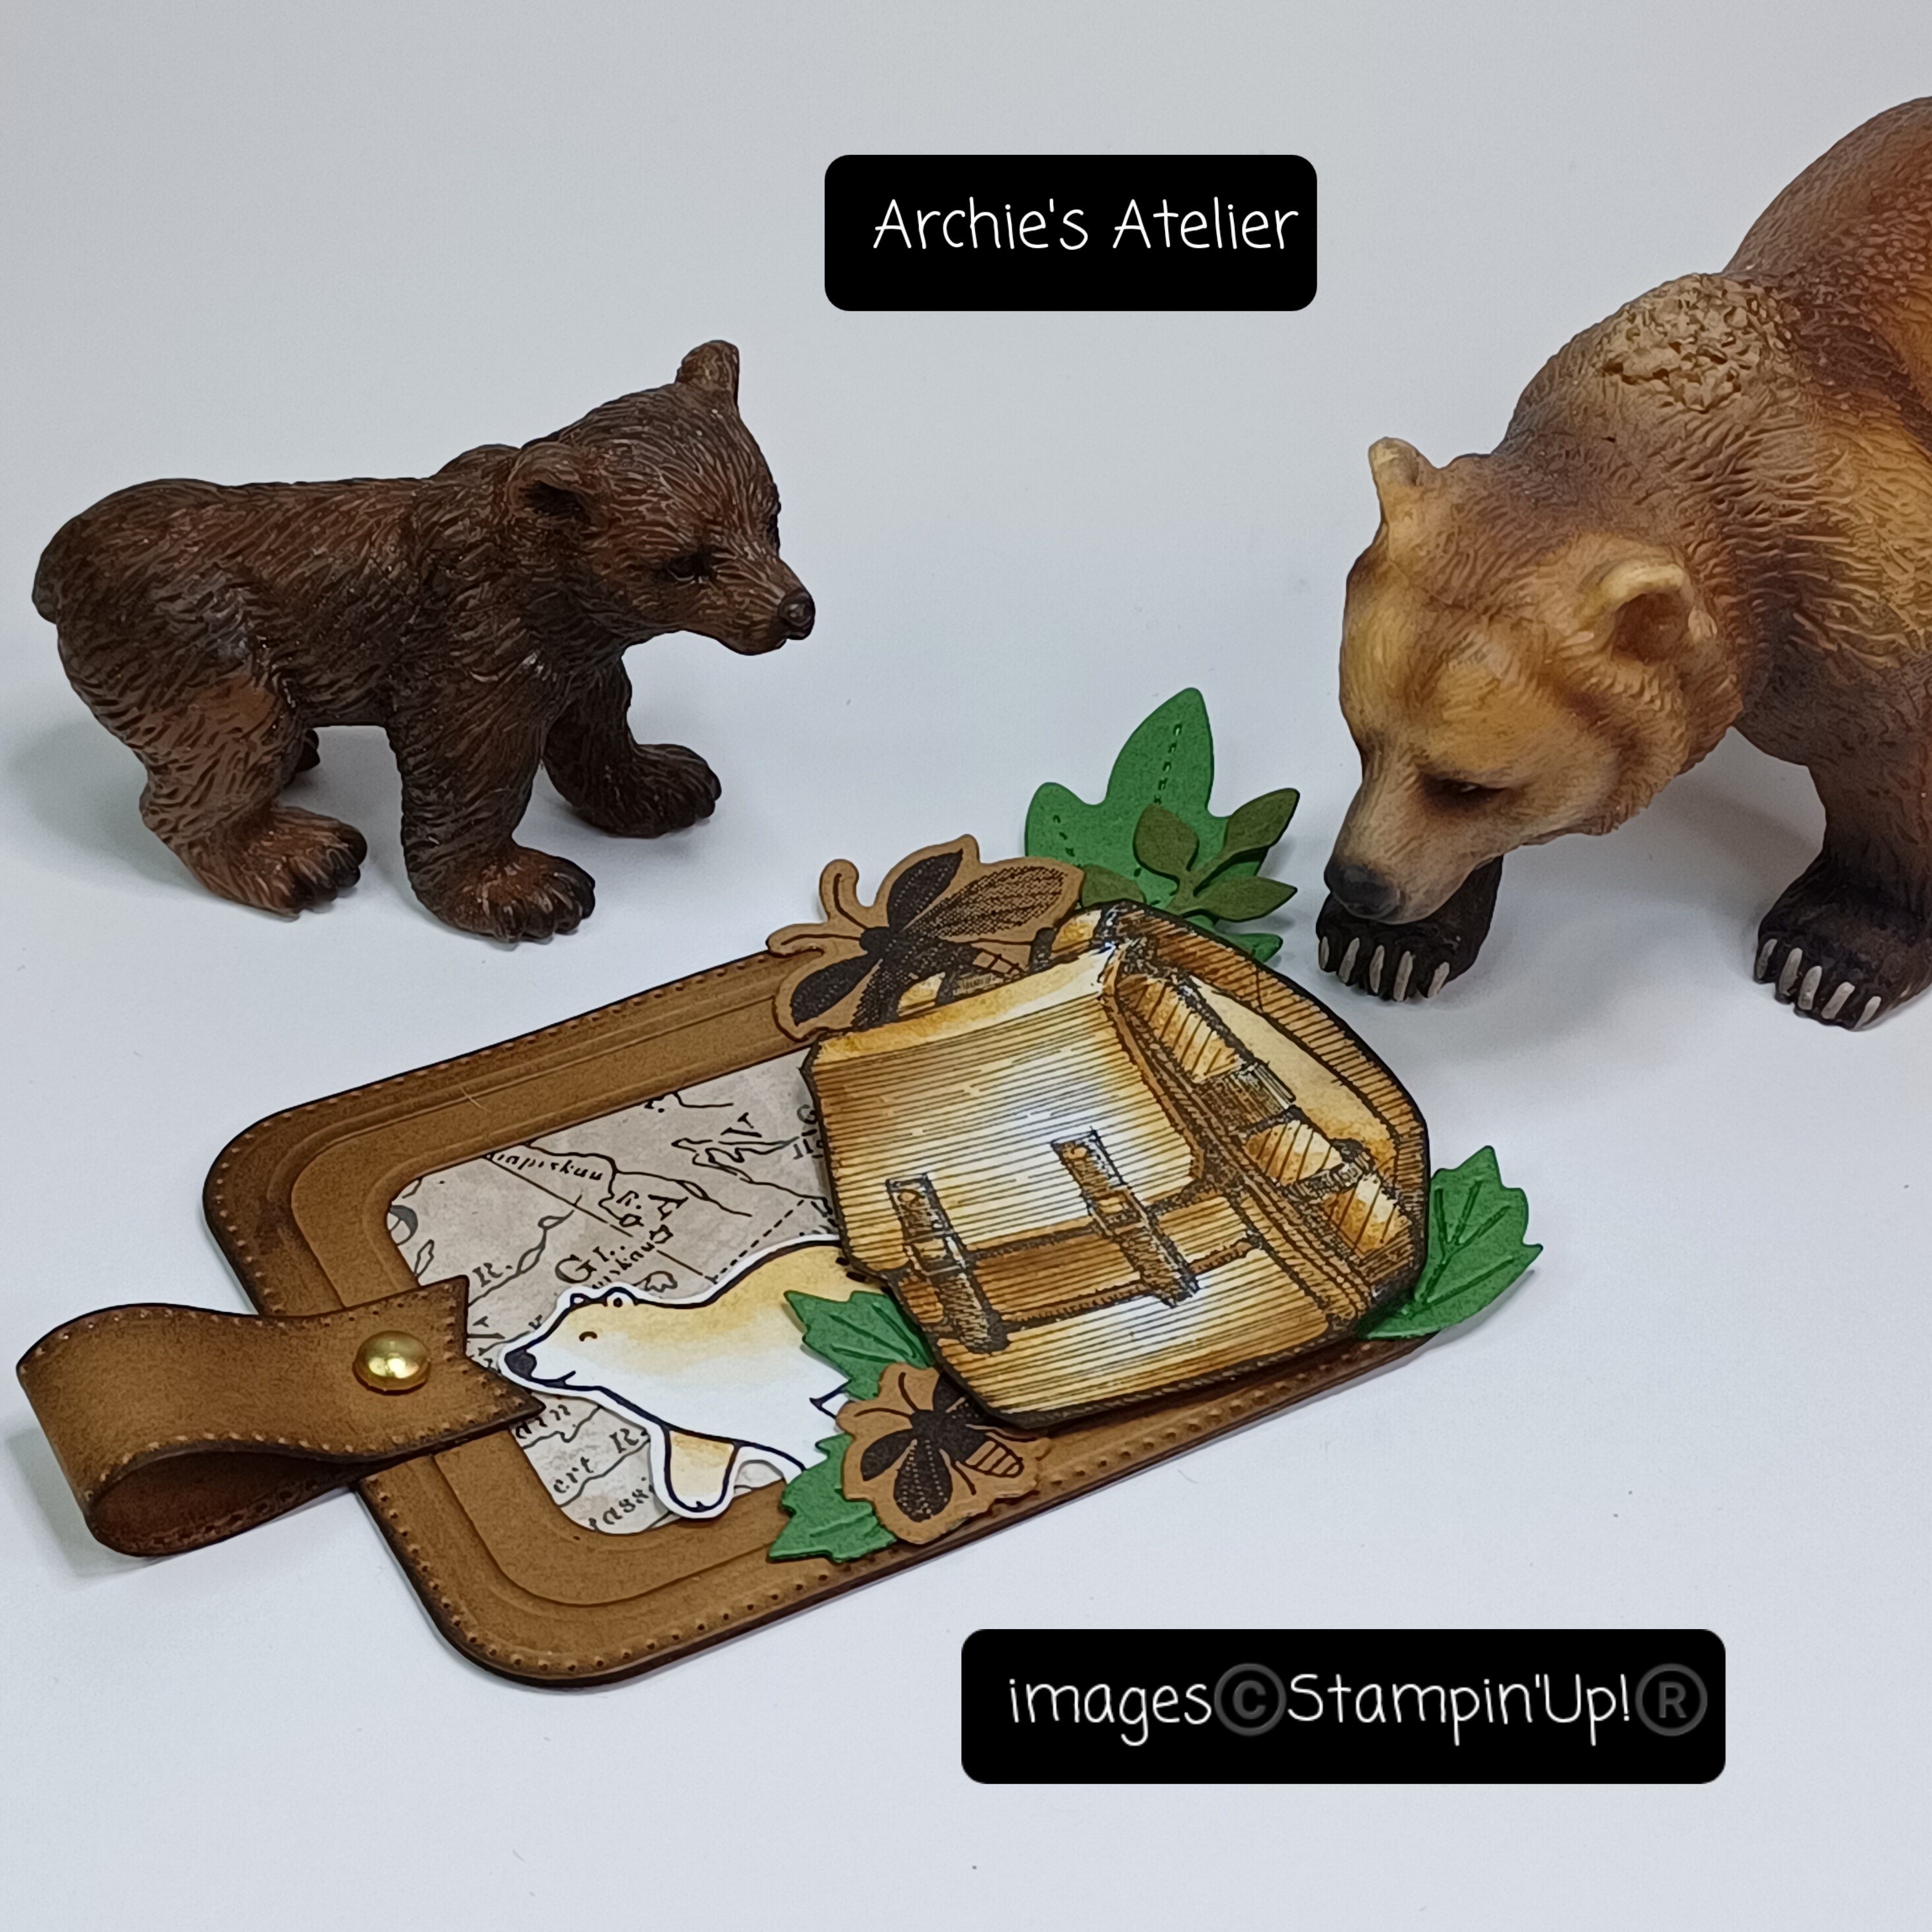


For this tag I used the following additional supplies:
- for the DSP backing panel a scrap leftover piece of map patterned paper from the retired World of Good Specialty Designer Series Paper (item 152491);
- Lighting The Way stamp set (item 160868) and co-ordinating Lighting The Way dies (item 160496) to stamp and die cut the two flying insects - stamped on Pecan Pie cardstock using Memento Tuxedo Black Ink (item 132708);

.jpg)
Lighting The Way dies - 160496
- Paper Florist dies (item 161284) to cut large Garden Green cardstock (item 102584) leaf;
- Around The Bend dies (item 160649) to cut two double leaves from Garden Green cardstock;
- Grove dies (item 157844) to cut five-leafed stem from Mossy Meadow cardstock (item 133676);
.jpg)
Grove dies - 157844
- Beary Cute stamp set (item 162016) for the small bear image - coloured using Pecan Pie ink (item 161665);
- Pecan Pie and Early Espresso inks to colour backpack image; and
- Stampin' Dimensionals (item 104430) to attach backpack image.

Additional supplies used for this tag:
- Dainty Delight dies (item 160674) to cut small flower from Basic White cardstock (item 159276), and flower center from Early Espresso cardstock (item 119686);
.jpg)
Dainty Delight dies - 160674
- Daffodil Delight ink (item 147094) sponged into center of Basic White cardstock flower;
- Grove dies (item 157844) to cut two three-leafed stems from watercolour paper - coloured using Mossy Meadow ink (item 147111);
- Tree Rings dies (item 159888) to cut leafy branch from watercolour paper - coloured using Pecan Pie ink (item 161665) and Mossy Meadow ink; and
.jpg)
Tree Rings dies (also includes Hybrid Embossing Folder) - 159888)
- Pecan Pie ink to colour sentiment panel - to get the mottled effect I pressed a wet paper towel over the inked panel.

The image panel on this last tag was coloured using Pecan Pie ink (item 161665).
Thank you for visiting my blog! Even though I am not a traveler I did have a lot of fun playing with the Next Destination stamp set!
If you are interested in purchasing any of the available Stampin' Up! products I have used in my projects, and you live in Canada and do not have a Stampin' Up! demonstrator, please do not hesitate to visit my online store found on my website https://archiesatelier.stampinup.net/ at your convenience, or simply click under the "Shop With Me" tab on the right sidebar of my blog, which will take you directly to my website and online store. I very much appreciate your business, and if you need any assistance please do not hesitate to contact me (lmccoyarchie@gmail.com)! The digital versions of both the May 2023-April 2024 Annual Catalogue and the September-December 2023 Mini Catalogue can be accessed at your convenience on my website! When visiting my online store don't forget to check out the great deals on the Clearance Rack as well as the selection of products now available as Online Exclusives - several new products were introduced on November 7, 2023 - including the Garden Meadow Bundle (item 162741) and the very pretty Meandering Meadows 6" x 6" Designer Series Paper (item 162735).

Looking for gift ideas for crafting friends? Consider the range of options Stampin' Up! offers in the Kits Collection - including the new card kit introduced on November 1, 2023 - The Best Destination Kit! There are also a variety of all-inclusive kits to help with your festive crafting: Rustic Christmas Countdown Kit; Christmas Gifting Kit; Christmas Everywhere Kit; Love, Santa Tag Kit; and the Festive Tags Kit!
Have fun creating!
Laurel
*It has come to my attention that quite often email correspondence from me is delivered to the recipient's spam or junk mail folder - if you have corresponded with me I have replied so be sure to check your spam or junk mail folder! Thank you!!

Just not interested in hearing the same old excuses!
Comments
Post a Comment