Having Fun With Lazy Days!
(and one Christmas project too!)

Hello! Today I am sharing a few projects I worked on this week inspired by the Stampin' Up! Lazy Days Bundle (item 161343), which includes the Lazy Days photopolymer stamp set (item 161340) and the co-ordinating Lazy Days dies (item 161342). The stamp set and dies can of course be purchased on their own, however, if purchased together using the Bundle item number you will receive the 10% Bundle Savings - and that's definitely a good thing! The Lazy Days stamp set and co-ordinating dies are also great compliments for the Garden Meadow stamp set (item 162736) and co-ordinating Garden Meadow dies (item 162740) - which are also available together as the Garden Meadow Bundle (item 162741) - and the Playing In The Rain stamp set (item 160542) and co-ordinating Playing In The Rain dies (item 160550)!

.jpg)
Lazy Days dies - 161342
(Bundle - 161343)
.jpg)
.jpg)
Garden Meadow dies - 162740
(Bundle - 162741)

.jpg)
Playing In The Rain dies - 160550
Just a quick note about the standard tools and supplies I used to complete the projects this week:
- Paper Trimmer (item 152392) - for trimming paper and cardstock - can also be used for scoring;
- stylus and scoreboard (Simply Scored Scoring Tool - item 122334) - for scoring fold lines. For crisp folds I also burnish all folded scored lines using my Bone Folder (item 102300) - I also used the Bone Folder to slightly curl the handles on my tote gift bags to prevent creases when gluing the handles to the totes;
- Stampin' Cut & Emboss Machine (item 149653) - for all die cutting;
- Paper Snips Scissors (item 103579) - these sharp scissors are great for trimming die cuts - i.e. separating a trio of buds;
- Take Your Pick Tool (item 144107) - the paper piercer, mini spatula, and tacky putty tips are a great help for picking up and placing small embellishments and die cuts; and
- for the main adhesive, Multipurpose Liquid Glue (item 110755).
All images and sentiments were stamped on watercolour paper using Stazon Jet Black Ink (item 101406), and the images were coloured using Classic Stampin' inks applied with small paint brushes and a little water.
On with the projects!


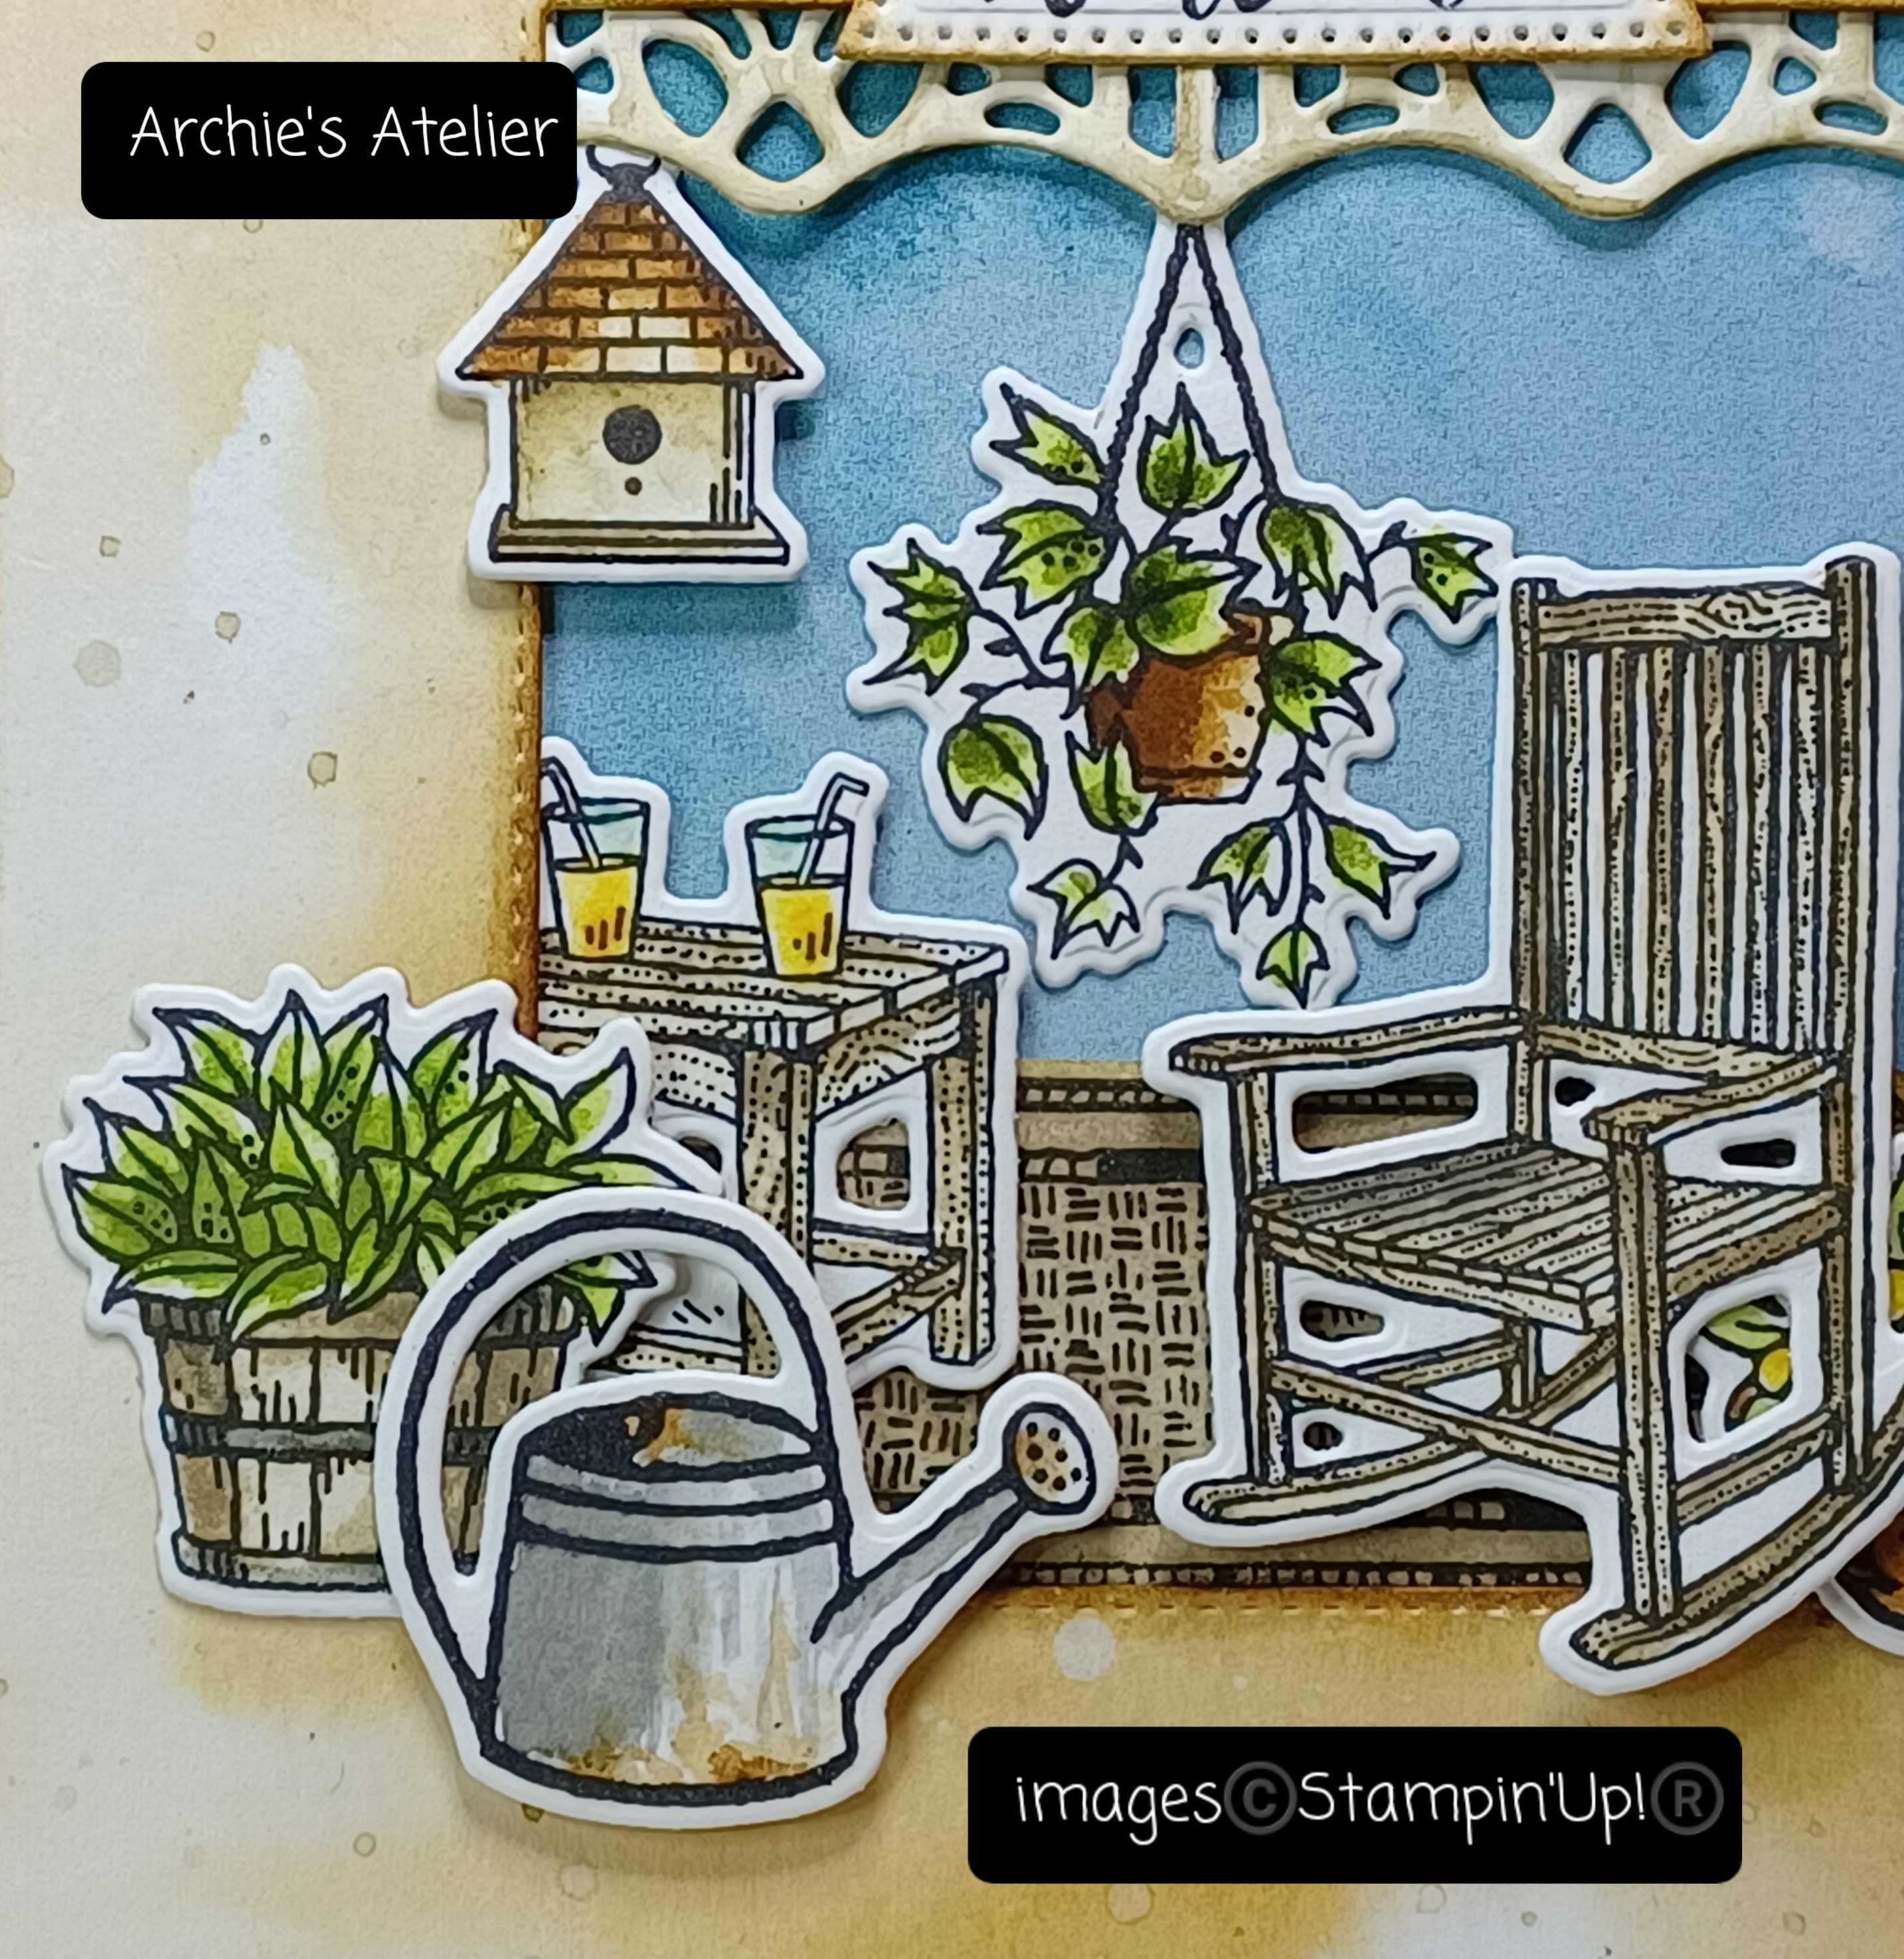


Additional supplies used to complete this 5 1/2" square top-fold card (watering can and flower basket images are from the Garden Meadow stamp set):
- Very Vanilla Thick cardstock (item 144237) for the card base, and the 4 7/8" square inside panel;
- Basic Black cardstock (item 121045) for the 5 1/8" square front matting panel (edges scraped with the blade of my craft knife), and the 5" square inside matting panel;
- watercolour paper for the 4 3/4" frame panel (opening cut using the largest square die from the Stylish Shapes dies - item 159183, and coloured using a wash of Pecan Pie ink - item 161665, with additional Pecan Pie ink sponged around all edges - Crumb Cake ink - item 147116 - splatters added by flicking a paint brush used to mix the ink with a little water), and the veranda post/gingerbread trim die cut - coloured using a wash of Crumb Cake ink;

Stylish Shapes dies - 159183
- Lost Lagoon patterned paper from Winter Meadow 12" x 12" Designer Series Paper (item 162133) for the approximately 3 1/2" square background panel;
- Crumb Cake ink to colour rug (applied using one of the Small Blending Brushes - item 160518), rocking chair, table, front of bird house, and plant basket;
- Pecan Pie ink to colour flower baskets, bird house roof, to sponge edges of "welcome" banner (cut using the smallest banner die from Stylish Shapes dies), and to add "rust" to watering can;
- Basic Gray ink (item 149165) to colour watering can, and bands on plant basket;
- Old Olive ink (item 147090) and Mossy Meadow ink (item 147111) to colour all foliage;
- Daffodil Delight ink (item 147094) to colour lemonade, flowers (card front), and bird bellies;
- Misty Moonlight ink (item 153118) to colour bird bodies;
- Sweet Sorbet ink (item 159216) to colour flowers in the basket on the inside panel;
- Early Espresso ink (item 147114) to colour hanging plant pot;
- Pool Party ink (item 147107) to add a little shading to the lemonade glasses; and
- Mini Stampin' Dimensionals (item 144108) - trimmed as required - used behind rocking chair, bird house, and right side of watering can.
Garden Themed Gift Tote


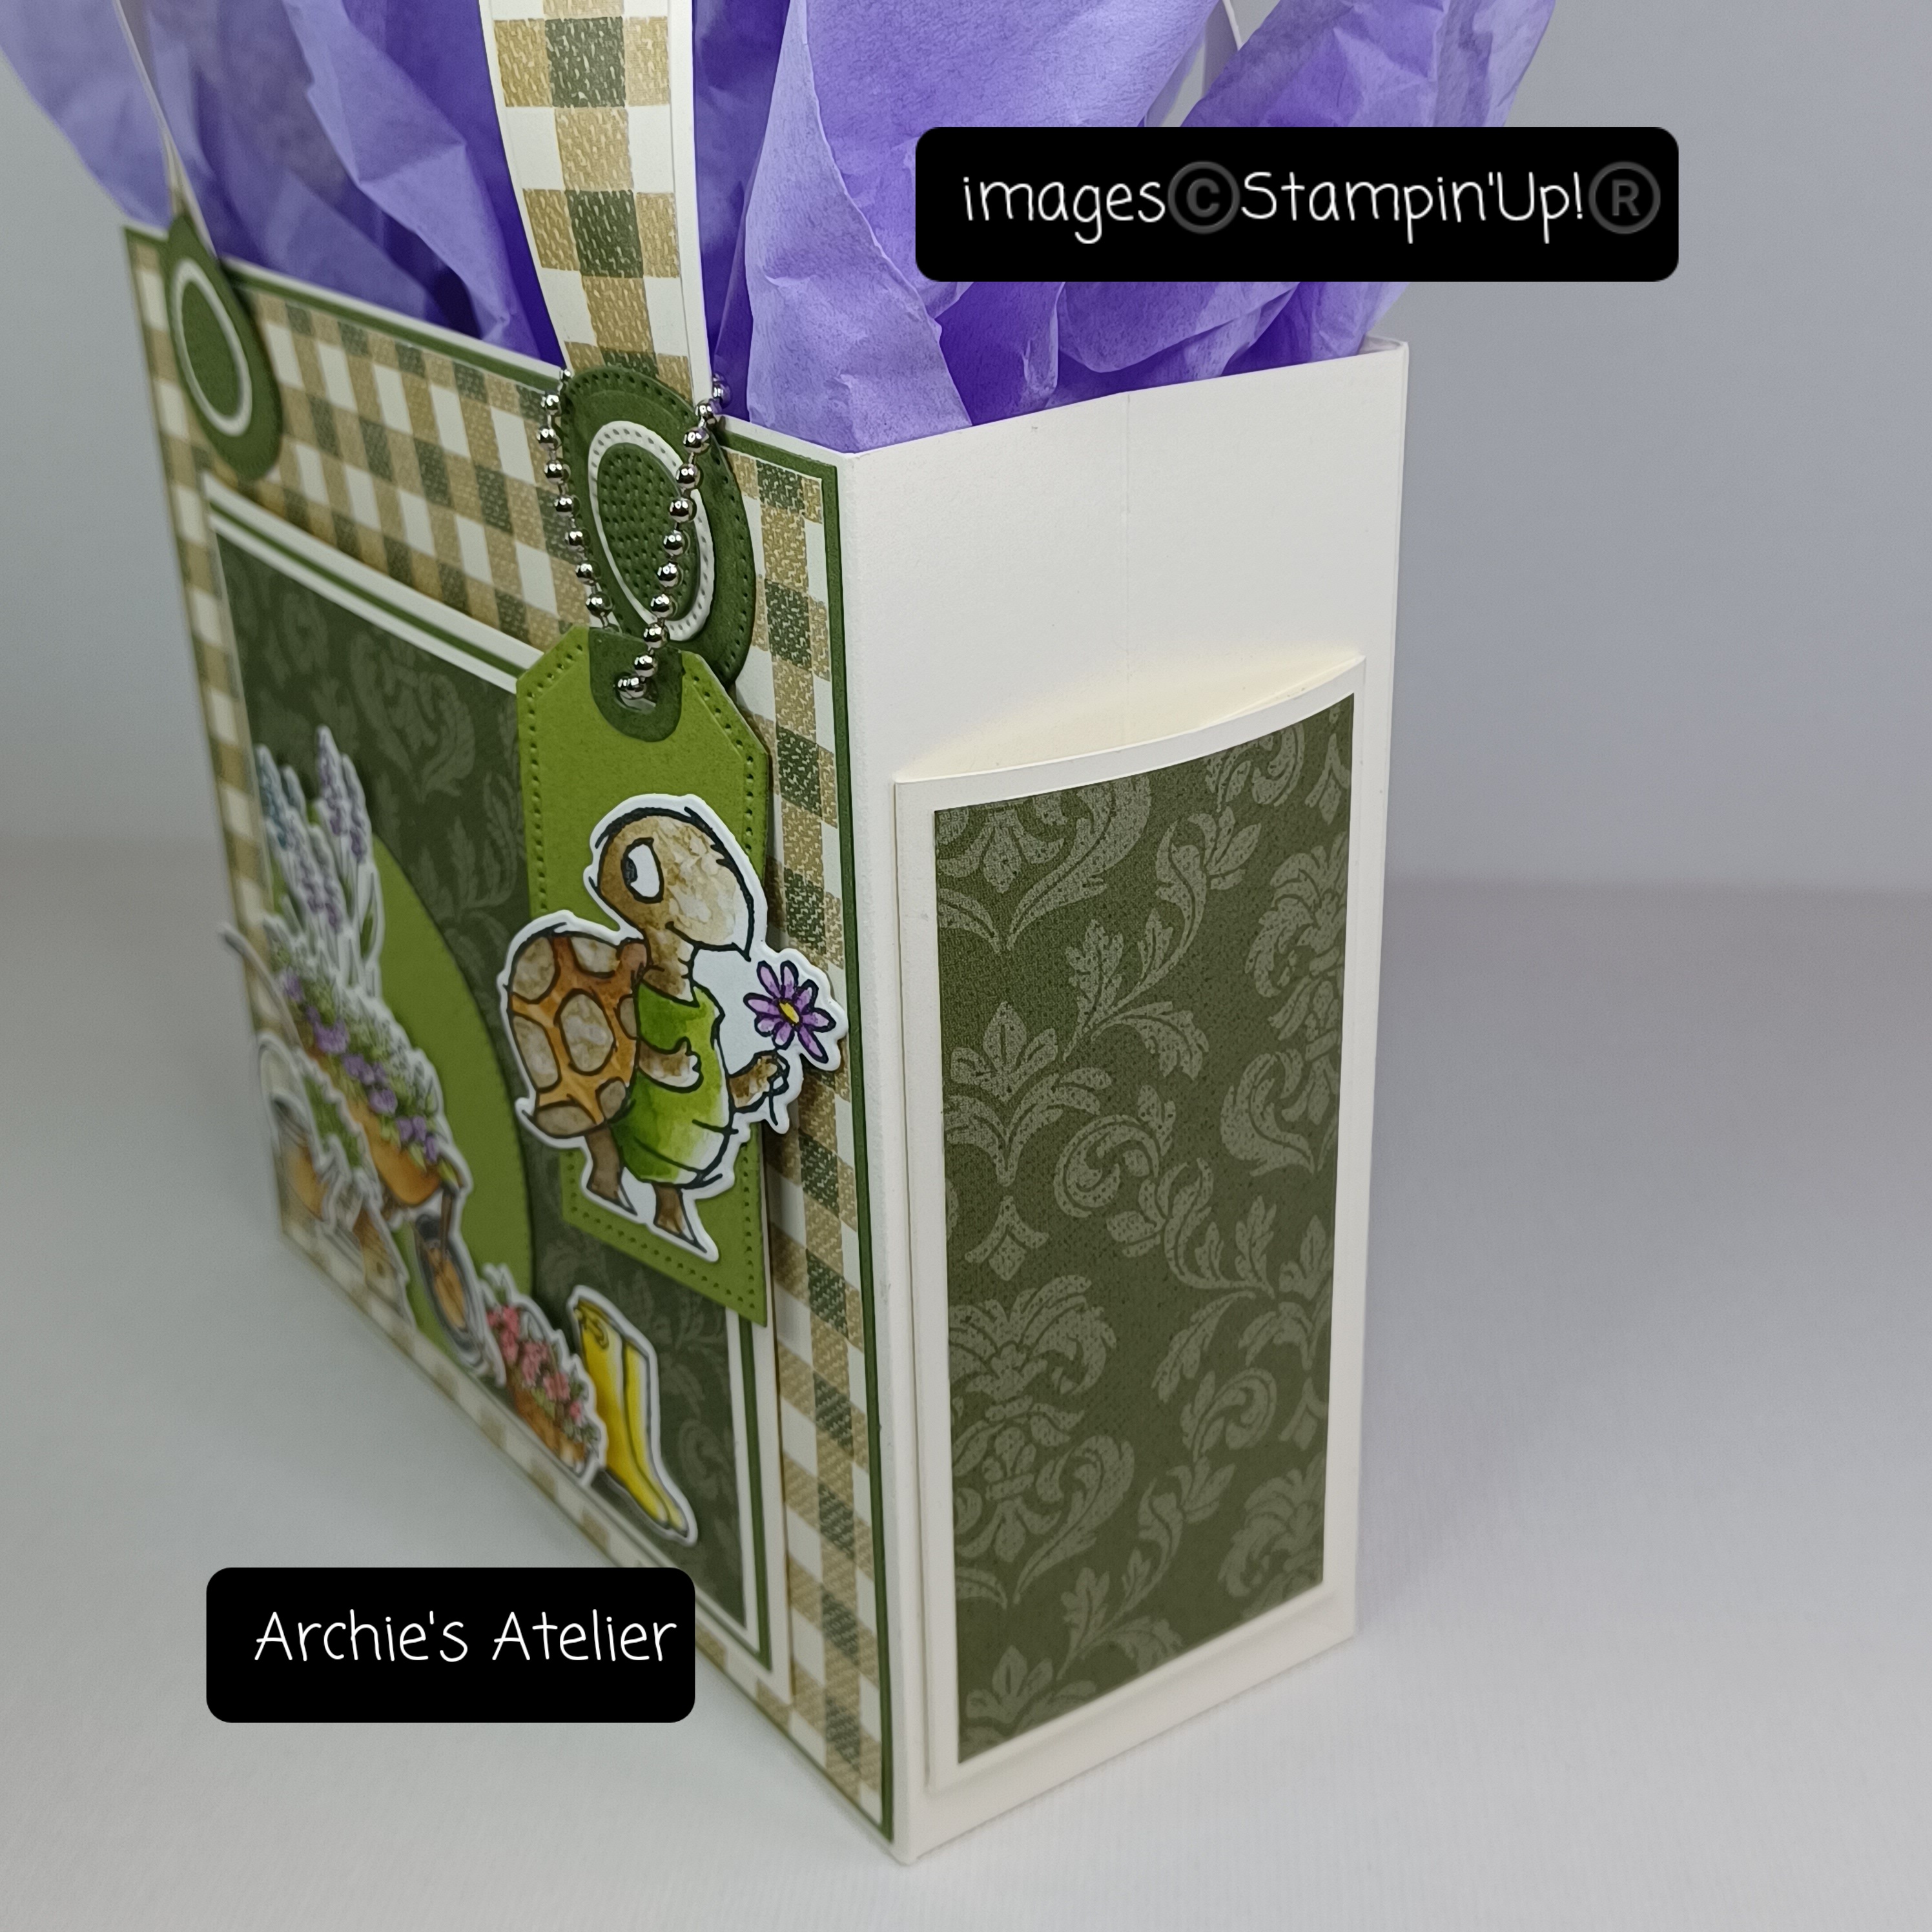


For this garden themed gift tote, constructed of Very Vanilla Thick cardstock (item 144237) with simple front, back and side panel pockets (front and back pockets measure 4 1/2" x 5", and side pockets measure 4 1/2" x 2 1/4"), I was inspired by the DIY Christmas Caddy Gift Bag presented by Sam Calcott (Mixed Up Craft) in her November 13, 2023, YouTube video (https://www.youtube.com/watch?v=bdz07chxETs). The basic construction of my tote, which measures 6" tall (excluding handles) x 6 1/2" wide x 2 1/2" deep, was similar to that which I used for my Paper Quilt Block Tote Bags shared in my February 10, 2023, blog post (https://archiesatelier.blogspot.com/2023/02/paper-quilt-block-tote-bags-and-card.html) - although for this tote I secured the two base panels together on one side edge, and with the two panels thus attached and lying flat on my work surface I added the front and back matting panels and all completed pocket panels before completing the assembly of the tote and securing the handles (the stamped/die cut decorations for front and back panels were added after the tote assembly was completed). I used the following additional supplies to complete the tote:
- for the body of the tote two 8 1/2" x 9 1/2" pieces of Very Vanilla Thick cardstock, scored on the 8 1/2" side at 2 1/2" (bottom flaps), and on the 9 1/2" side at 6 1/2", 7 3/4" - just to a point 5" down from top edge (over the cardstock panel on the scoreboard, and parallel to the top edge, I placed a ruler, lined up at the 5" mark on the left side of the scoreboard), and at 9" (1/2" tab is the glue tab). After removing the cardstock from the scoreboard I used a ruler and stylus to score lines from the bottom of the 7 3/4" score line out to each bottom corner of the side panel;
- for the front and back matting panels: two 5 7/8" x 6 3/8" pieces of Mossy Meadow cardstock (item 133676); and two 5 3/4" x 6 1/4" pieces of Very Vanilla/Mossy Meadow patterned paper from Let's Go Fishing 12" x 12" Designer Series Paper (item 161534);
- for the front and back panel pocket bases two 6 1/2" x 5 1/4" pieces of Very Vanilla Thick cardstock - scored on two sides and the bottom at 3/4" (before folding back these flaps which help give the pockets a little room for expansion - not a lot but enough to slip in a few seed packets - I angle cut across the intersection point of the vertical and horizontal score lines on each bottom corner so that when folded back the flaps did not overlap);
- for the front and back panel pocket matting panels: two 4 1/4" x 4 3/4" pieces of Mossy Meadow cardstock; two 4 1/8" x 4 1/2" pieces of Very Vanilla Thick cardstock; and two 4" x 4 1/4" pieces of Mossy Meadow patterned paper from Traditions of St. Nick 12" x 12" Designer Series Paper (item 162355);
- for the side panel pocket bases two 3 3/4" x 5 1/4" pieces of Very Vanilla Thick cardstock - scored on two sides and the bottom at 3/4" and angle cut at the bottom corners as noted above;
- for the matting panels for the side panel pockets: two 4 1/4" x 2" pieces of Mossy Meadow patterned paper from Traditions of St. Nick DSP;
- for the handles: two 11" x 3/4" pieces of Very Vanilla Thick cardstock, and two 11" x 5/8" pieces of Very Vanilla/Mossy Meadow patterned paper from Let's Go Fishing DSP (handles glued to outside of front and back panels - 3/4" from bottom of each end of handle, and outside edge of handle 3/4" in from edge of tote;
- for the handle end decorations: four Mossy Meadow cardstock circles cut using the second smallest circle die from Stylish Shapes dies; four Very Vanilla Thick cardstock circles cut using the smallest circle die from Stylish Shapes dies; and four Mossy Meadow cardstock circles cut using the largest perforated flower center circle from Paper Florist dies (item 161284);
.jpg)
Paper Florist dies - 161284
- Old Olive cardstock (item 100702) for 3" diameter circle cut using the Stylish Shapes dies, and tag cut using the Tailor Made Tags dies (item 155563) - Mossy Meadow cardstock for the hole re-enforcer, also cut using the Tailor Made Tags dies;
.jpg)
Tailor Made Tags dies - 155563
- the following inks to colour the stamped/die cut images: Pecan Pie (item 161665), Basic Gray (item 149165), Mossy Meadow (item 147111), Highland Heather (Ink Refill - item 147167), Sweet Sorbet (item 159216), Daffodil Delight (item 147094), Misty Moonlight (item 153118), and Crumb Cake (item 147116) - for the "blotchy" effect on the turtle I dabbed clean water onto the inked area with a fine-tipped paint brush and then blotted dry with paper towel; and
- Mini Stampin' Dimensionals (item 144108) - trimmed as required - used behind right side of flower basket on front panel and left side of watering can.
The silver ball chain used to hang the turtle tag from the handle was picked up at my local scrapbooking shop.
This is quite a sturdy tote and could hold a few small gardening related gifts - each side pocket is just the right size to accommodate three plastic plant markers tied together of course with some gardening twine!
I decided to also make a Christmas tote - with just a few minor alterations:


I used Shaded Spruce cardstock (item 146981) for the tote base and handles but rather than adding DSP strips to the handles I scored the handle strips along the length five times on the back side at 1/8" intervals, and glued the handles to the inside of the front and back panels - but still using the 3/4' and 3/4" alignments as for the garden tote. I eliminated the side panel pockets and made the front and back panel pockets smaller - finished size is 3 3/4" x 3 1/2" - two 4 1/2" x 5" pieces of Basic White Thick cardstock (item 159229), scored on two sides and bottom at 3/4"; and for the matting panels: two 3 5/8" x 3 3/8" pieces of Basic Black cardstock (item 121045), and two 3 1/2" x 3 1/4" pieces of festive floral patterned paper from Joy of Christmas 12" x 12" Designer Series Paper (item 161958). For the front and back panel matting panels: two 5 5/8" x 6 1/8" pieces of Basic White Thick cardstock; two 5 1/4" x 5 3/4" pieces of Basic Black cardstock; and two 5" x 5 1/2" pieces of Shaded Spruce patterned paper from Joy of Christmas DSP (edges sponged with Shaded Spruce ink - item 147088). For the handle's double bow I used ribbon recently added to the Clearance Rack - Real Red 3/8" Mini Ruffled Ribbon (item 156323). Through the center of the ribbon bow I tied a bow using gold cord from Simply Elegant Trim (item 155766). The four 3/4" diameter black buttons were from my stash!
I made three small cards to include with the garden themed gift tote:


Additional supplies to complete this 4" square top-fold card:
- Very Vanilla Thick cardstock (item 144237) for the card base, and 3 3/4" square matting panel;
- Mossy Meadow cardstock (item 133676) for the 3 7/8" square matting panel;
- Basic Black cardstock (item 121045) for the 3 5/8" square matting panel;
- Old Olive patterned paper from the 6" x 6" Designer Series Paper-Regals (item 161642) for the 3 1/2" square matting panel;
- Sweet Sorbet ink (item 159216), Mossy Meadow ink (item 147111), Highland Heather (Ink Refill - item 147167), Crumb Cake ink (item 147116), Pecan Pie ink (item 161665), Early Espresso ink (item 147114), Daffodil Delight ink (item 147094), and Pool Party ink (item 147107) to colour the images;
- Pecan Pie ink to sponge around the edges of sentiment flag (cut using the smallest flag die from Nested Essentials dies - item 161597);
.jpg)
Nested Essentials dies - 161597
- Stampin' Dimensionals (item 104430) - trimmed as required to attach the image "cluster" to the card front; and
- three Coastal Cabana shaded dots from Ombre Decorative Dots (item 161448) added to card front.


Additional supplies used to complete this 4" x 3" top-fold gift card:
- Very Vanilla Thick cardstock (item 144237) for the card base and 2 3/4" x 1 3/8" rectangle (cut using the Deckled Rectangles dies - item 159173) - Mossy Meadow ink (item 147111) splatters added to rectangle by flicking paint brush used to mix a little water with the ink;
.jpg)
Deckled Rectangles dies - 159173
- Basic Black cardstock (item 121045) for the 3 5/8" x 2 5/8" matting panel - edges scraped with the blade of my craft knife;
- Old Olive patterned paper from the 6" x 6" Designer Series Paper-Regals (item 161642) for the 3 1/2" x 2 1/2" matting panel; and
- Mossy Meadow ink, Sweet Sorbet ink (item 159216), Pecan Pie ink (item 161665), and Crumb Cake ink (item 147116) to colour the images.
And finally . . .


Additional supplies used to complete this 4" square top-fold card:
- Very Vanilla Thick cardstock (item 144237) for the card base;
- Mossy Meadow cardstock (item 133676) for the 3 7/8" square matting panel - edges scraped with the blade of my craft knife;
- map patterned paper from Let's Go Fishing 12" x 12" Designer Series Paper (item 161534) for the 3 3/4" square matting panel;
- Paper Florist dies (item 161284) to cut two large and two small flower shapes, and six buds from Highland Heather cardstock (item 146986); two large leaves, and bud stems from Mossy Meadow cardstock; one seven-leafed stem from Old Olive cardstock (item 100702); one circle stamen center from Daffodil Delight cardstock (item 119683); and one stamen, and one perforated circle flower center from Pecan Pie cardstock (item 161717) - the edges of which were sponged with Pecan Pie ink (item 161665);
- Around The Bend dies (item 160649) to cut two double leaves from Old Olive cardstock; and
.jpg)
Around The Bend dies - 160649
- one of the Mini Stampin' Dimensionals (item 144108) used to attach the Pecan Pie cardstock perforated circle flower center.
Thank you for visiting my blog! I had a lot of fun working on these projects - whether because or despite the fact that outside this week it has looked like a perfect winter wonderland that even Hallmark couldn't replicate! - and I am certainly looking forward to playing more with the Lazy Days Bundle!
The following items that I used this week are currently unavailable but I have included the time frame that Stampin' Up! expects the items will again be available for ordering:
- Bone Folder (item 102300) - week of December 18, 2023;
- Simply Elegant Trim (item 155766) - week of January 1, 2024; and
- Nested Essentials dies (item 161597) - week of December 25, 2023.
If you are interested in purchasing any of the available Stampin' Up! products I have used in my projects, and you live in Canada and do not have a Stampin' Up! demonstrator, please do not hesitate to visit my online store found on my website https://archiesatelier.stampinup.net/ at your convenience, or simply click under the "Shop With Me" tab on the right sidebar of my blog, which will take you directly to my website and online store. I very much appreciate your business, and if you need any assistance please do not hesitate to contact me (lmccoyarchie@gmail.com)! The digital versions of both the May 2023-April 2024 Annual Catalogue and the September-December 2023 Mini Catalogue can be accessed at your convenience on my website! When visiting my online store don't forget to check out the great deals on the Clearance Rack (several items added earlier this week!) as well as the selection of products now available as Online Exclusives - including the Garden Meadow Bundle!

The Last Chance Promotion featuring the retiring products from the September-December 2023 Mini Catalogue is on now until January 3, 2024. Many of the retiring products are offered at substantial discounts but products will only be available while supplies last so don't miss out on a great opportunity to stock up on some favourites! A few of the discounts include:
- Stars At Night Hybrid Embossing Folder (item 162006) - 30% off;
- Handcrafted Elements dies (item 162330) - 10% off;
- Sending Cheer stamp set (item 162050) and Sending Cheers dies (item 162052) - each at 40% off;
- Fruitful Blessing dies (item 162209) - 30% off;
- Bag of Bones dies (item 162218) - 10% off
- Cheery Patterns Embossing Folders (item 162287) - 10% off;
- Year To Celebrate stamp set (item 162279) - 40% off;
- Classic Gift Card Envelopes (item 162116) - 30% off;
- Cheers To The Season stamp set (item 162309) - 30% off; and
- Precious Pinecones stamp set (item 162175) - 60% off!

Have fun creating!
Laurel
*It has come to my attention that quite often email correspondence from me is delivered to the recipient's spam or junk mail folder - if you have corresponded with me I have replied so be sure to check your spam or junk mail folder! Thank you!!

Catching a few winks before the big game!
Comments
Post a Comment