Final Days of Sale-A-Bration!

Hello! Since there is less than one week left in the Stampin' Up! Sale-A-Bration (ends on August 31, 2022!), I am sharing today a few more projects I worked on this week featuring some of the Sale-A-Bration items: Stylish Sketches stamp set (item 159937); Rings of Love 12" x 12" Designer Series Paper (item 159939); and the Wonderful World 12" x 12" Designer Series Paper (which together with the Wonderful World stamp set is a single Sale-A-Bration item available for free with an order of $120.00 CDN before taxes and shipping - item 159918). It's not too late to take advantage of Sale-A-Bration to get some fun free products while stocking up on your supplies for fall and Christmas projects! All Sale-A-Bration items are available only while supplies last!

Now on with the projects! For all die cutting for my projects I used my Stampin' Cut & Emboss Machine (item 149653); the adhesive used was Multipurpose Liquid Glue (item 110755), and for paper trimming (and scoring) I used my Paper Trimmer (item 152392).
Variations On A Theme
Stylish Sketches stamp set (item 159937)
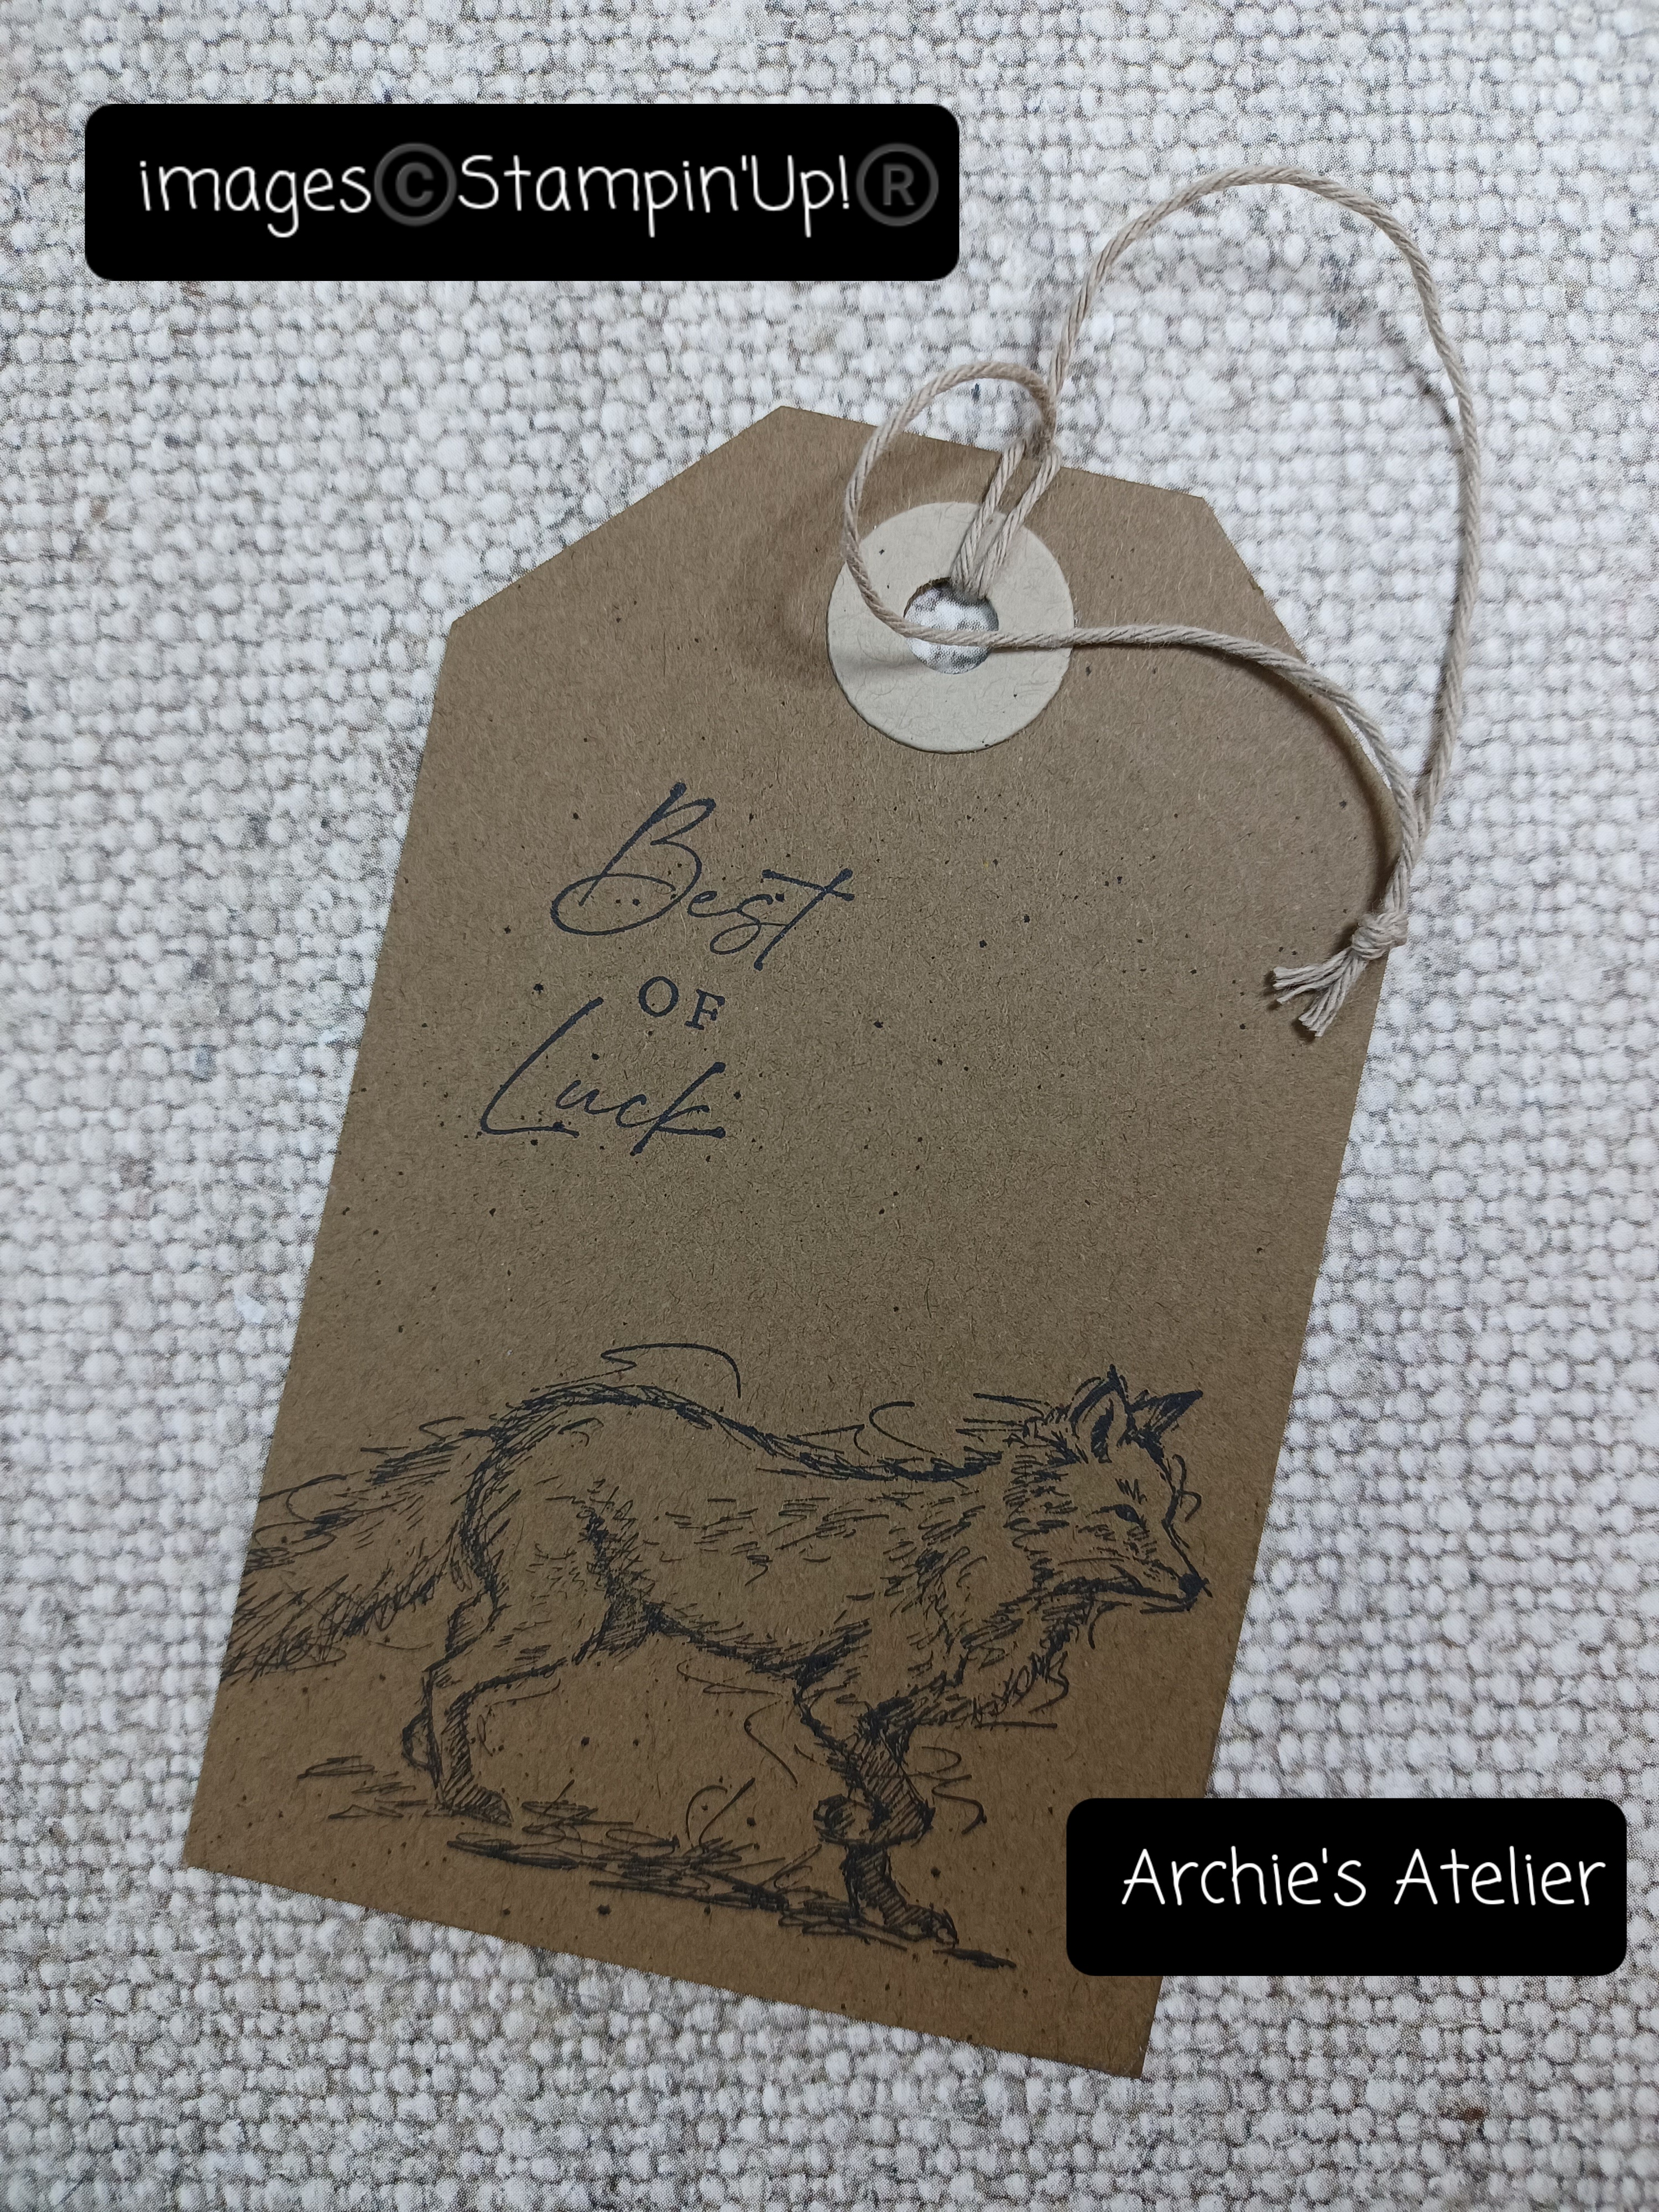
For my two cards and one tag I used the same image from the Stylish Sketches stamp set; the Decorated Pine dies (item 159710); and the same sentiment from the Brightest Glow stamp set (item 159542). Both the Decorated Pine dies and the Brightest Glow stamp set are featured in the July-December 2022 Mini Catalogue. The images and sentiments were stamped on watercolour paper (Fluid 100 5" x 7" Watercolour Paper - item 149612) using Stazon Jet Black Ink (item 101406). To colour the fox I used the Cajun Craze watercolour pencil (Watercolour Pencils - Assortment 2 - item 149014). The pine branches were also cut from watercolour paper and coloured using Evening Evergreen ink (item 155576) and Soft Suede ink (item 147115).


For this 5 1/2" x 4 1/4" top-fold card I used the following additional supplies:
- Evening Evergreen cardstock (item 155574) for the card base;
- Very Vanilla Thick cardstock (item 144237) for the front matting panel, and for the inside panel - I distressed the edges of the front matting panel using the blade of my craft knife;
- Artistic Mix Decorative Masks (item 159178) - I applied the Evening Evergreen ink (item 155576) through the two "plaid" masks using a blending brush (Blending Brushes - item 153611);
- Linen Thread (item 104199) for the bow; and
- Brushed Metallic Dots (item 156506) - two of the copper dots added to the front panel.


- Mint Macaron cardstock (item 138337) for the card base, and for the inset pieces of the bell (I cut two bells - one from the Mint Macaron cardstock and one from copper Brushed Metallic 12" x 12" cardstock - item 153524 - I lightly sanded the Brushed Metallic cardstock outline bell);
- Very Vanilla Thick cardstock (item 144237) and Soft Suede cardstock (item 115318) for the front matting panels - I distressed the edges of the Very Vanilla Thick cardstock panel using the blade of my craft knife;
- Evening Evergreen ink (item 155576) for the colour wash around the image and sentiment; and
- Linen Thread (item 104199) for the bow.


- Crumb Cake cardstock (item 120953) and Soft Suede cardstock (item 115318) for the matting tags - I distressed the edges of the Crumb Cake cardstock matting tag using the blade of my craft knife;
- Artistic Mix Decorative Masks (item 159178) - I used the two "plaid" masks/stencils applying the Evening Evergreen ink (item 155576) with a blending brush (Blending Brushes - item 153611); and then lightly spritzing with water (Stampin' Spritzers - item 126185) - I also used some of the Craft Stampin' Ink White Refill (item 101780) to add a few splatters to the image tag;
- Basic Black Stampin' Write Marker (item 100082) to add additional splatters to the image tag by flicking the brush end of the marker against the marker lid;
- Very Best Trio Punch (item 159878 - also featured in the July-December 2022 Mini Catalogue) to cut the diagonal "tag" corners - this is a great punch as it enables you to make any size tag! With this punch you can also cut ornate design corners and a ribbon slot opening:

Very Best Trio Punch - item 159878

for the ornate design corners after you punch the first corner you must turn your paper over before punching the second corner to ensure you get the same design on the opposite corners
At the top of the tag I also added an almost Crumb Cake-coloured eyelet.
Rings of Love Designer Series Paper Notepad Holders


For this 6 5/8" tall x 5" wide x 3/8" deep notepad holder, which holds a 96-page 4" x 6" memo pad (package of 5 from Staples), and mini pen (package of 10 from Dollarama), I used the following supplies:
- 2 pieces of Night of Navy cardstock (item 100867) for the base: the first piece - which will be the back, and front bottom and top fold-over flaps - is 10 3/8" x 5" - scored on the 10 3/8" side at 1 1/2", 1 7/8", 8 1/2", and 8 7/8", and the second piece - which will be the front panel - is 6 5/8" x 5". The top of the second piece is glued to the underside of the top fold-over flap of the first piece - just up to the first fold line. Before adding the decorative paper panels I added the magnetic discs (Basic Grey Small Magnets, purchased at my local scrapbooking store) centered on the inside of the bottom fold-over flap and on the bottom of the front of the second piece;
- a 1" x 2 3/4" piece of Night of Navy cardstock for the pen loop - after curling the cardstock slightly using a bone folder (Bone Folder - item 102300) I glued together the two bottom edges of the loop (keeping the pen in the loop to make sure of fit) and then, before adding the decorative paper panel to the front of the holder, glued the bottom of the loop towards the top of and centered on the top fold-over flap;
- a 6 1/2" x 5 3/8" piece of Crushed Curry cardstock (item 131199) for the pocket to hold the memo pad - scored at 1/2" on both edges of the 5 3/8" side, and at 1/2" on one edge of the 6 1/2" side. The pocket is glued to the center of the inside of the back panel - approximately 1/8" from each edge and from the second score lines on the bottom and top fold-over flaps. The cardboard backing of the memo pad fits into the pocket;
- Crushed Curry cardstock and Soft Suede cardstock (item 115318) for matting panels;
- Rings of Love DSP for the front and inside front decorative paper panels, and for strips added to the first page of the memo pad - the bird image circles were cut using the Layering Circles dies (item 151770);
- Tea Boutique 6" x 6" Designer Series Paper (item 158659) for the Crushed Curry/white striped decorative paper;
- 6" x 6" Designer Series Paper Assortments - Regals (item 159256) for the Crushed Curry floral design decorative paper;
- Tailor Made Tags dies (item 155563) to cut the Night of Navy cardstock tag (before cutting the tag I glued a strip of the Tea Boutique DSP to the Night of Navy cardstock), and the Soft Suede cardstock hole re-enforcer; and
- Linen Thread (item 104199) for the tag loop.


For this 8 1/2" tall x 6" wide (closed) x 1/4" deep notepad holder I followed the instructions provided by Maymay Made It Crafts in her July 23, 2022, You Tube video "Stop What You Are Doing! Make A Bunch of These! Everyone Will Want One! Legal Pad Folio Holder" (https://www.youtube.com/watch?v=w9IezOwxFfc&list=PLYpyfl_txhTH8h6pX-tY5vT8caxJr7YJ1&index=11). Since my notebook was 8" x 5" I made a slightly smaller pocket to hold the notebook - I used a piece of cardstock 7 3/4" x 6 7/16" scored at 1/2" on three sides. For my holder I used the following supplies:
- Evening Evergreen cardstock (item 155574) for the holder base - 2 pieces: one 8 1/2" x 11" - scored on the 11" side at 3", 9" and 9 1/4"; one 8 1/2" x 8" - scored on the 8" side at 6" and 6 1/4". Evening Evergreen cardstock was also used for matting panels for the front cover pocket and closing flap strip;
- Parakeet Party cardstock (item 159259) for the notebook pocket (7 3/4" x 6 7/16" - scored at 1/2" on three sides);
- Sweetest Christmas 12" x 12" Designer Series Paper (item 159559) - from the July-December 2022 Mini Catalogue - for the Sweet Sorbet with white diamonds patterned paper - I wanted a co-ordinating patterned paper that would highlight the red tones in the Rings of Love DSP;
- Sweetest Christmas 12" x 12" DSP, Crumb Cake cardstock (item 120953), and Soft Suede cardstock (item 115318) for the tags and hole re-enforcers;
- Very Best Trio Punch (item 159878) to cut the diagonal "tag" corners;
- small circle die from Decorated Pine dies (item 159710) to cut the large outer circles for the hole re-enforcers - I centered the circle die over holes punched using a 1/4" hole punch;
- Sale-A-Bration Stylish Sketches stamp set (item 159937) for the tag images;
- Honeybee Home stamp set (item 157943) for the tag sentiments - who wouldn't appreciate receiving a gift with these sentiments?;
- Memento Tuxedo Black Ink (item 132708) to stamp the tag images and sentiments; and
- Crumb Cake baker's twine (Baker's Twine Essentials Pack - item 155475) for the tag loops, and the bow on the red button (from my stash!) on the front cover pocket.
And finally . . .
Wonderful World Designer Series Paper
Lidded Treat Box

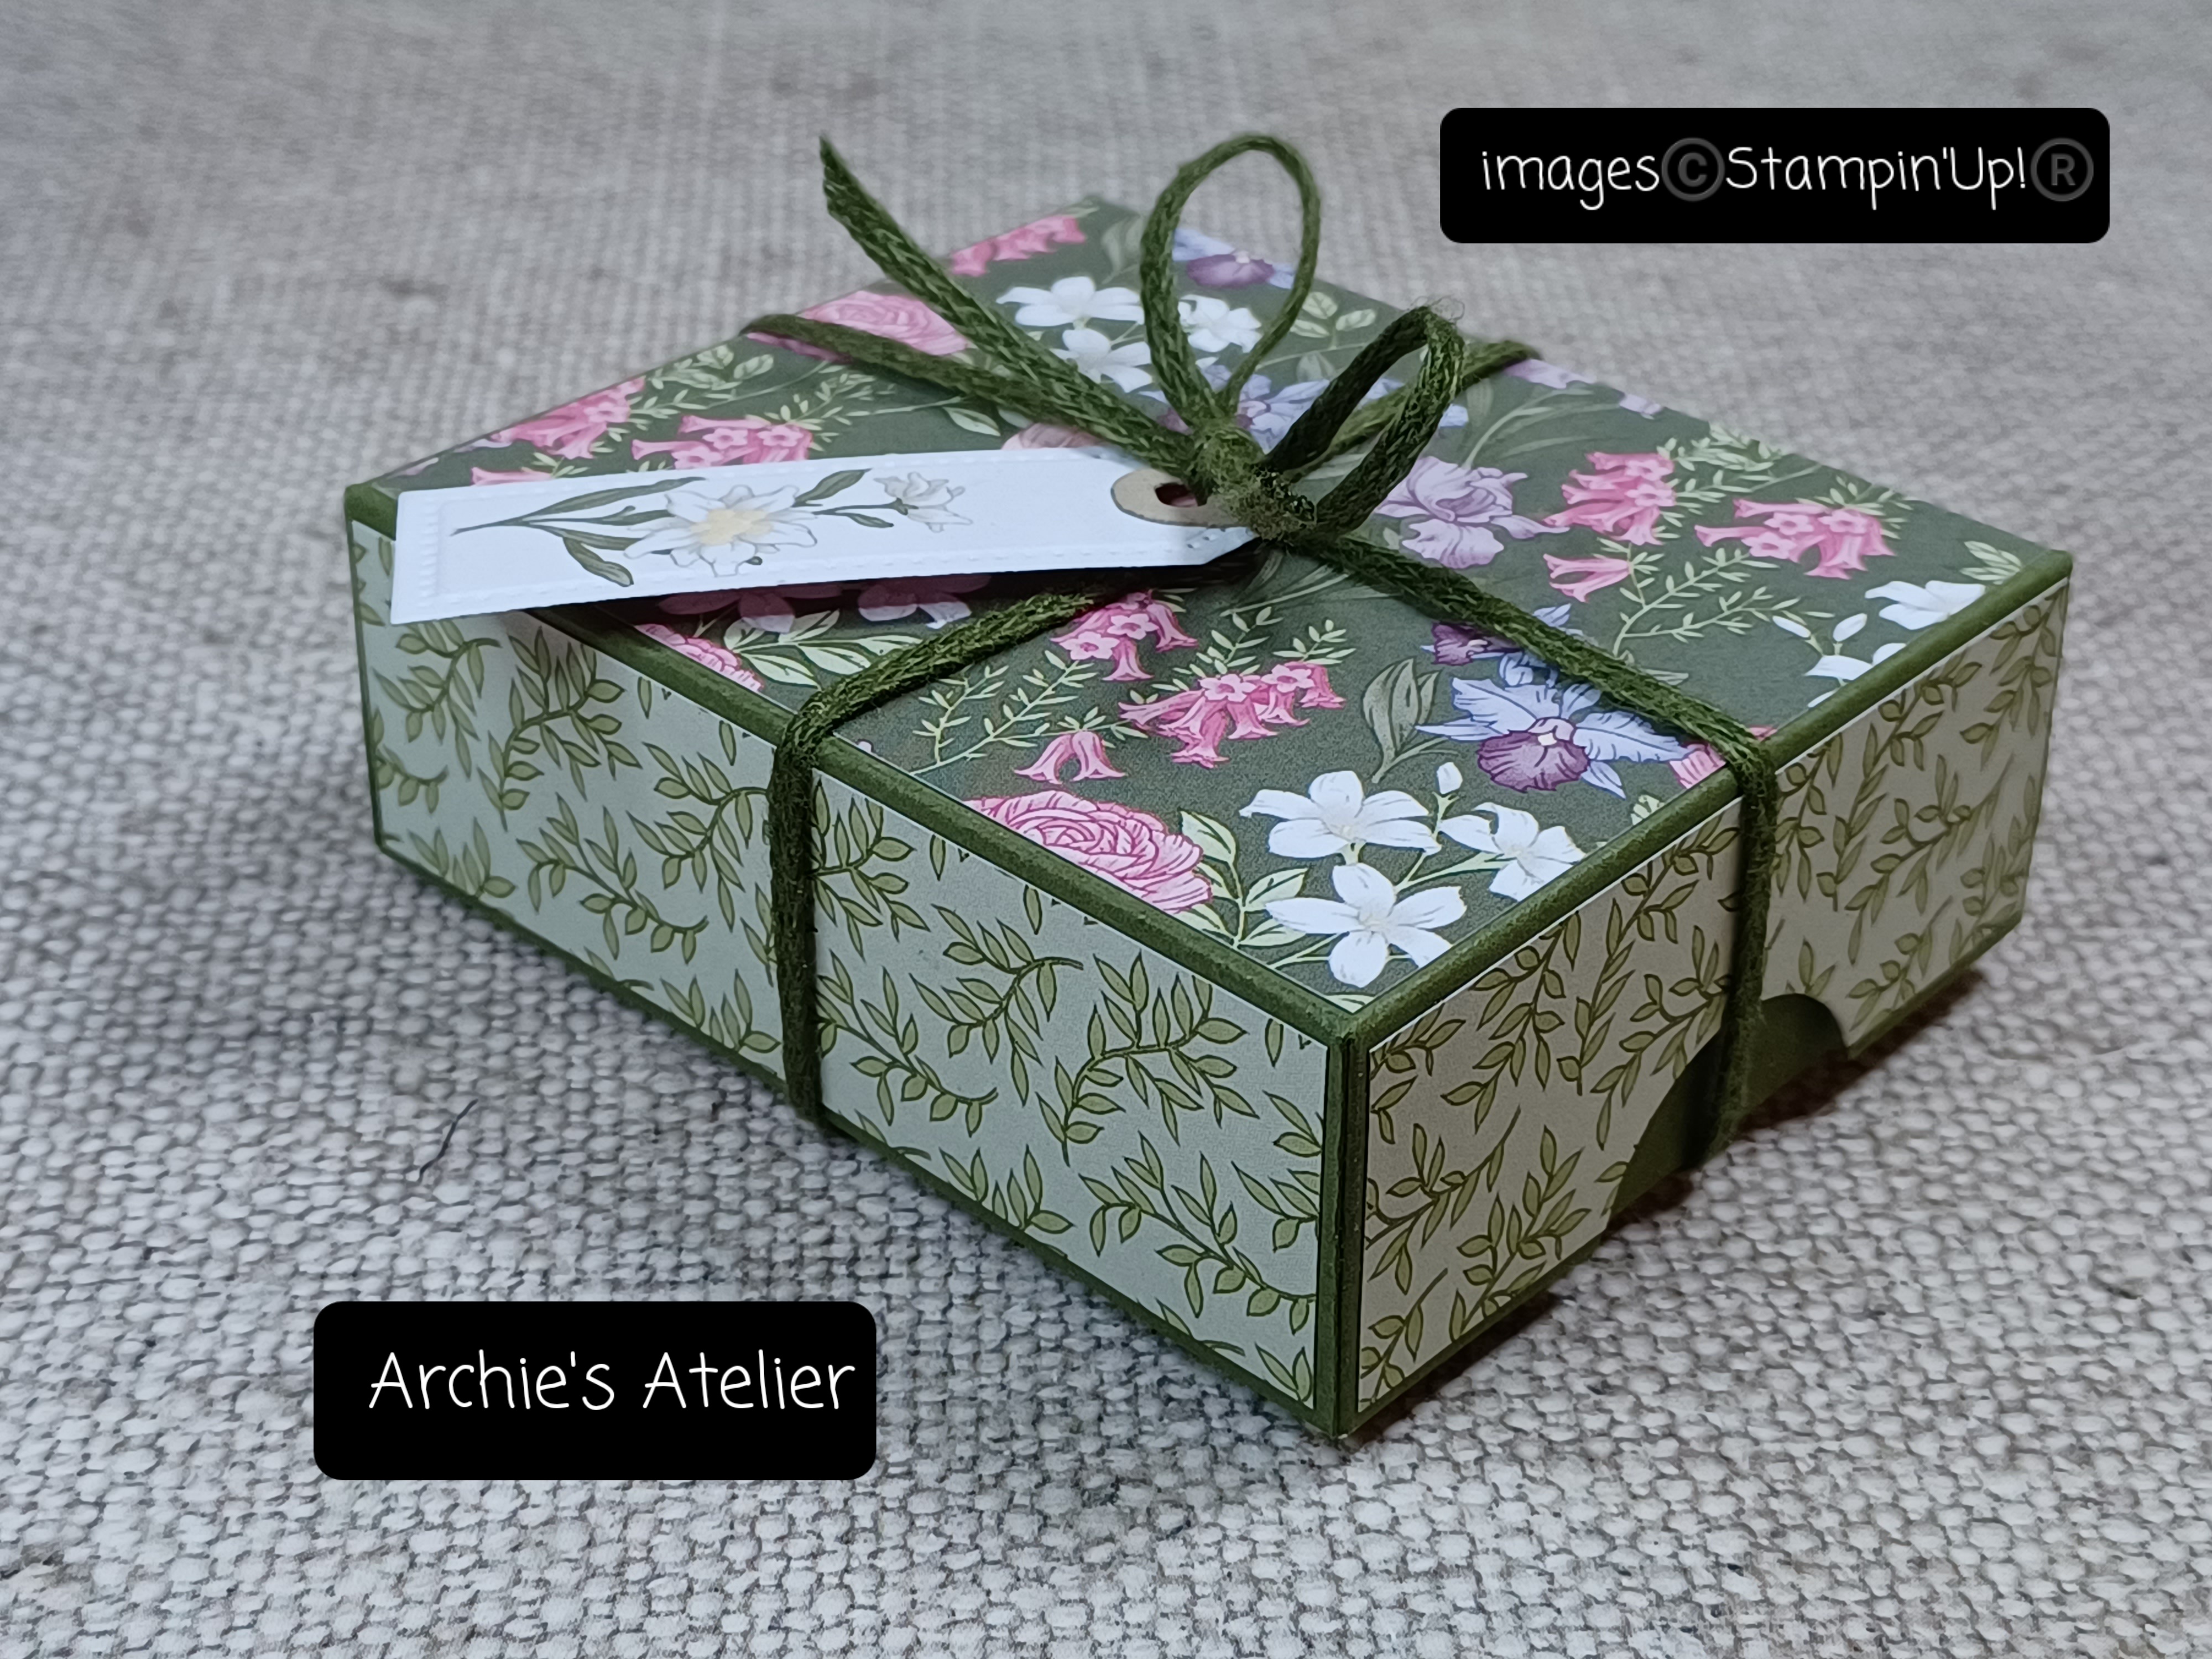

For this 3 3/8" x 2 3/4" x 1 1/8" deep lidded box, which holds one of the twin-wrapped packages of Little Debbie Swiss Rolls (I am all about the chocolate treats!), I used the following supplies:
- for the base of the box a 5 5/8" x 5" piece of Mossy Meadow cardstock (item 133676) scored at 1 1/8" on all four sides;
- for the lid of the box a 5 11/16" x 5 1/16" piece of Mossy Meadow cardstock, also scored at 1 1/8" on all four sides;
- co-ordinating pieces of Wonderful World DSP for the decorative paper panels for the top and sides of the lid - panels cut 1/8" smaller than the cardstock panels - after adhering the DSP panels I used a 1" circle punch to cut the thumb notches in the two sides;
- Tailor Made Tags dies (item 155563) to cut the Wonderful World DSP floral tag and the Crumb Cake cardstock (item 120953) hole re-enforcer; and
- Mossy Meadow 3/16" Braided Linen Trim (item 154298 - currently available on the Clearance Rack!) to tie the tag to the box.
Thank you for visiting my blog! As always I had a lot of fun working on these projects! Although I am sorry that Sale-A-Bration is almost at an end (and with the end of August the end of summer) I am looking forward to working on some more fall/Halloween and Christmas projects - and I may sneak in some of the Tree Lot dies to a few projects too!
If you are interested in purchasing any of the available Stampin' Up! products I have used in my projects, and you live in Canada and do not have a Stampin' Up! demonstrator, please do not hesitate to visit my online store found on my website https://archiesatelier.stampinup.net/ at your convenience, or simply click under the "Shop With Me" tab on the right sidebar of my blog, which will take you directly to my website and online store. I very much appreciate your business! You can browse the PDF versions of the July-December 2022 Mini Catalogue, the May 2022-April 2023 Annual Catalogue, and the July 1 - August 31, 2022 Sale-A-Bration Brochure, anytime on my website. Please check my August 4, 2022, blogpost ("Playing With The Perched In A Tree Bundle!" - https://archiesatelier.blogspot.com/2022/08/playing-with-perched-in-tree-bundle.html) to see the additional Sale-A-Bration products added for August. Remember that the Sale-A-Bration products are available only while supplies last so don't miss out! Don't forget to check out the Clearance Rack too!
Have fun creating!
Laurel

Comments
Post a Comment