Playing with the Browns!
(Early Espresso, Soft Suede, and Crumb Cake)

Hello! Today I am sharing a few projects I worked on this week while playing with a few colour combinations featuring Early Espresso, Soft Suede, and Crumb Cake. My inspiration for these projects came from a few sources - a book article on brown colour combinations for weddings; a few chocolate treats; and going through my button stash looking for buttons to match the Stampin' Up! cardstock colours so I could make button earrings!
Slider Treat Boxes for Little Debbie Individually Wrapped Frosted Fudge Cakes

I found these individually wrapped Little Debbie Frosted Fudge Cakes at Dollarama and thought they would be a perfect fit for a slider treat box - a little treat as a token of appreciation for a friend, co-worker, teacher etc.
To make the box and the sliding sleeve I used one piece of 8 1/2" x 11" cardstock, cut and scored as follows:
- for the box - 7 3/8" x 4 3/8", scored at 1 1/2" on all four sides; and
- for the sleeve - 6 1/2" x 4 1/2", scored on the 6 1/2" side at 1 1/2", 3", 4 1/2", and 6" (the 1/2" tab is the glue tab for the underside of the sleeve).

Early Espresso and Pumpkin Pie


For my first box I used Early Espresso cardstock (item 119686) for the box and sleeve; the sentiment circle; and the detailed butterfly. For the decorative paper panels for each end of the box and the top and two sides of the sleeve I used the Early Espresso patterned paper from the 6" x 6" Designer Series Paper Assortments - Neutrals (item 159257). The "thank you" sentiment, from the Cup of Tea stamp set (item 158661), was stamped using VersaMark Ink (item 102283) and heat embossed using clear embossing powder (Stampin' Emboss Powders - Basics - item 155554). The circle was cut using the new Stylish Shapes dies (item 159183). The Early Espresso cardstock detailed butterfly and the solid Pumpkin Pie cardstock (item 105117) butterfly were cut using the Brilliant Wings dies (item 155523). The foliage was cut from Old Olive cardstock (item 100702) using the Forever Flourishing dies (item 152714). The little Pumpkin Pie cardstock flowers were cut using the little flower dies included with the Bouquet of Love Hybrid Embossing Folder (item 157641). I glued the foliage to the top of the sleeve and then attached the sentiment circle using Stampin' Dimensionals (item 104430). I "painted" both butterflies with Wink of Stella Clear Glitter Brush (item 141897), and in attaching the detailed butterfly to the solid butterfly I only added glue to the body of the detailed butterfly. To the center of each of the flowers I added one of the small Classic Matte Dots (item 158146) - Very Vanilla. To add a little more sparkle I added a double bow made with gold cord from Simply Elegant Trim (item 155766).
Soft Suede and Coastal Cabana


For the second treat holder I used the following supplies:
- Soft Suede cardstock (item 115318) for the box, sleeve, and detailed leaf;
- Costal Cabana cardstock (item 131297) for the solid leaf, and the sentiment tag;
- Soft Suede Ink (item 147115) to stamp the "Thank You" sentiment, from the Nature's Harvest stamp set (item 156495). After stamping the sentiment I embossed the Coastal Cabana cardstock using the Timeworn Type 3D Embossing Folder (item 156505);
- Tailor Made Tags dies (item 155563) to cut the embossed sentiment tag;
- Summer Shadows dies (item 156618) to cut the detailed and solid leaves; and
- Soft Suede patterned paper from the 6" x 6" Designer Series Paper Assortments - Neutrals (item 159257) for the DSP panels for each end of the box, and the top and both sides of the sleeve. I sponged all edges of the DSP with Soft Suede Ink.
Crumb Cake and Cherry Cobbler
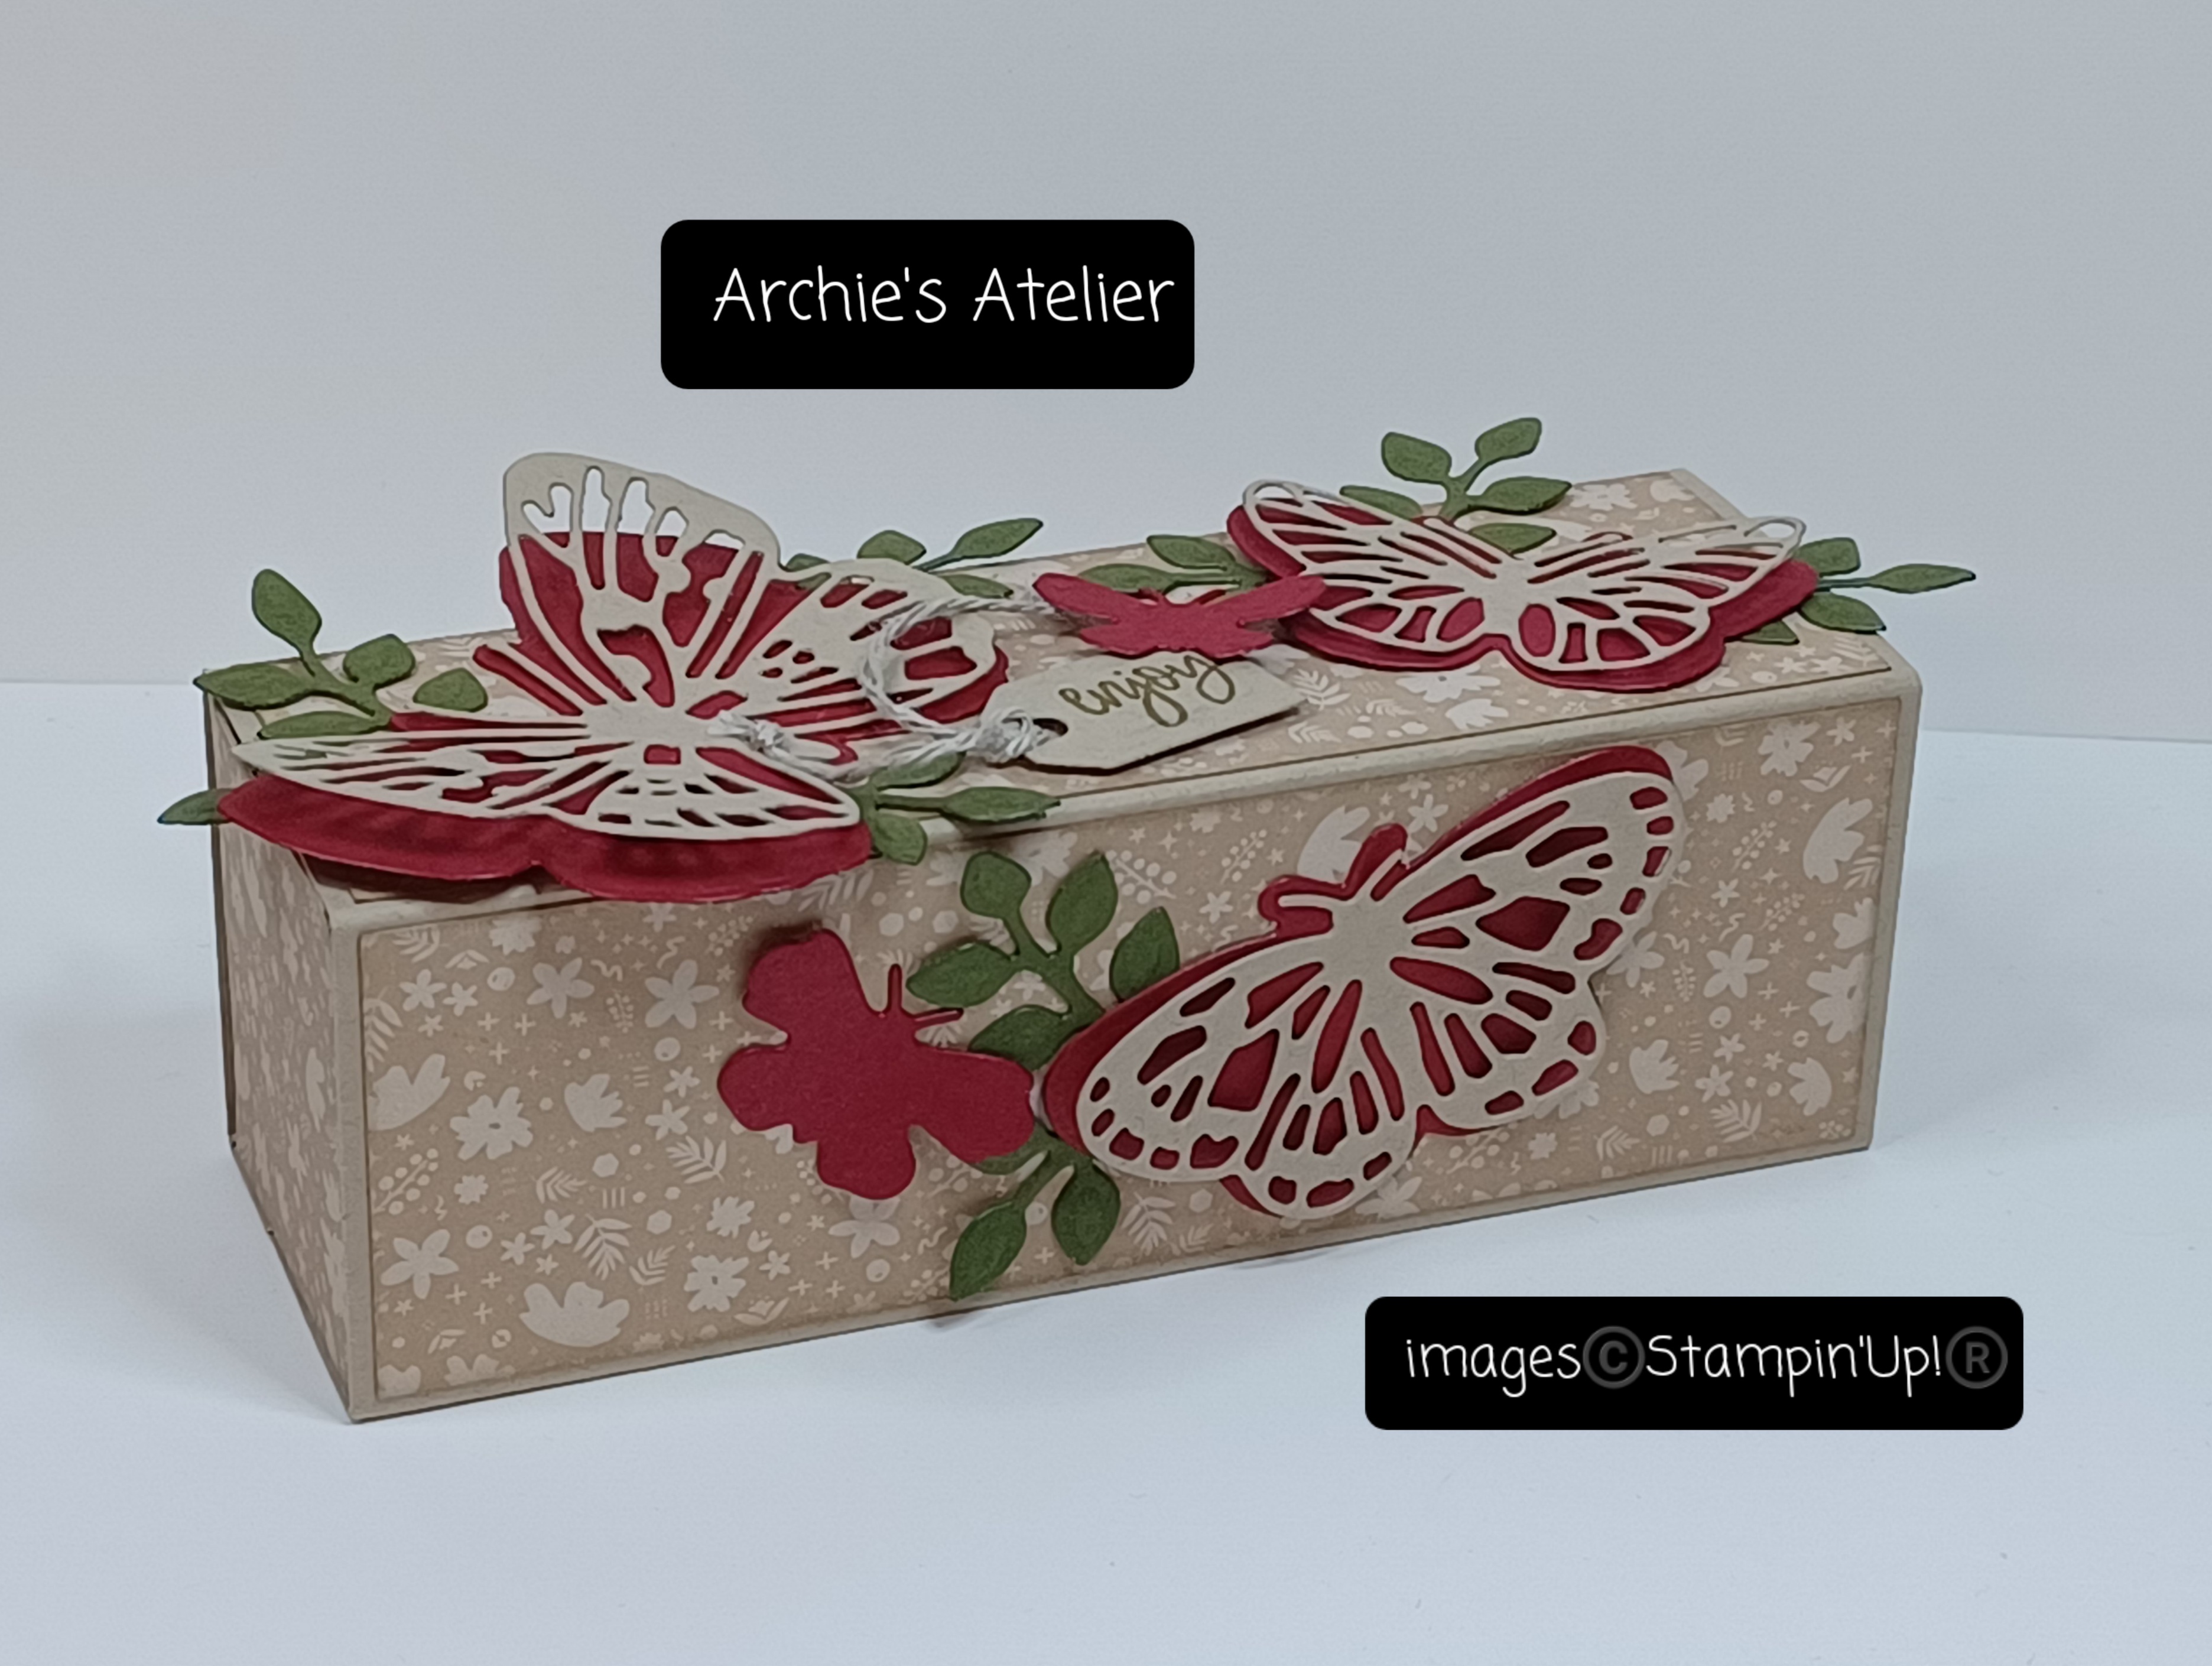


For the third treat holder I used the following supplies:
- Crumb Cake cardstock (item 120953) for the box and sleeve; detailed butterflies; and sentiment tag;
- Cherry Cobbler cardstock (item 119685) for the solid butterflies;
- Mossy Meadow cardstock (item 133676) for the foliage, cut using the Grove dies (item 157844);
- Crumb Cake patterned paper from the 6" x 6" Designer Series Paper Assortments - Neutrals (item 159257) for the decorative paper panels for both ends of the box, and the top and both sides of the sleeve;
- Soft Suede Ink (item 147115) to stamp the "enjoy" sentiment (from the Cup of Tea stamp set - item 158661), and to sponge all edges of the DSP panels;
- Brilliant Wings dies (item 155523) to cut all butterflies;
- Meadow dies (item 155852) to cut the small sentiment tag; and
- Linen Thread (item 104199) for the tie on the tag.
Treat Bag Topper

For the treat bag to hold these chocolate-covered pretzels I used one of the 5 3/4" x 4 3/8" Clear Envelopes (item 102619) - with the self-adhesive closure at the bottom so that accessing the treats does not mean that the topper has to be destroyed! With a topper these clear envelopes would make great birthday party favours! For the topper I used the following supplies:
- Early Espresso cardstock (item 119686) - 4 1/2" x 4 1/2" - scored on one side at 2 1/4";
- Highland Heather cardstock (item 146986) for the sentiment banner - cut using the Stylish Shapes dies (item 159183);
- Gorgeous Grape cardstock (item 146987) for the image matting circle - cut using the Stylish Shapes dies;
- Basic White cardstock (item 159276) to stamp the robot image on - the image circle was also cut using the Stylish Shapes dies;
- double-sided tape (Tear & Tape Adhesive - item 154031) to attach the topper to the envelope;
- Splatters 3D Embossing Folder (Stripes & Splatters 3D Embossing Folders - item 157980) to emboss the front of the topper;
- White Ink (item 147277) - used to lightly sponge the embossed front of the topper to help accentuate the embossed pattern;
- Memento Tuxedo Black Ink (item 132708) to stamp the robot image;
- Stazon Jet Black Ink (item 101406) to stamp the sentiment;
- Nuts & Bolts stamp set (item 157650) for the robot image and sentiment;
- Stampin' Dimensionals (item 104430) to attach the image circle to matting circle, and to attach the sentiment banner;
- Linen Thread (item 104199) for the bow; and
- Rustic Metallic Adhesive-Backed Dots (item 159082) to embellish the topper.
I coloured the robot image using alcohol markers. For all my projects the glue I have used is Multipurpose Liquid Glue (item 110755).
Earring Tent Cards
For when you want to combine the present and the card! To make the stand for these cards I cut a piece of cardstock 3" long by a width that was 1/8" shorter than the width of the card, and on the 3" side scored at 1/2" (valley fold), 1 1/2" (mountain fold), and 2 1/2" (valley fold) - the 1/2" tabs were glued to the inside front and back of the card.
Early Espresso and Polished Pink


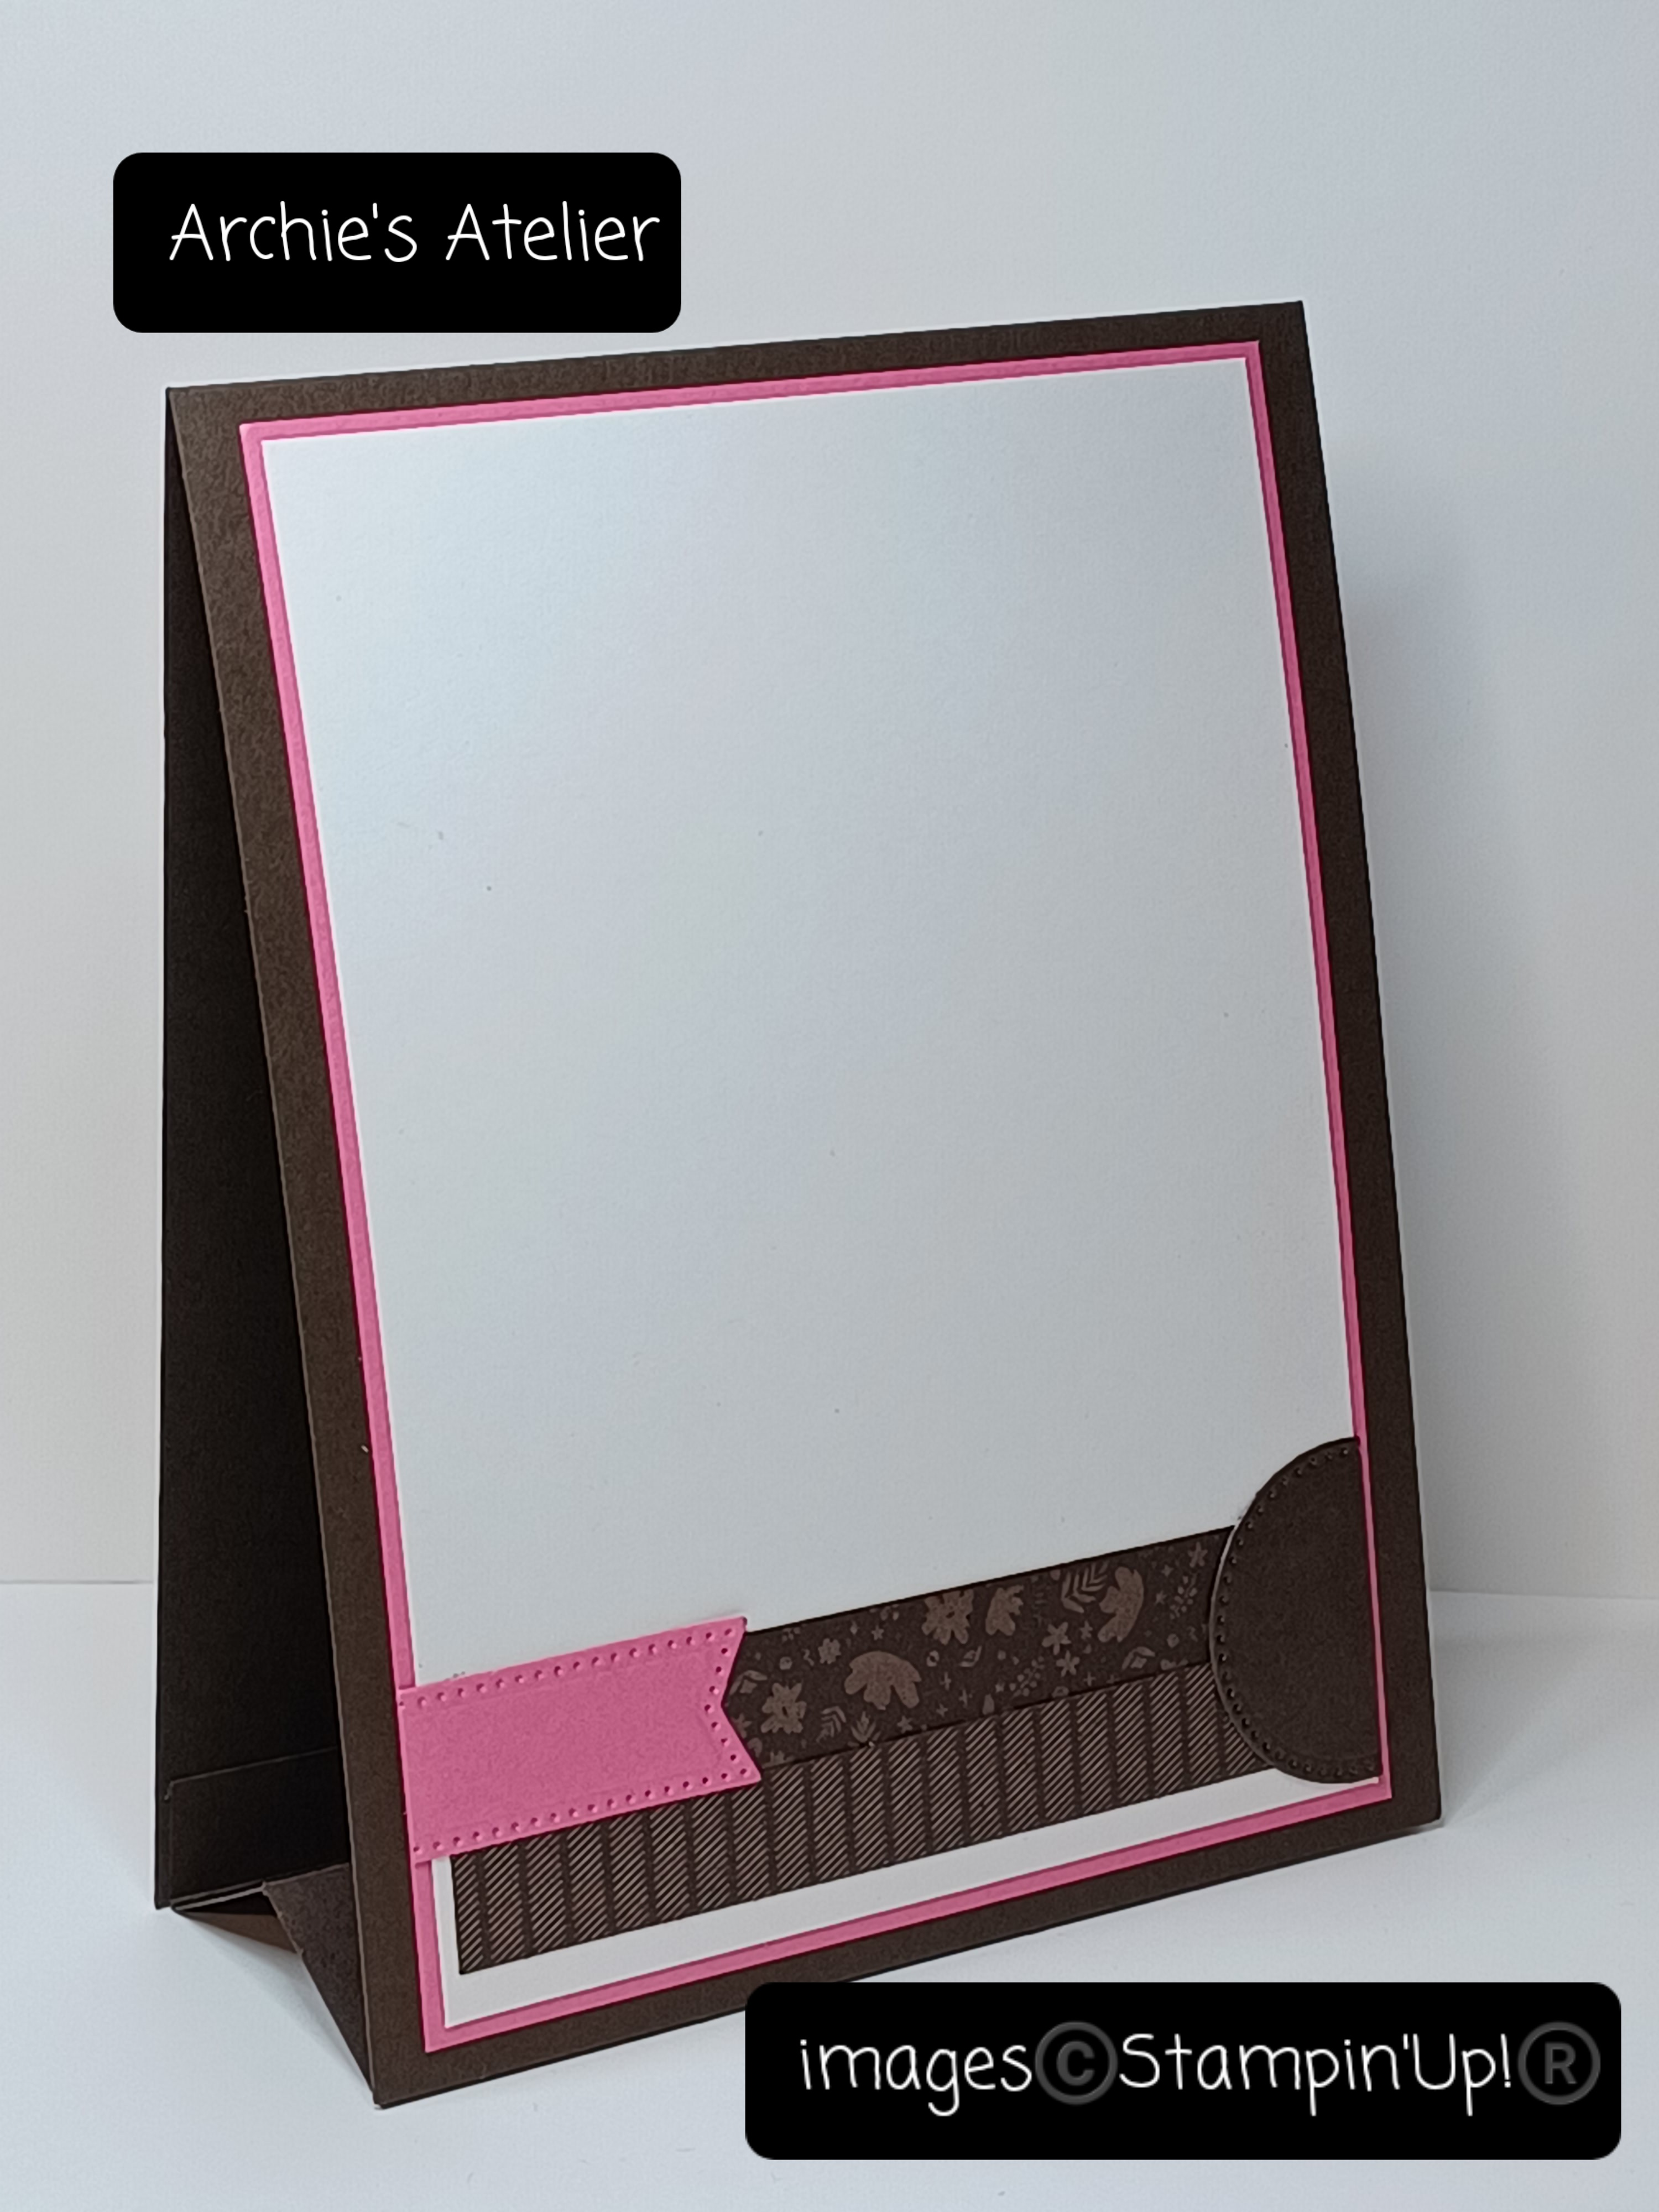

For this 5 1/2" x 4 1/4" card I used the following supplies:
- Early Espresso cardstock (item 119686) for the card base; the stand; and the circles, which were cut using the Stylish Shapes dies (item 159183);
- Polished Pink cardstock (item 155710) for the panel base for the circles, the matting panels (front and back of the card), the sentiment banner and back banner (cut using the Stylish Shapes dies);
- Soft Suede Ink (item 147115) to stamp the "Happy Birthday" sentiment, from the Catch You Later stamp set (item 158037);
- Early Espresso patterned paper from the 6" x 6" Designer Series Paper Assortments - Neutrals (item 159257) for the decorative paper strips used on the front and back panels; and
- Basic White cardstock (item 159276) for the back panel.
To make the holes for the earrings I used the paper piercer end of the Take Your Pick tool (item 144107) - a very handy tool!
And finally . . .
Soft Suede, Coastal Cabana and Bermuda Bay


For this 4" x 4" card I used the following supplies:
- Costal Cabana cardstock (item 131297) for the card base, stand, and base for the decorative paper strips;
- Bermuda Bay cardstock (item 131197) for the front and back matting panels;
- Soft Suede cardstock (item 115318) for the front square panel, cut using the Stylish Shapes dies (item 159183); and the hole re-enforcers, which were cut using the Tailor Made Tags dies (item 155563);
- Basic White cardstock (item 159276) for the back sentiment panel;
- Soft Suede Ink (item 147115) to stamp the "Best Wishes & Happy Thoughts" sentiment, from the new Nature's Prints stamp set (item 158793); and to sponge the edges of the Soft Suede cardstock square and hole re-enforcers, and edges of some of the DSP;
- Soft Suede patterned paper from the 6" x 6" Designer Series Paper Assortments - Neutrals (item 159257) and Coastal Cabana patterned paper from the 6" x 6" Designer Series Paper Assortments - Brights (item 159258) for the decorative paper strips;
- Stitched Greenery die (item 155451) to emboss ("quilt") the DSP strip front panel; and
- white baker's twine (Baker's Twine Essentials Pack - item 155475) to tie the bow in the almost Soft Suede button from my stash.
For the front panel I cut the DSP strips 3/4" wide and used the Stitched Greenery die to emboss the panel to create a quilted effect.
Thank you for visiting my blog! As always I had a lot of fun working on this week's projects! I am looking forward to experimenting with many more colour combinations!
If you are interested in purchasing any of the available Stampin' Up! products I have used for these projects, and you live in Canada and do not have a Stampin' Up! demonstrator, please do not hesitate to visit my online store found on my website https://archiesatelier.stampinup.net/ at your convenience, or simply click under the "Shop With Me" tab on the right sidebar of my blog, which will take you directly to my website and online store. I very much appreciate your business! You can browse the PDF of the new May 2022-April 2023 Annual Catalogue anytime on my website!
Have fun creating!
Laurel

Comments
Post a Comment