Mixing It Up With Mixed Florals!

Hello! Today I am sharing a few card projects I worked on this week featuring the Stampin’ Up!® Online Exclusives Mixed Florals stamp set (item 16463). This photopolymer stamp set is also available together with the co-ordinating Mixed Florals dies (item 164641) in the Mixed Florals Bundle (item 164642) - if you are interested in purchasing both the stamp set and dies be sure to use the Bundle item number when submitting your order to ensure that you receive the 10% Bundled Savings!

For my cards I played with a few different techniques using the two large floral images from the stamp set:
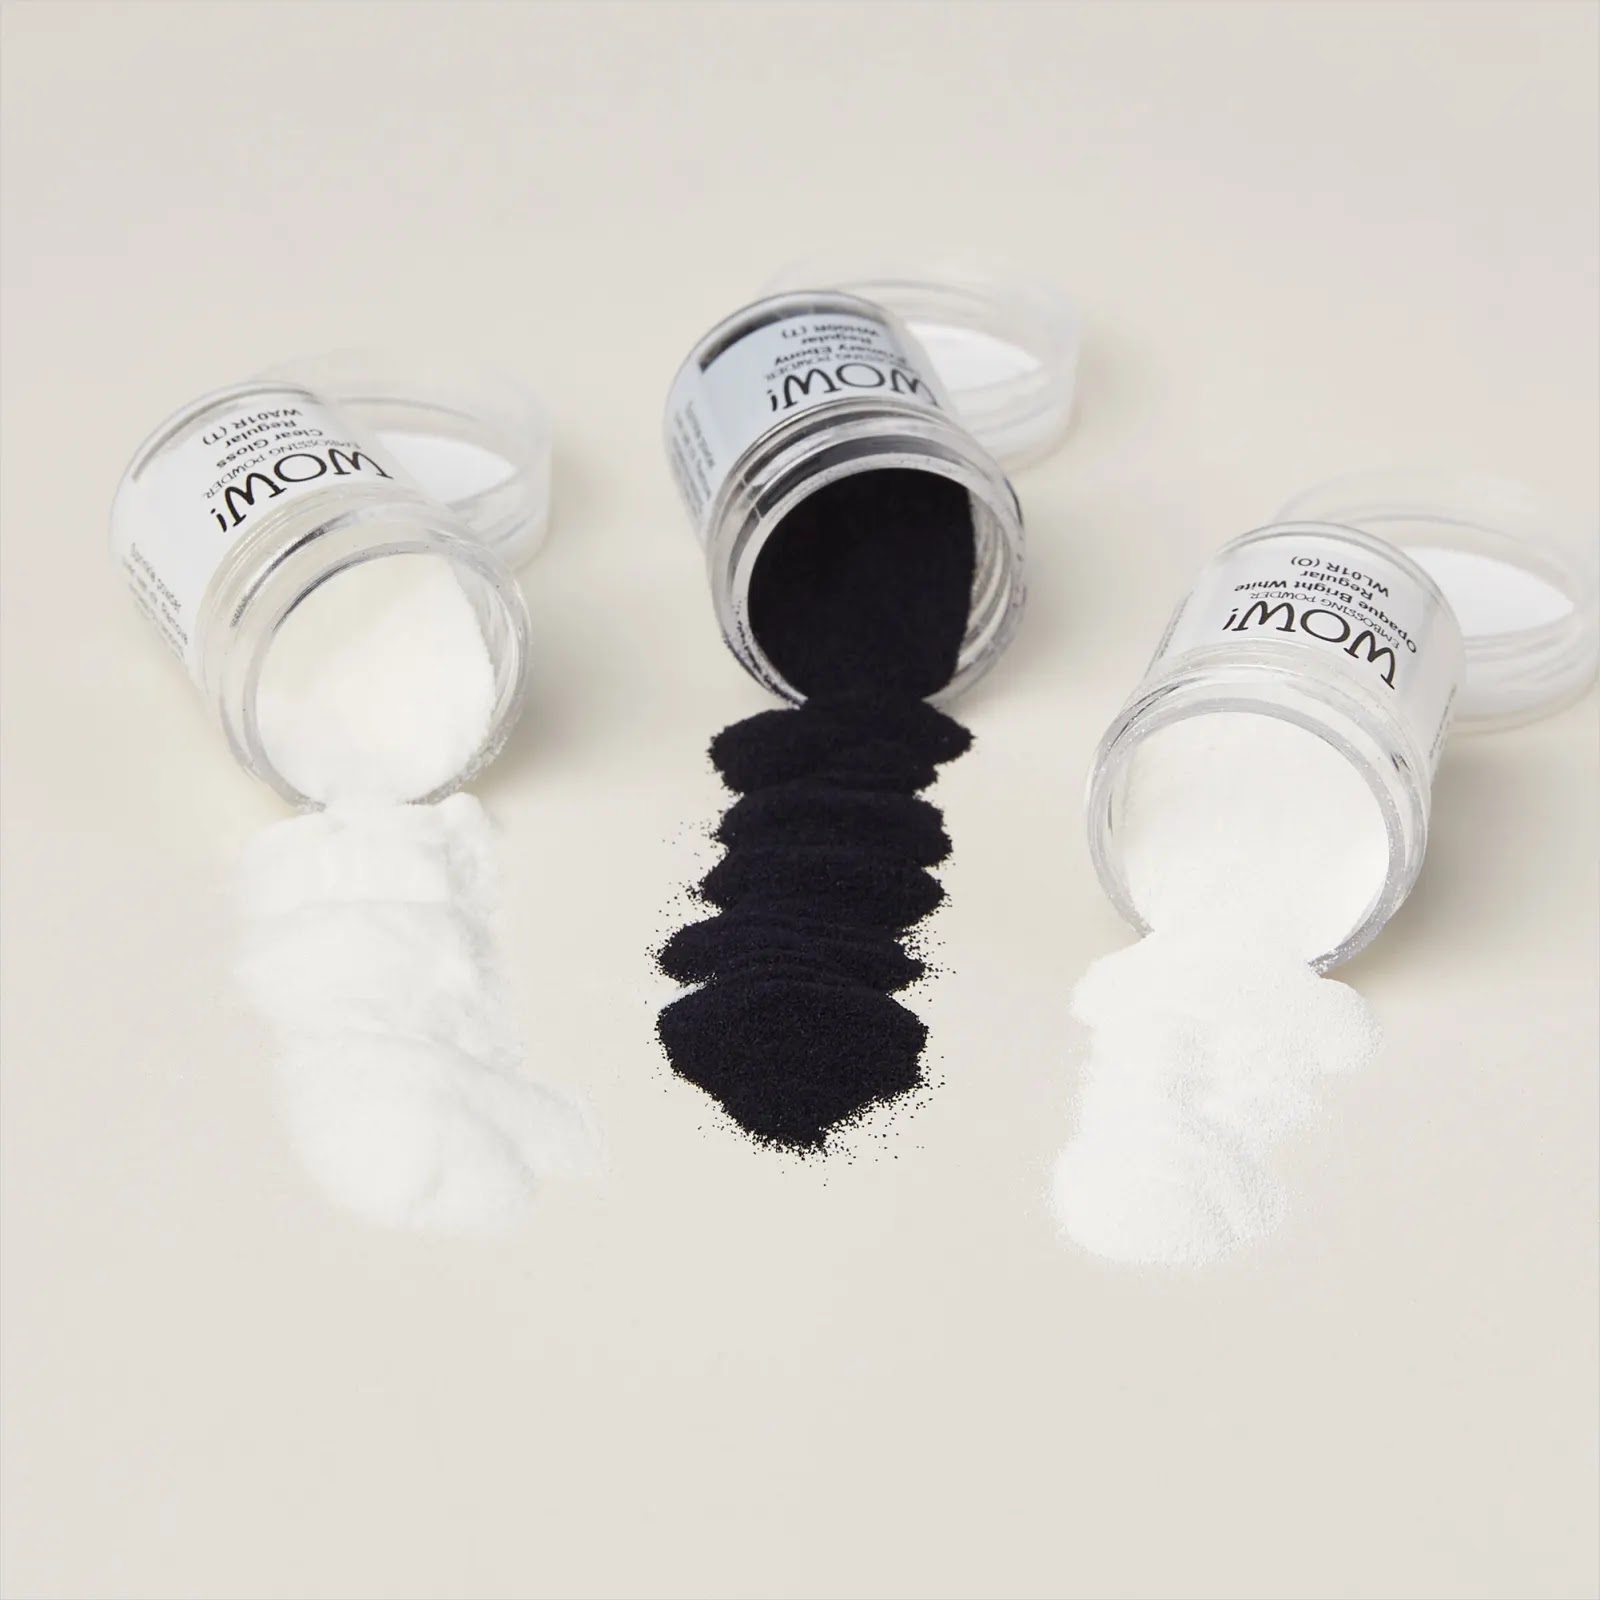
- stamping the image on cardstock using VersaMark Ink (item 102283), and heat embossing using white embossing powder (WOW! Embossing Powder-Basics - item 165679 [white, black, and clear embossing powders]);

- stamping the image on linen patterned paper from the Online Exclusives Woven Textures 12" x 12" Designer Series Paper (item 165560) and, for a monochromatic effect, colouring the image using Crumb Cake ink (item 147116) applied with a small paint brush and a little water;
.webp)
- stamping the image on watercolour paper, and colouring with Classic Stampin' inks/Classic Stampin' ink refills mixed with a little water and applied using a small paint brush; and
- stamping the image on Smoky Slate patterned paper from the Country Lace 12" x 12" Designer Series Paper (item 163415) or on cardstock, and colouring with regular colour pencils - again, for a monochromatic effect, using coloured pencils very close in colour to the Designer Series Paper or cardstock base. For those images stamped on the Designer Series Paper I used Studio gray pencils #070 and #071; for the image stamped on Lost Lagoon cardstock (item 133679) I used Crayola "teal" and "green blue" pencils; and for the image stamped on Petunia Pop cardstock (item 163801) I used a Crayola "magenta" pencil.

To stamp the sentiments, and all images - with the exception of those heat embossed - I used Stazon Jet Black Ink (item 101406).
I used the following dies, stamp sets, and embossing folders:
- Online Exclusives Everyday Arches dies (item 164629) - to cut window openings, image panels, and, by using low-tack tape to hold two of the nesting dies together while passing the dies and cardstock through the Stampin' Cut & Emboss Machine (item 149653), frames;

- retiring Delicate Forest dies (item 162679) - currently available, while supplies last, as one of the discounted Last Chance Products - for the two leafy sprigs die cut from Soft Seafoam cardstock (item 146988), and shaded with Old Olive ink (item 147090) used on the card with the white heat embossed tulips on a Poppy Parade cardstock (item 119793) base;

- Online Exclusives Grow With Love stamp set (item 164797) - "From the garden of" sentiment;


- retiring Attention Shoppers stamp set (item 163640) - currently available, while supplies last, as one of the discounted Last Chance Products - "thanks" sentiment;

- Storybook Friends stamp set (item 164668) - "Hello friend" sentiment;

- retiring Timber 3D Embossing Folder (item 156406) - currently available, while supplies last, as one of the discounted Last Chance Products - after dragging my Basic Gray ink pad (item 149165) across the raised design on one inside panel of the embossing folder I embossed the 4 1/8" x 3 5/8" panel of Pebbled Path cardstock (item 161722) used on the "thanks" monochromatic card; and
.webp)
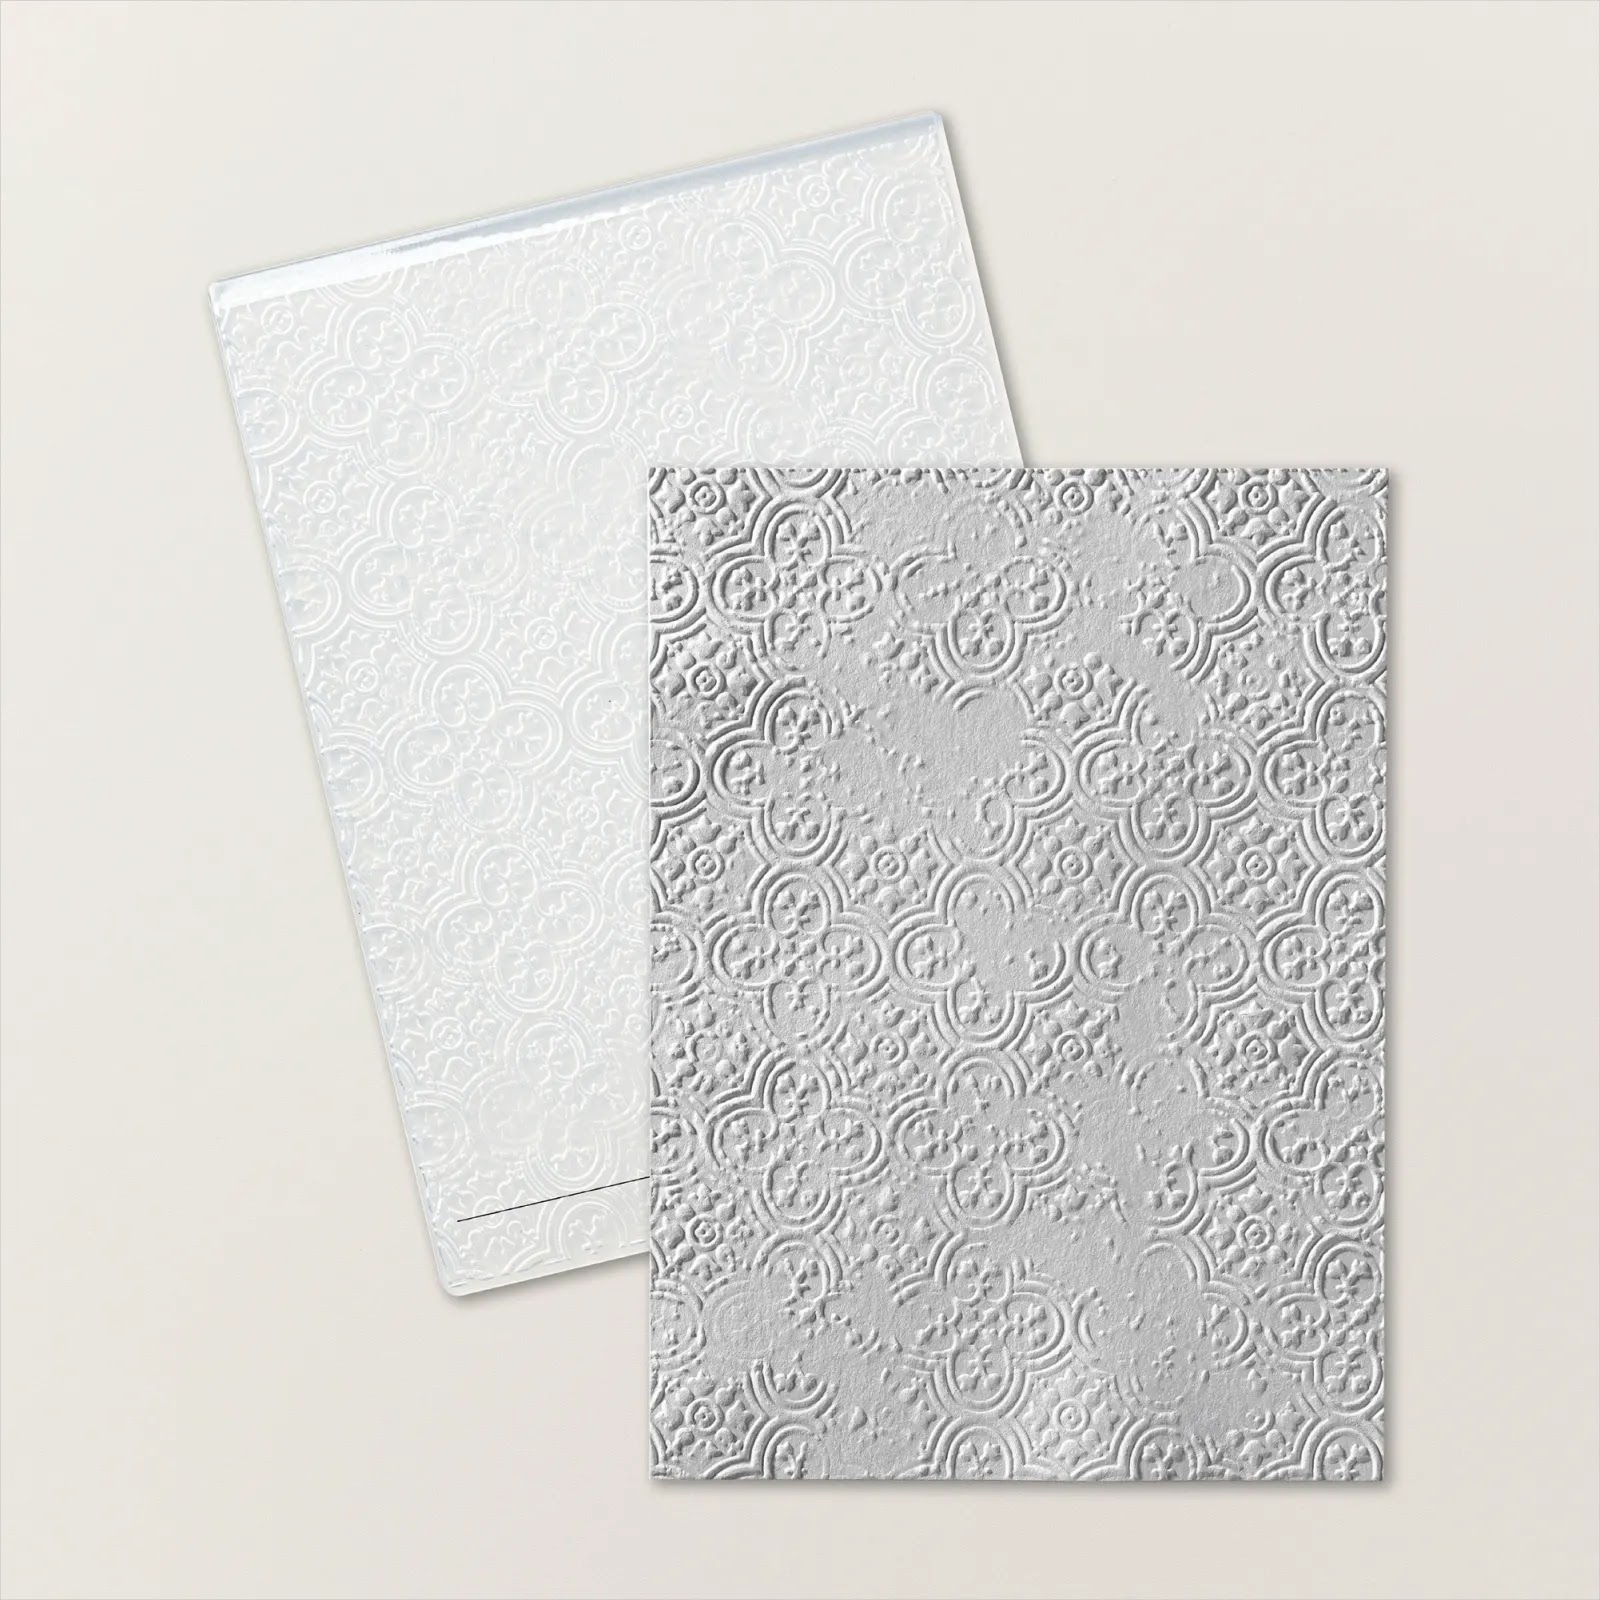
- retiring Distressed Tile 3D Embossing Folder (item 162189) - also currently available, while supplies last, as one of the discounted Last Chance Products - used to emboss the 4 7/8" x 3 7/8" Basic Black cardstock (item 121045) panel on the Basic Black cardstock Everyday Arches framed watercoloured tulips card.
Just a brief summary of the basic tools and supplies I used to complete my cards this week in addition to the Stampin' Cut & Emboss Machine (item 149653) that was used for all die cutting and embossing:
- Paper Trimmer (item 152392) - for trimming cardstock and Designer Series Paper panels and strips - can also be used for scoring;
- stylus and scoreboard (Simply Scored Scoring Tool - item 122334) for scoring card fold lines;
- Bone Folder (item 102300) for burnishing scored card fold lines;
- Paper Snips Scissors (item 103579) - these sharp little scissors are perfect for trimming die cuts - i.e. shortening the stem of a leafy sprig;
- Take Your Pick Tool (item 144107) - the tacky putty tip is definitely a great help for picking up and placing small embellishments; and
- for the main adhesive, Multipurpose Liquid Glue (item 110755).
In addition, for the heat embossed projects I rubbed an Embossing Buddy (a small pouch filled with anti-static powder) over the cardstock before stamping the image. The anti-static powder helps prevent the embossing powder from sticking to non-inked areas of the cardstock (or other surface on which you are heat embossing - i.e. Designer Series Paper, watercolour paper etc.). An Embossing Buddy is included in the Embossing Additions Tool Kit (item 159971).

To heat (activate) the embossing powder I also used a heat gun (Heat Tool - item 129053). The Heat Tool has two heat settings: low to dry ink; and high to heat/melt/activate embossing powder.

To shade the Delicate Forest foliage cardstock die cuts, or the edges of a Designer Series Paper or cardstock panel or strip, I used one of the Small Blending Brushes (item 160518) to apply the Classic Stampin' ink.

On with the projects!


Additional supplies used to complete this 4" x 3 1/2" top-fold card:
- Summer Splash cardstock (item 163797) for the card base, and 3" x 2 1/4" image panel;
- Basic Black cardstock (item 121045) for image panel's 3 1/8" x 2 3/8" matting panel (edges scraped with the blade of my craft knife); 3 3/4" x 3 1/4" front panel; and inside panel's 3 3/4" x 3 1/4" matting panel, and 3 1/8" x just shy of 1/4" wide strip;
- Basic White Thick cardstock (item 159229) for image panel's 3 1/4" x 2 1/2" matting panel; front panel's 3 7/8" x 3 3/8" matting panel; and 3 5/8" x 3 1/8" inside panel;
- Summer Splash striped patterned paper from the retiring 2024-2026 In Colour 6" x 6" Designer Series Paper Assortments (item 163777) - currently available, while supplies last, as one of the discounted Last Chance Products *a collection of new designs for the 6" x 6" Designer Series Papers for the 2024-2026 In Colours, as well as for all other colour families, will be introduced with the launch of the May 2025-April 2026 Annual Catalogue* - for front panel's 2 3/4" x 3/4" strip, and inside panel's 3 1/8" x 1/2" strip;
- Basic Black Stampin' Write Marker (item 162481) to add splatters to image panel by flicking the brush tip against the marker lid; and
- black baker's twine (Baker's Twine Essentials Pack - item 155475) wrapped and knotted around the card front.


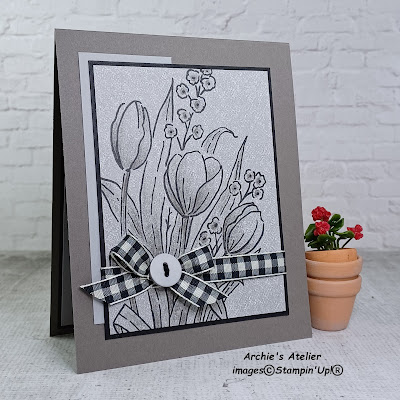
Additional supplies used to complete this 5 1/2" x 4 1/4" top-fold card:
- Poppy Parade cardstock (item 119793) for the card base, and the image panel (which was trimmed to fit behind the top panel);
- Basic White Thick cardstock (item 159229) for the 5 1/4" x 4" front (top) panel (using the Everyday Arches dies I cut the window opening in the center of this panel); the Everyday Arches frame for the window opening (for the frame I paired the die used to cut the window opening with the next largest of the nesting dies); and the 5 1/4" x 4" inside panel; and
- Foam Adhesive Strips (item 141825) - curved around the back of the window opening on the Basic White Thick cardstock front (top) panel to attach the panel to the embossed image panel. Before attaching the two panels - but after gluing the frame around the window opening - I wrapped a small length of 5/8" "almost Poppy Parade" gingham ribbon from my dollar store stash across the side of the front panel, securing each end of the ribbon on the back of the front panel with one of the Mini Glue Dots (item 103683). I applied glue to the back of the image panel to attach the completed framed image panel to the card front. After this I tucked the two foliage die cuts under the ribbon, and glued on the white button from my stash. Before gluing the Basic White Thick cardstock inside panel to the inside back of the card I wrapped a length of the ribbon across the Basic White Thick cardstock panel - again securing each end of the ribbon to the back of the cardstock panel using Mini Glue Dots.


Additional supplies used to complete this 3 3/4" x 3" top-fold card:
- Crumb Cake cardstock (item 120953) for the card base, and trimmed sentiment strip;
- Basic Black cardstock (item 121045) for the image panel's 3 1/2" x 2 5/8" matting panel; and inside panel's 3 5/8" x 2 7/8" matting panel;
- Very Vanilla cardstock (item 101650) for the 3 1/2" x 2 3/4" inside panel - splatters added by flicking the paint brush loaded with Crumb Cake ink (item 147116) and water; and
- Crumb Cake ink to shade the edges of the 3 3/8" x 2 1/2" Designer Series Paper image panel, and the trimmed sentiment strip.


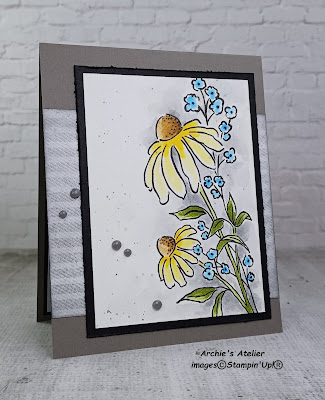
Additional supplies used to complete this 5 1/2" x 4 1/2" top-fold card:


.webp)


- Basic Black cardstock (item 121045) for the card base; image panel's 4 1/8" x 3 1/8" matting panel; and inside panel's 5 1/4" x 4 1/4" matting panel;
- Smoky Slate cardstock (item 131202) for the image panel's 5" x 4" matting panel; and inside panel's 5 3/8" x 4 3/8" matting panel;
- Basic White Thick cardstock (item 159229) for the 5" x 4" inside panel; and
- Berry Burst ink (item 147143), Old Olive ink (item 147090), Azure Afternoon ink refill (item 161668), and Basic Gray ink (item 149165) to colour the 4" x 3" image panel.


Additional supplies used to complete this 5" x 4" top-fold card:
- Pebbled Path cardstock (item 161722) for the card base;
- Basic Black cardstock (item 121045) for the image panel's 4 3/8" x 3 1/4" matting panel (edges scraped with the blade of my craft knife); and inside panel's 4 3/4" x 3 3/4" matting panel;
- Smoky Slate cardstock (item 131202) for the 4 5/8" x 3 5/8" inside panel;
- Smoky Slate striped ticking patterned paper from the Country Lace 12" x 12" Designer Series Paper (item 163415) for the front panel's 4" x 3 5/16" strip - edges shaded with Basic Gray ink (item 149165);
- Daffodil Delight ink (item 147094), Daffodil Delight ink refill (item 119672), Pecan Pie ink (item 161665), Mossy Meadow ink refill (item 133651), Azure Afternoon ink refill (item 161668), and Basic Gray ink to colour the 4 1/8" x 3" image panel; and
- two small and three large of the Basic Gray dots from the retired Classic Matte Dots (item 158146) added to the card front.


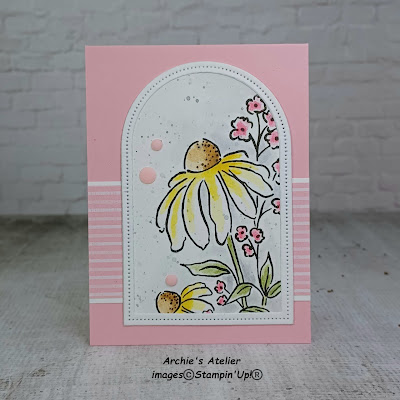
Additional supplies used to complete this 4" x 3" top-fold card:
- Pretty In Pink cardstock (item 163793) for the card base;
- Pretty In Pink striped patterned paper from the retiring 2024-2026 In Colour 6" x 6" Designer Series Paper Assortments (item 163777) - currently available, while supplies last, as one of the discounted Last Chance Products - for the front panel's 3" x 1 1/2" strip; and the inside panel's 2 3/4" x 1/2" strip;
- Basic White Thick cardstock (item 159229) for the 3" x 1 5/8" matting panel for the front panel's DSP strip; the Everyday Arches frame; and the 3 3/4" x 2 3/4" inside panel;
- Real Red ink (item 147084), Daffodil Delight ink (item 147094), Pecan Pie ink (item 161665), Old Olive ink (item 147090), and Basic Gray ink (item 149165) to colour the image panel trimmed to fit behind the Everyday Arches frame; and
- two small and one large of the Pretty In Pink dots from the retiring 2024-2026 In Colour Resin Dots (item 163389) - currently available, while supplies last, as one of the discounted Last Chance Products - added to the framed image panel.


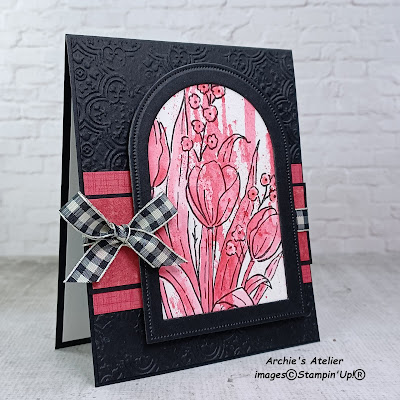
For the image panel on this 5" x 4" top-fold card I stamped the tulip image on a piece of watercolour paper that had previously been randomly coloured by "ink smooshing" with Real Red ink (item 147084). After stamping the image I applied additional Real Red ink to colour the flowers and leaves - just thought this might be an interesting technique. I trimmed the panel to fit behind the two stacked Everyday Arches frames. To complete the card I used the following additional supplies:
- Basic Black cardstock (item 121045) for the card base, embossed panel, and two Everyday Arches frames (I glued the two frames together just for a little additional durability as I wanted to "pop up" the framed image);
- two Real Red patterned papers from the retired One Horse Open Sleigh 6" x 6" Designer Series Paper (item 162118) for the front panel's 3 7/8" x 2" and 3 7/8" x 1 1/4" strips (smaller strip matted with a 4" x 1 3/8" strip of Basic Black cardstock);
- Basic White Thick cardstock (item 159229) for the 4 3/4" x 3 3/4" inside panel;
- after gluing the two DSP strips over the embossed panel on the card front I wrapped a length of Black & Very Vanilla 3/8" Large Check Ribbon (item 161982) around the card front centered over the DSP strips and tied a bow over to the far side; and
- Stampin' Dimensionals (item 104430) to attach and pop up the framed image panel.


Additional supplies used to complete this 5" x 4" top-fold card:
- Pebbled Path cardstock (item 161722) for the card base;
- Smoky Slate cardstock (item 131202) for the front panel's 4" x 1 1/2" strip; and 4 5/8" x 3 5/8" inside panel;
- Basic Black cardstock (item 121045) for the image panel's 4 1/8" x 3 1/8" matting panel; and inside panel's 4 3/4" x 3 3/4" matting panel; and
- before gluing the matted 4" x 3" DSP image panel to the card front I wrapped a length of Black & Very Vanilla 3/8" Large Check Ribbon (item 161982) across the matted panel, securing each end of the ribbon to the back of the matting panel with one of the Mini Glue Dots (item 103683). After gluing the matted image panel to the card front I glued on the ribbon bow - adding to the center of the bow an "almost Smoky Slate" button from my stash, through the center of which I threaded a length of black embroidery thread, tying a small knot at the back of the button.


Additional supplies used to complete this 5" x 4" top-fold card:
- Smoky Slate cardstock (item 131202) for the card base, and the 4 5/8" x 3 5/8" inside panel;
- Basic Black cardstock (item 121045) for the 4 5/8" x 3 5/8" embossed panel's 4 3/4" x 3 3/4" matting panel; the 4" x 3" DSP image panel's 4 1/8" x 3 1/8" matting panel; and the inside panel's 4 3/4" x 3 3/4" matting panel, and 3 5/8" x 1/4" strip; and
- from the same Country Lace DSP as used for the image panel a 3 5/8" x 3/4" strip for the inside panel.


Additional supplies used to complete this 4" x 3" top-fold card:
- Lost Lagoon cardstock (item 133679) for the card base, and 2 3/4" x 1 5/8" image panel;
- Basic Black cardstock (item 121045) for the image panel's 2 7/8" x 1 3/4" matting panel (edges scraped with the blade of my craft knife); the front panel's 3 7/8" x 2 7/8" matting panel; and the inside panel's 3 3/4" x 2 3/4" matting panel;
- Basic White Thick cardstock (item 159229) for the 3 5/8" x 2 5/8" inside panel;
- Lost Lagoon patterned paper from the Perennial Lavender 12" x 12" Designer Series Paper (item 162593) for the front panel's 3 3/4" x 2 3/4" panel, and inside panel's 2 5/8" x 1/4" strip; and another Lost Lagoon patterned paper from the Perennial Lavender DSP for the inside panel's 2 5/8" x 3/4" strip - all edges of the DSP panel and strips sponged with Lost Lagoon ink (item 161678);

- for the trimmed sentiment strip (ends torn) a small piece of Lost Lagoon patterned paper from the Thoughtful Journey 6" x 6" Designer Series Paper (item 163303) - the top and bottom edges of the trimmed strip sponged with Lost Lagoon ink;

- Stampin' Dimensionals (item 104430) to attach and pop up the matted image panel; and
- two small and two large of the Pool Party dots from Party Dots (item 164602) added to the card front.

And finally . . .


Additional supplies used to complete this 5" x 3" top-fold card:
- Petunia Pop cardstock (item 163801) for the card base (splatters added by flicking the brush tip of the Basic Black Stampin' Write Marker - item 162481 - against the marker lid); and the image panel;
- Basic Black cardstock (item 121045) for the front panel's Everyday Arches frame, and 2 3/4" x 1/2" strip; and inside panel's 4 7/8" x 2 7/8" matting panel, and 2 3/4" x 1/4" strip;
- Basic White Thick cardstock (item 159229) for the 4 3/4" x 2 3/4" inside panel;
- Petunia Pop striped patterned paper from the retiring 2024-2026 In Colour 6" x 6" Designer Series Paper Assortments (item 163777) - currently available, while supplies last, as one of the discounted Last Chance Products - for the front panel's 4 1/4" x 1 3/8" strip; and inside panel's 2 3/4" x 1" strip;
- Stampin' Dimensionals (item 104430) to attach and pop up the die cut image panel; and
- three of the small and two of the large Petunia Pop dots from the retiring 2024-2026 In Colour Resin Dots (item 163389) - currently available, while supplies last, as one of the discounted Last Chance Products - added to the card front.
Using an envelope punch board I made an envelope from a piece (trimmed to the appropriate size) of the Online Exclusives Botanical Textures 12" x 12" Designer Series Paper (item 165545).
.webp)
Thank you for visiting my blog! I had a lot of fun working on these card projects this week!
Unfortunately Stampin' Up! advises that the following products I used this week are not currently available, but I have indicated below the date that Stampin' Up! expects the products to again be available for ordering:
- Stazon Jet Black Ink (item 101406) - week of April 14, 2025;
- VersaMark Ink (item 102283) - week of April 14, 2025;
- Crumb Cake ink (item 147116) - week of April 21, 2025;
- Party Dots (item 164602) - week of April 28, 2025;
- Everyday Arches dies (item 164629) - week of May 19, 2025; and
- Basic White Thick cardstock (item 159229) - TBD.
Just a reminder that the sales period for the May 2024-April 2025 Annual Catalogue ends on May 5, 2025, at which time the five 2023-2025 In Colours (Copper Clay, Wild Wheat, Boho Blue, Moody Mauve, and Pebbled Path) - and all products in these colours, including cardstock, Classic Stampin' ink pads, Classic Stampin' ink refills, Stampin' Blends, the five-pack Stampin' Write Marker Assortment, and the 2023-2025 In Colours 6" x 6" Designer Series Paper Assortments - will be retired so you may want to check your supplies and submit orders for any required products well in advance of the Annual Catalogue end date because retiring In Colours products usually do sell out very quickly! The 8 1/2" x 11" Wild Wheat cardstock and the 8 1/2" x 11" Boho Blue cardstock have already sold out!
The Last Chance Products listing has recently been updated to include retiring products from the May 2024-April 2025 Annual Catalogue; the January-April 2025 Mini Catalogue; and the Online Exclusives line. Many retiring Last Chance Products have been discounted - like several of the products I used in my projects this week - and there are definitely some great bargains to be had but all Last Chance Products continue to be available only while supplies last!
Although it is definitely sad to see favourite products retired the good news is that with the launch on May 6, 2025, of the May 2025-April 2026 Annual Catalogue will come the release of lots of exciting new products - including five new In Colours for 2025-2027: Strawberry Slush, Timid Tiger, Darling Duckling, Secret Sea, and Cloud Cover!

Coinciding with the launch of the Annual Catalogue on May 6, 2025, will also come the release of new products in the Online Exclusives line - so there is lots to look forward to!
If you are interested in purchasing any of the available Stampin’ Up!® products I have used in my projects - or you need to restock your supplies of any of the available retiring products, including the retiring 2023-2025 In Colours products - and you live in Canada and do not have a Stampin' Up! demonstrator, please do not hesitate to visit my online store found on my website https://archiesatelier.stampinup.net/ at your convenience, or simply click under the "Shop With Me" tab on the right sidebar of my blog, which will take you directly to my website and online store. I very much appreciate your business and would be very pleased to be your demonstrator! If you need any assistance please do not hesitate to contact me (lmccoyarchie@gmail.com) and I will try my best to help! The digital versions of the May 2024-April 2025 Annual Catalogue, January-April 2025 Mini Catalogue, and the companion (and digital-only) January 2025 Scrapbooking Brochure, are all available for you to access at your convenience on my website (https://archiesatelier.stampinup.net/). As of May 6, 2025, the digital version of the May 2025-April 2026 Annual Catalogue will be available for you to access at your convenience on my website. If visiting the online store don't forget to check out the full line of Online Exclusives products - and the Last Chance Products listing!
Have fun creating!
Laurel
*It has come to my attention that quite often email correspondence from me is delivered to the recipient's spam or junk mail folder - if you have corresponded with me I have replied so be sure to check your spam or junk mail folder! Thank you!!

No, no I can't possibly listen to another breaking news story about tariffs!!🙀
Comments
Post a Comment