Adventure Awaits!
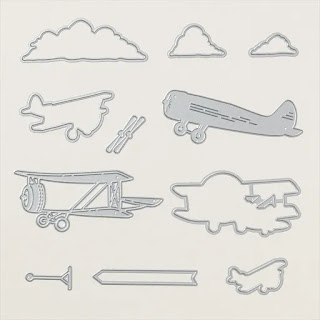
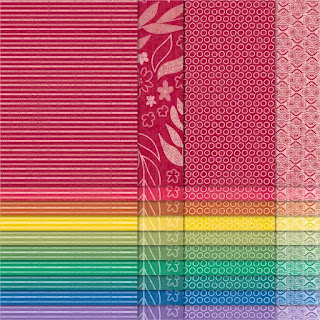
Hello! Today I am sharing two groups of projects I worked on this week: a framed decor project and card using the retiring Stampin’ Up!® Adventurous Sky stamp set (item 163439), Adventurous Sky dies (item 163446), and the Take To The Sky 12" x 12" Designer Series Paper (item 163436) - which includes two sheets of "cut apart" panels and tags. All three of these products are featured in the May 2024-April 2025 Annual Catalogue as part of the Take To The Sky Suite Collection (item 163832). As retiring Last Chance Products these products are available only while supplies last, and, unfortunately, the Adventurous Sky stamp set is now no longer available. However, if you are interested, the French version of the stamp set (Ciel D'Aventure - item 163442) remains available as one of the substantially discounted Last Chance Products, and although the sentiments are of course in French there is no change in the images from the English version of the stamp set!
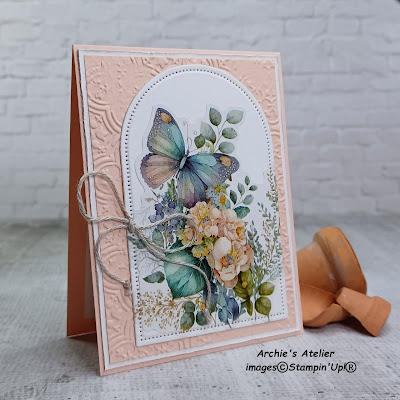
For the second group of projects I made a few quick and easy small note cards featuring several Sticky Lab embossed glitter stickers I was lucky enough to pick up at Dollarama a few months ago. I really liked the painterly effect and colours of these sticker images when I came across them, and thought they would co-ordinate very well with some of my Stampin' Up!® cardstock and Designer Series Papers!
The Adventurous Sky (or Ciel D'Aventure) stamp set, co-ordinating Adventurous Sky dies, and the Take To The Sky Designer Series Paper are great foundations for projects for any aviation enthusiast! For my first project I had in my collection the perfect stamp to combine with these products from the Take To The Sky Suite Collection: "Air-Boy", a Mo Manning Penny Black® slapstick/cling stamp - a little boy (or girl) who has aviator aspirations!
For the Adventurous Sky projects I stamped the images for colouring on watercolour paper using Stazon Jet Black Ink (item 101406), and coloured the images using Classic Stampin' inks/Classic Stampin' ink refills mixed with a little water and applied with small paint brushes. For the card, the riveted panel image used on the frame, and the two sentiments were stamped on cardstock also using Stazon Jet Black Ink, as was the "adventure" sentiment on the first project.
Just a quick summary of the basic tools and supplies I used to complete all the projects this week:
- Paper Trimmer (item 152392) - for trimming cardstock and Designer Series Paper panels and strips - I also used the Paper Trimmer for scoring the card fold lines, and adding decorative scored lines on an embossed Lost Lagoon cardstock (item 133679) panel on one of the sticker cards. I used my Bone Folder (item 102300) to burnish the cards' scored fold lines;
- Stampin' Cut & Emboss Machine (item 149653) - for all die cutting, and embossing;
- Paper Snips Scissors (item 103579) - these sharp little scissors are perfect for fussy cutting stamped images for which there are no co-ordinating dies - i.e. "Air-Boy";
- Take Your Pick Tool (item 144107) - the paper piercer and tacky putty tips are definitely a great help for picking up and placing small die cuts and embellishments; and
- for the main adhesive, Multipurpose Liquid Glue (item 110755). When gluing DSP to a large base surface, such as the heavy weight cardboard backing panel for the framed project, I use the Stampin' Brayer (item 162936) to roll over the DSP immediately after gluing it to the base surface to ensure even coverage of the liquid glue and good even adhesion of the DSP to the base surface. When applying glue to a larger surface area I will also often use an old small flat tipped paint brush to help spread the glue over the surface.
On with the projects!
For this project I began with an 8" x 8" thrift store black wood frame, glass removed, and frame edges distressed with a medium grit sandpaper. To complete the project I used the following additional supplies:
- for the background panel I trimmed a piece of heavy weight cardboard to fit the frame's 8" square back opening, and to this cardboard panel I glued the trimmed panel of airplane/grid patterned paper from the Take To The Sky DSP;
- a 5 7/8" square panel of Night Of Navy/white patterned paper from the Take To The Sky DSP, matted with a 6" square panel of Basic White Thick cardstock (item 159229), and a 6 1/4" square panel of Night Of Navy cardstock (item 100867);
- one of the Night Of Navy/white airplane blueprint "cut apart" panels, trimmed to 4" x 3", and matted with a 4 1/8" x 3 1/8" panel of Basic White Thick cardstock. To add a little dimension I used trimmed strips from Foam Adhesive Sheets (item 152815) to attach this matted panel to the Night Of Navy cardstock matted DSP panel. To this completed panel I added the stamped and die cut images, sentiment tag, and additional die cuts before then using additional trimmed strips from Foam Adhesive Sheets to attach the completed panel to the background panel;
- watercolour paper - the more textured side used as the up-facing side - for the two clouds die cut using the Adventurous Sky dies. I used Basic Gray ink (item 149165), applied with one of the Small Blending Brushes (item 160518 - package of three), to add some shading to the cloud die cuts;
- Crumb Cake ink (item 147116) and Crumb Cake ink refill (item 121029) to colour the young aviator image;
- Crumb Cake ink, Crumb Cake ink refill, and Basic Gray ink to colour the three airplane images;
- Crumb Cake cardstock (item 120953) for the sentiment tag, die cut using the retired Online Exclusives (and unfortunately no longer available) Greetings Of The Season dies (item 164112) - after I stamped the "adventure" sentiment from the Scenic Adventure stamp set (item 165466), one of the new Online Exclusives products that will be released on May 6, 2025, I shaded the tag with Crumb Cake ink;
- Night Of Navy cardstock for the arrow die cut (Adventurous Sky dies) - glued behind the sentiment tag; and
- one large and one small of the retired Rustic Metallic Adhesive-Backed Dots (item 159082) added, respectively, to the ends of the sentiment tag and the Night Of Navy cardstock die cut arrow.
Additional supplies used to complete this 5 3/8" x 4 3/8" top-fold card:
- retired - and now unfortunately no longer available - Boho Blue cardstock (item 161724) for the card base, 5 1/8" x 4 1/8" front panel, body of airplane die cut, and "congrats" sentiment tag;
- Smoky Slate cardstock (item 131202) for the airplane overlay and propeller die cuts, "to my friend" sentiment tag, frame die cut (over stamped with riveted panel image, and shaded with Crumb Cake ink - item 147116), and inside panel's 3 7/8" x 1" matting strip;
- Basic Black cardstock (item 121045) for base arch and arch frame die cuts, and inside panel's 5" x 4" matting panel;
- Online Exclusives Everyday Arches dies (item 164629) to cut arch and arch frame die cuts - to cut the frames I use low-tack tape to hold two of the nesting dies together while I pass the dies and cardstock through the Stampin' Cut & Emboss Machine;
- Smoky Slate patterned paper from Take To The Sky DSP for the stamped frame's backing panel, and inside panel's 3 7/8" x 7/8" strip;
- Basic Gray ink (item 149165) to add shading to airplane die cuts and sentiment tags;
- Online Exclusives Tags To Go dies (item 165576) to cut the two sentiment tags;
- retiring - and currently available as one of the discounted Last Chance Products - Gone Fishing stamp set (item 161535) for the "congrats" sentiment;
- trimmed strips from Foam Adhesive Sheets (item 152815) to attach and pop up the airplane die cut; and
- one large and two small of the retired Rustic Metallic Adhesive-Backed Dots (item 159082) for, respectively, the center of the propeller, and to cover the holes in the ends of the two sentiment tags.
For the sticker cards I began by applying the stickers to Basic White Thick cardstock (item 159229), which I then die cut using the Everyday Arches dies (item 164629). For the little bunny card before I stuck the sticker to the cardstock and die cut the cardstock I used Crumb Cake ink (item 147116) to stamp one of the script images from the Online Exclusives Elements Of Text stamp set (item 164774) on the cardstock. After applying the sticker and die cutting the arch I used one of the Small Blending Brushes (item 160518) to apply Crumb Cake ink for shading.
With two exceptions the cards are 4" x 3" - the two smaller cards are 3 1/2" x 2 1/2", and 3 1/2" x 2 1/4" - and all are top-folding cards. For card bases I used Basic White Thick cardstock, Pool Party cardstock (item 122924), and Petal Pink cardstock (item 146985).
I used the following additional supplies to complete the cards:
- Basic Black cardstock (item 121045), Lost Lagoon cardstock (item 133679), Petal Pink cardstock, Basic White Thick cardstock, Mossy Meadow cardstock (item 133676), Early Espresso cardstock (item 119686), Pecan Pie cardstock (item 161717), and Smoky Slate cardstock (item 131202) for matting panels, embossed panels, and additional arch and arch frame die cuts;
- Exposed Brick 3D Embossing Folder (item 161600) - to emboss Pecan Pie cardstock panel - embossed panel shaded with Pecan Pie ink (item 161665);
- retiring - and currently available as one of the discounted Last Chance Products - Distressed Tile 3D Embossing Folder (item 162189) - to emboss Lost Lagoon and Petal Pink cardstock panels;
- Online Exclusives Mini Corrugated 3D Embossing Folder (item 165559) - to emboss strips of Crumb Cake cardstock (item 165559), which were torn and edges sponged with either Pecan Pie ink or Crumb Cake ink;
- for additional panels and strips: Smoky Slate/white checkered patterned paper from the retiring Take To The Sky 12" x 12" Designer Series Paper (item 163436); linen and woven basket patterned papers from the Online Exclusives Woven Textures 12" x 12" Designer Series Paper (item 165560); Pool Party/Crumb Cake wood grain patterned paper from Country Woods 12" x 12" Designer Series Paper (item 163393); Wild Wheat gingham patterned paper from Timeless Plaid 6" x 6" Designer Series Paper (item 164678); and Pretty Peacock striped patterned paper from the retiring - and currently available as one of the discounted Last Chance Products - Regals 6" x 6" Designer Series Paper Assortments (item 163774);
- trimmed strips from Foam Adhesive Sheets (item 152815) - to attach and pop up all but two of the stickered arch die cuts (the arch die cuts on the Smoky Slate fox and Petal Pink embossed panel cards were adhered using Multipurpose Liquid Glue); and
- for additional embellishments: Linen Thread (item 104199) - bows; Very Vanilla baker's twine (Baker's Twine Essentials Pack - item 155475) - bow tied through the "almost Very Vanilla" button from my stash that was added to the little bunny card; and two small and one large of the Basic Gray dots from the retired Classic Matte Dots (item 158146) - Smoky Slate fox card.
On a couple of the cards I added splatters by flicking paint brushes loaded with Basic Gray ink (item 149165) mixed with water; Crumb Cake ink mixed with water; and Pool Party ink (item 147107) mixed with water. On the Lost Lagoon cardstock embossed panel card with Linen Thread bow I added glimmery splatters to the stickered arch die cut using my Wink Of Stella Glitter Brush (item 141897).
It is always handy to have a few gift note cards on hand - and I thought that a few of these cards packaged up with co-ordinating envelopes could make a nice little gift too!
Thank you for visiting my blog! I had a lot of fun working on all my projects this week!
Unfortunately Stampin' Up! advises that the following products I used this week are not currently available, but I have indicated below the date that Stampin' Up! expects the products to again be available for ordering:
- Stazon Jet Black Ink (item 101406) - week of April 28, 2025;
- Everyday Arches dies (item 164629) - week of May 12, 2025; and
- Basic White Thick cardstock (item 159229) - TBD.
Just a reminder that the sales period for the May 2024-April 2025 Annual Catalogue ends on May 5, 2025, at which time the five 2023-2025 In Colours (Copper Clay, Wild Wheat, Boho Blue, Moody Mauve, and Pebbled Path) - and all products in these colours, including cardstock, Classic Stampin' ink pads, Classic Stampin' ink refills, Stampin' Blends, the five-pack Stampin' Write Marker Assortment, and the 2023-2025 In Colours 6" x 6" Designer Series Paper Assortments - will be retired so you may want to check your supplies and submit orders for any required products well in advance of the Annual Catalogue end date because retiring In Colour products usually do sell out very quickly! The 8 1/2" x 11" Wild Wheat cardstock, the 8 1/2" x 11" Boho Blue cardstock, and the 8 1/2" x 11" Pebbled Path cardstock have already sold out!
The Last Chance Products listing has been updated to include retiring products from the May 2024-April 2025 Annual Catalogue; the January-April 2025 Mini Catalogue; and the Online Exclusives line. Many retiring Last Chance Products have been discounted - like several of the products I used in my projects this week - and there are definitely some great bargains to be had but all Last Chance Products continue to be available only while supplies last!
Although it is definitely sad to see favourite products retired the good news is that with the launch on May 6, 2025, of the May 2025-April 2026 Annual Catalogue will come the release of lots of exciting new products - including five new In Colours for 2025-2027: Strawberry Slush, Timid Tiger, Darling Duckling, Secret Sea, and Cloud Cover!
Coinciding with the launch of the Annual Catalogue on May 6, 2025, will also come the release of new products in the Online Exclusives line - so there is lots to look forward to! I am certainly looking forward to working on and sharing projects using some of these new products very soon!
If you are interested in purchasing any of the available Stampin’ Up!® products I have used in my projects - or you need to restock your supplies of any of the available retiring products, including the retiring 2023-2025 In Colours products - and you live in Canada and do not have a Stampin' Up! demonstrator, please do not hesitate to visit my online store found on my website https://archiesatelier.stampinup.net/ at your convenience, or simply click under the "Shop With Me" tab on the right sidebar of my blog, which will take you directly to my website and online store. I very much appreciate your business and would be very pleased to be your demonstrator! If you need any assistance please do not hesitate to contact me (lmccoyarchie@gmail.com) and I will try my best to help! The digital versions of the May 2024-April 2025 Annual Catalogue, January-April 2025 Mini Catalogue, and the companion (and digital-only) January 2025 Scrapbooking Brochure, are all available for you to access at your convenience on my website (https://archiesatelier.stampinup.net/). As of May 6, 2025, the digital version of the May 2025-April 2026 Annual Catalogue will be available for you to access at your convenience on my website. If visiting the online store don't forget to check out the full line of Online Exclusives products - and the Last Chance Products listing!
Have fun creating and Happy Easter!
Laurel
*It has come to my attention that quite often email correspondence from me is delivered to the recipient's spam or junk mail folder - if you have corresponded with me I have replied so be sure to check your spam or junk mail folder! Thank you!!
Gearing up for the Battle of Ontario! 😺🏒💙


.webp)


.webp)

.webp)


Comments
Post a Comment