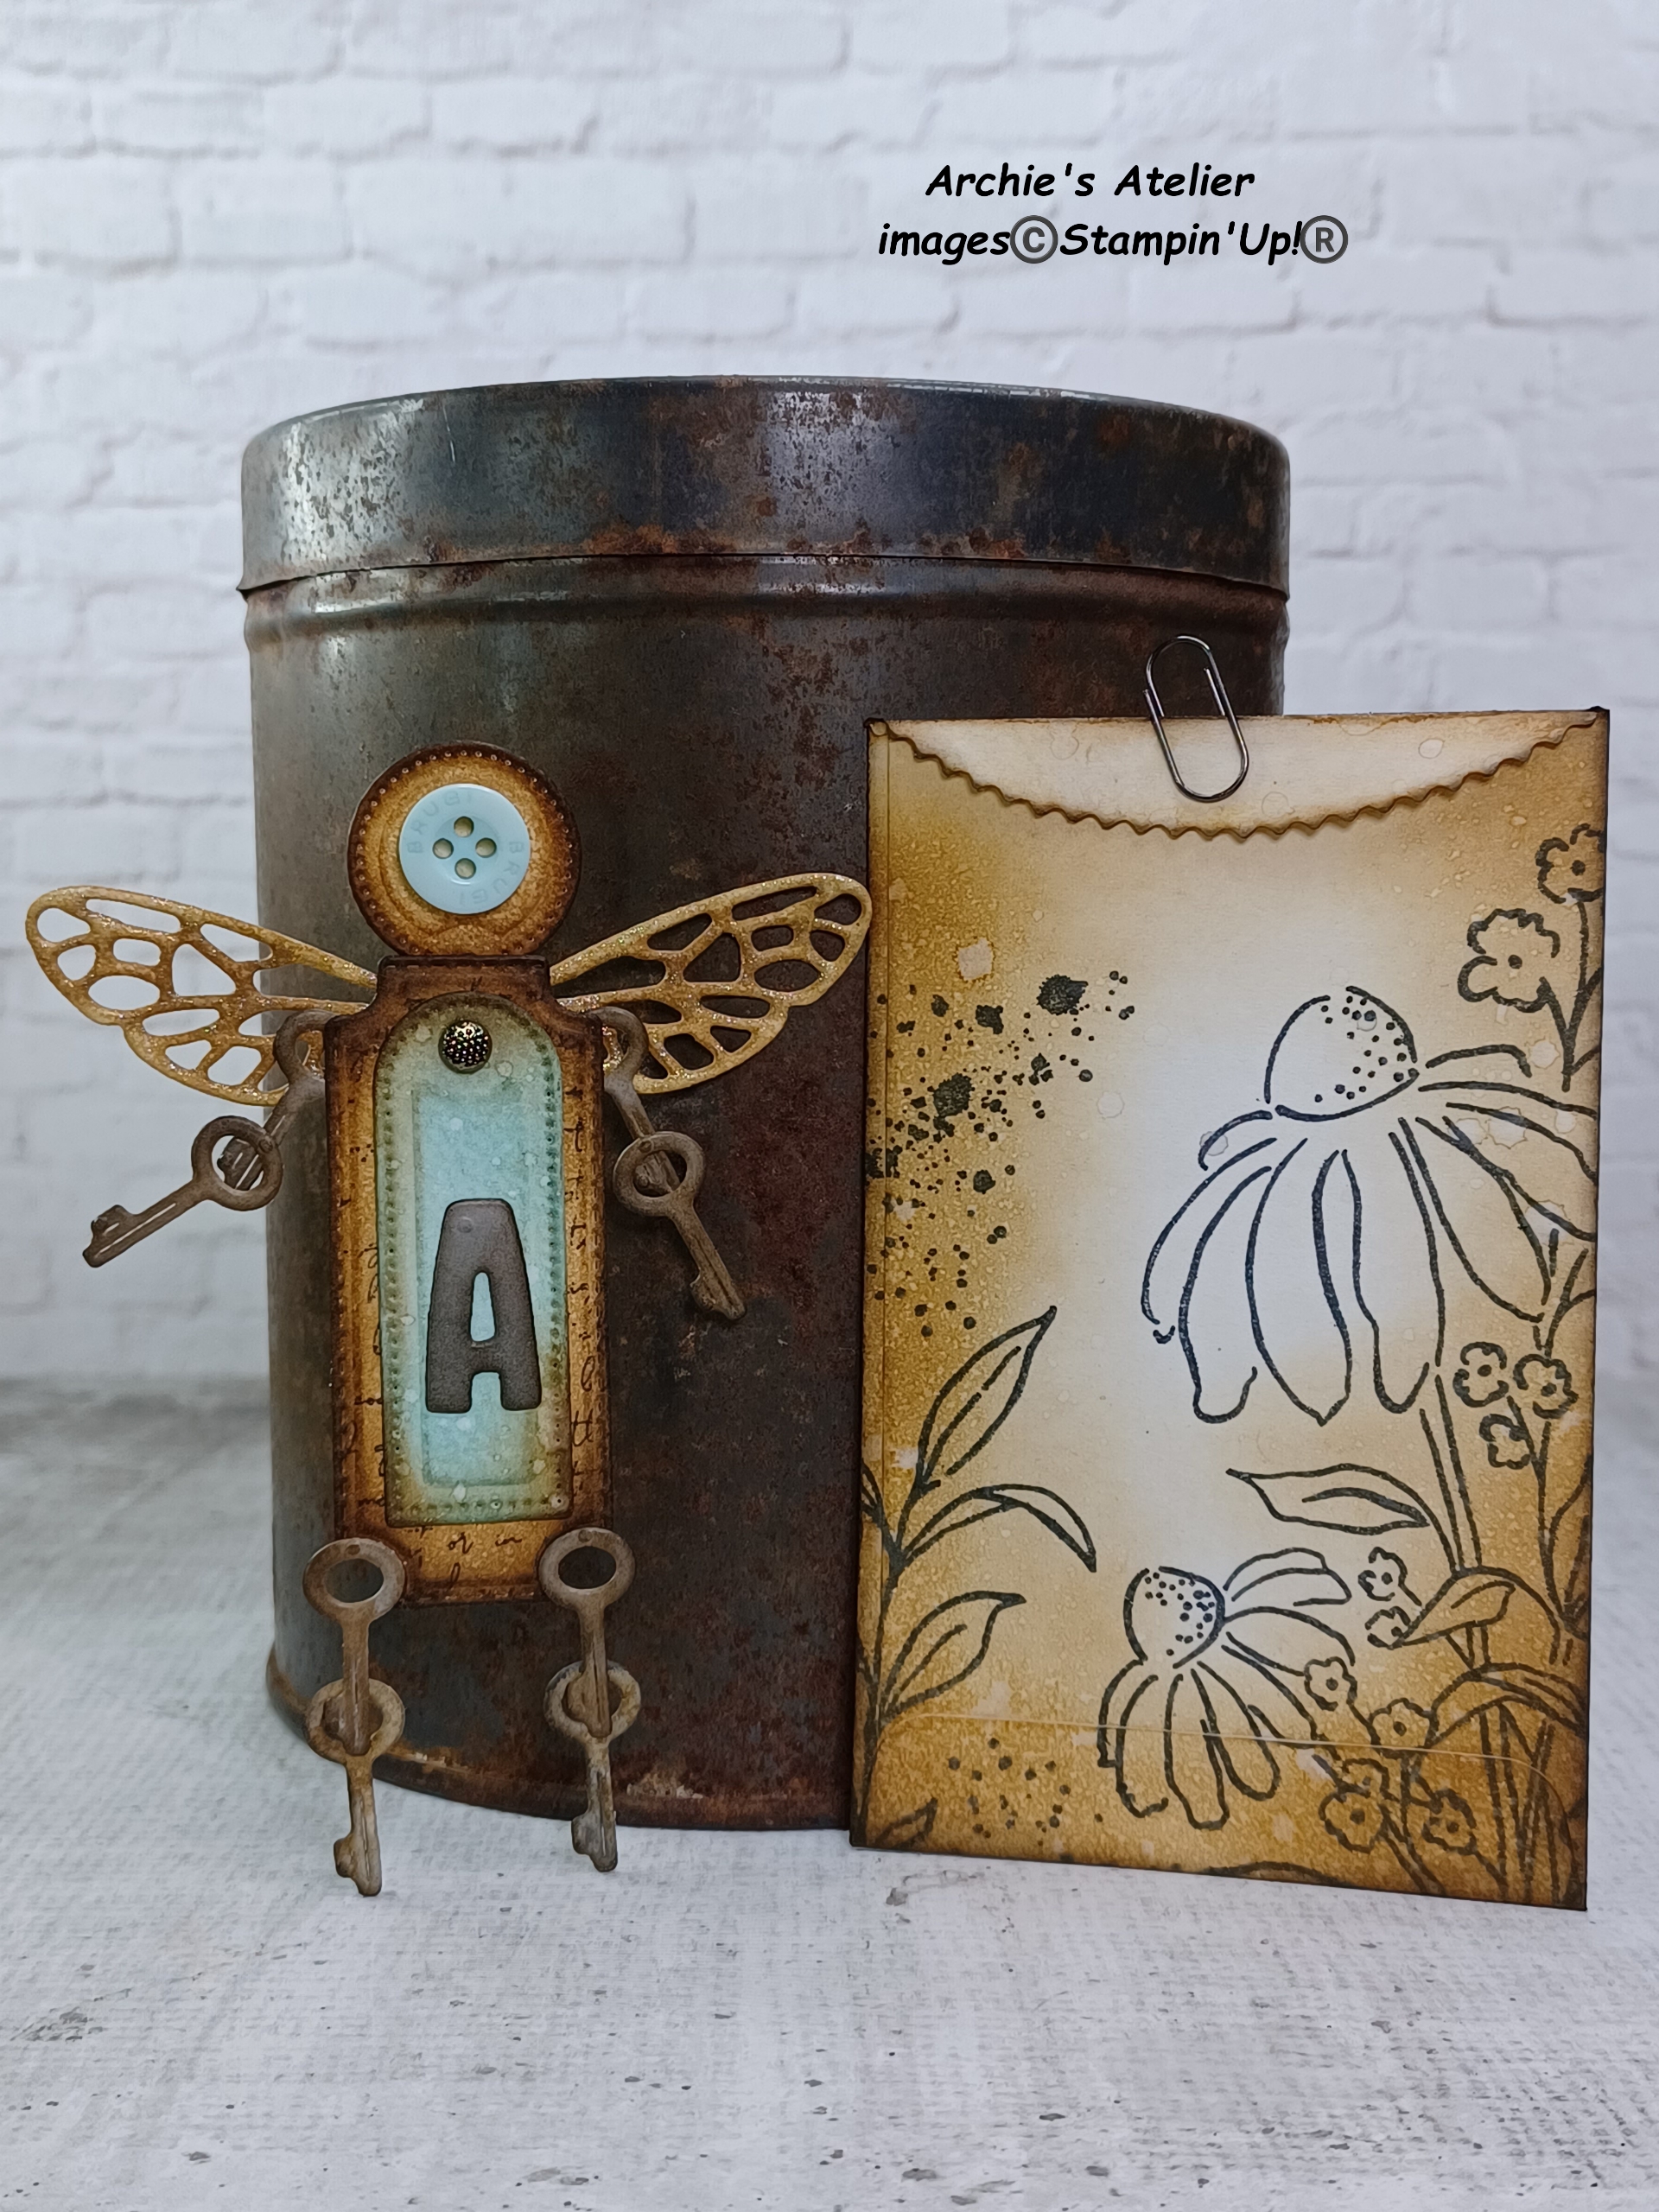
- retired Queen Bee (item 160476) - bee image used on the bags.
With the exception of the Changing Leaves three-leafed sprigs on the smaller dolls, the two letter "A's", the Country Flowers leafy clumps, several keys, and the small Country Birdhouse flower, all die cuts - including the majority of the keys - were cut from watercolour paper. The three-leafed sprigs were die cut from either Old Olive cardstock (item 100702) and shaded with Mossy Meadow ink (item 147111), or Pool Party cardstock (item 122924) and shaded with Pool Party ink (item 147107); the "A's" die cut from Gray Granite cardstock (item 146983), and shaded with Basic Gray ink (item 149165) and Early Espresso ink (item 147114); the leafy clumps die cut from Granny Apple Green cardstock (item 146990) and Old Olive cardstock, and shaded with Mossy Meadow ink; the keys die cut from Gray Granite cardstock, and shaded with Basic Gray ink, Pecan Pie ink (item 161665), and Early Espresso ink; and the small Country Birdhouse flower die cut from Pumpkin Pie cardstock (item 105117), and shaded with Pumpkin Pie ink (item 147086).
The two "From The Garden Of" sentiments were stamped on Crumb Cake cardstock (item 120953) using Stazon Jet Black Ink (item 101406), the edges and torn ends sponged with Early Espresso ink.
To colour the watercolour paper die cuts I combined two techniques: using small paint brushes to apply washes of Classic Stampin' inks/Classic Stampin' ink refills, and using Small Blending Brushes (item 160518) to apply Classic Stampin' inks for additional shading. To add additional visual texture - a mottled effect - I quite often lightly spritzed the coloured die cuts with water (Stampin' Spritzers - item 126185), blotting dry with paper towel. When stamping on the coloured die cuts I used Stazon Jet Black Ink, and used Early Espresso ink for additional shading.
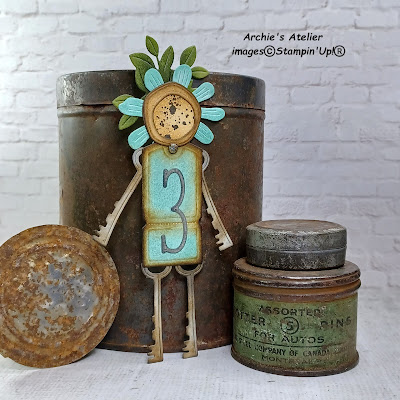
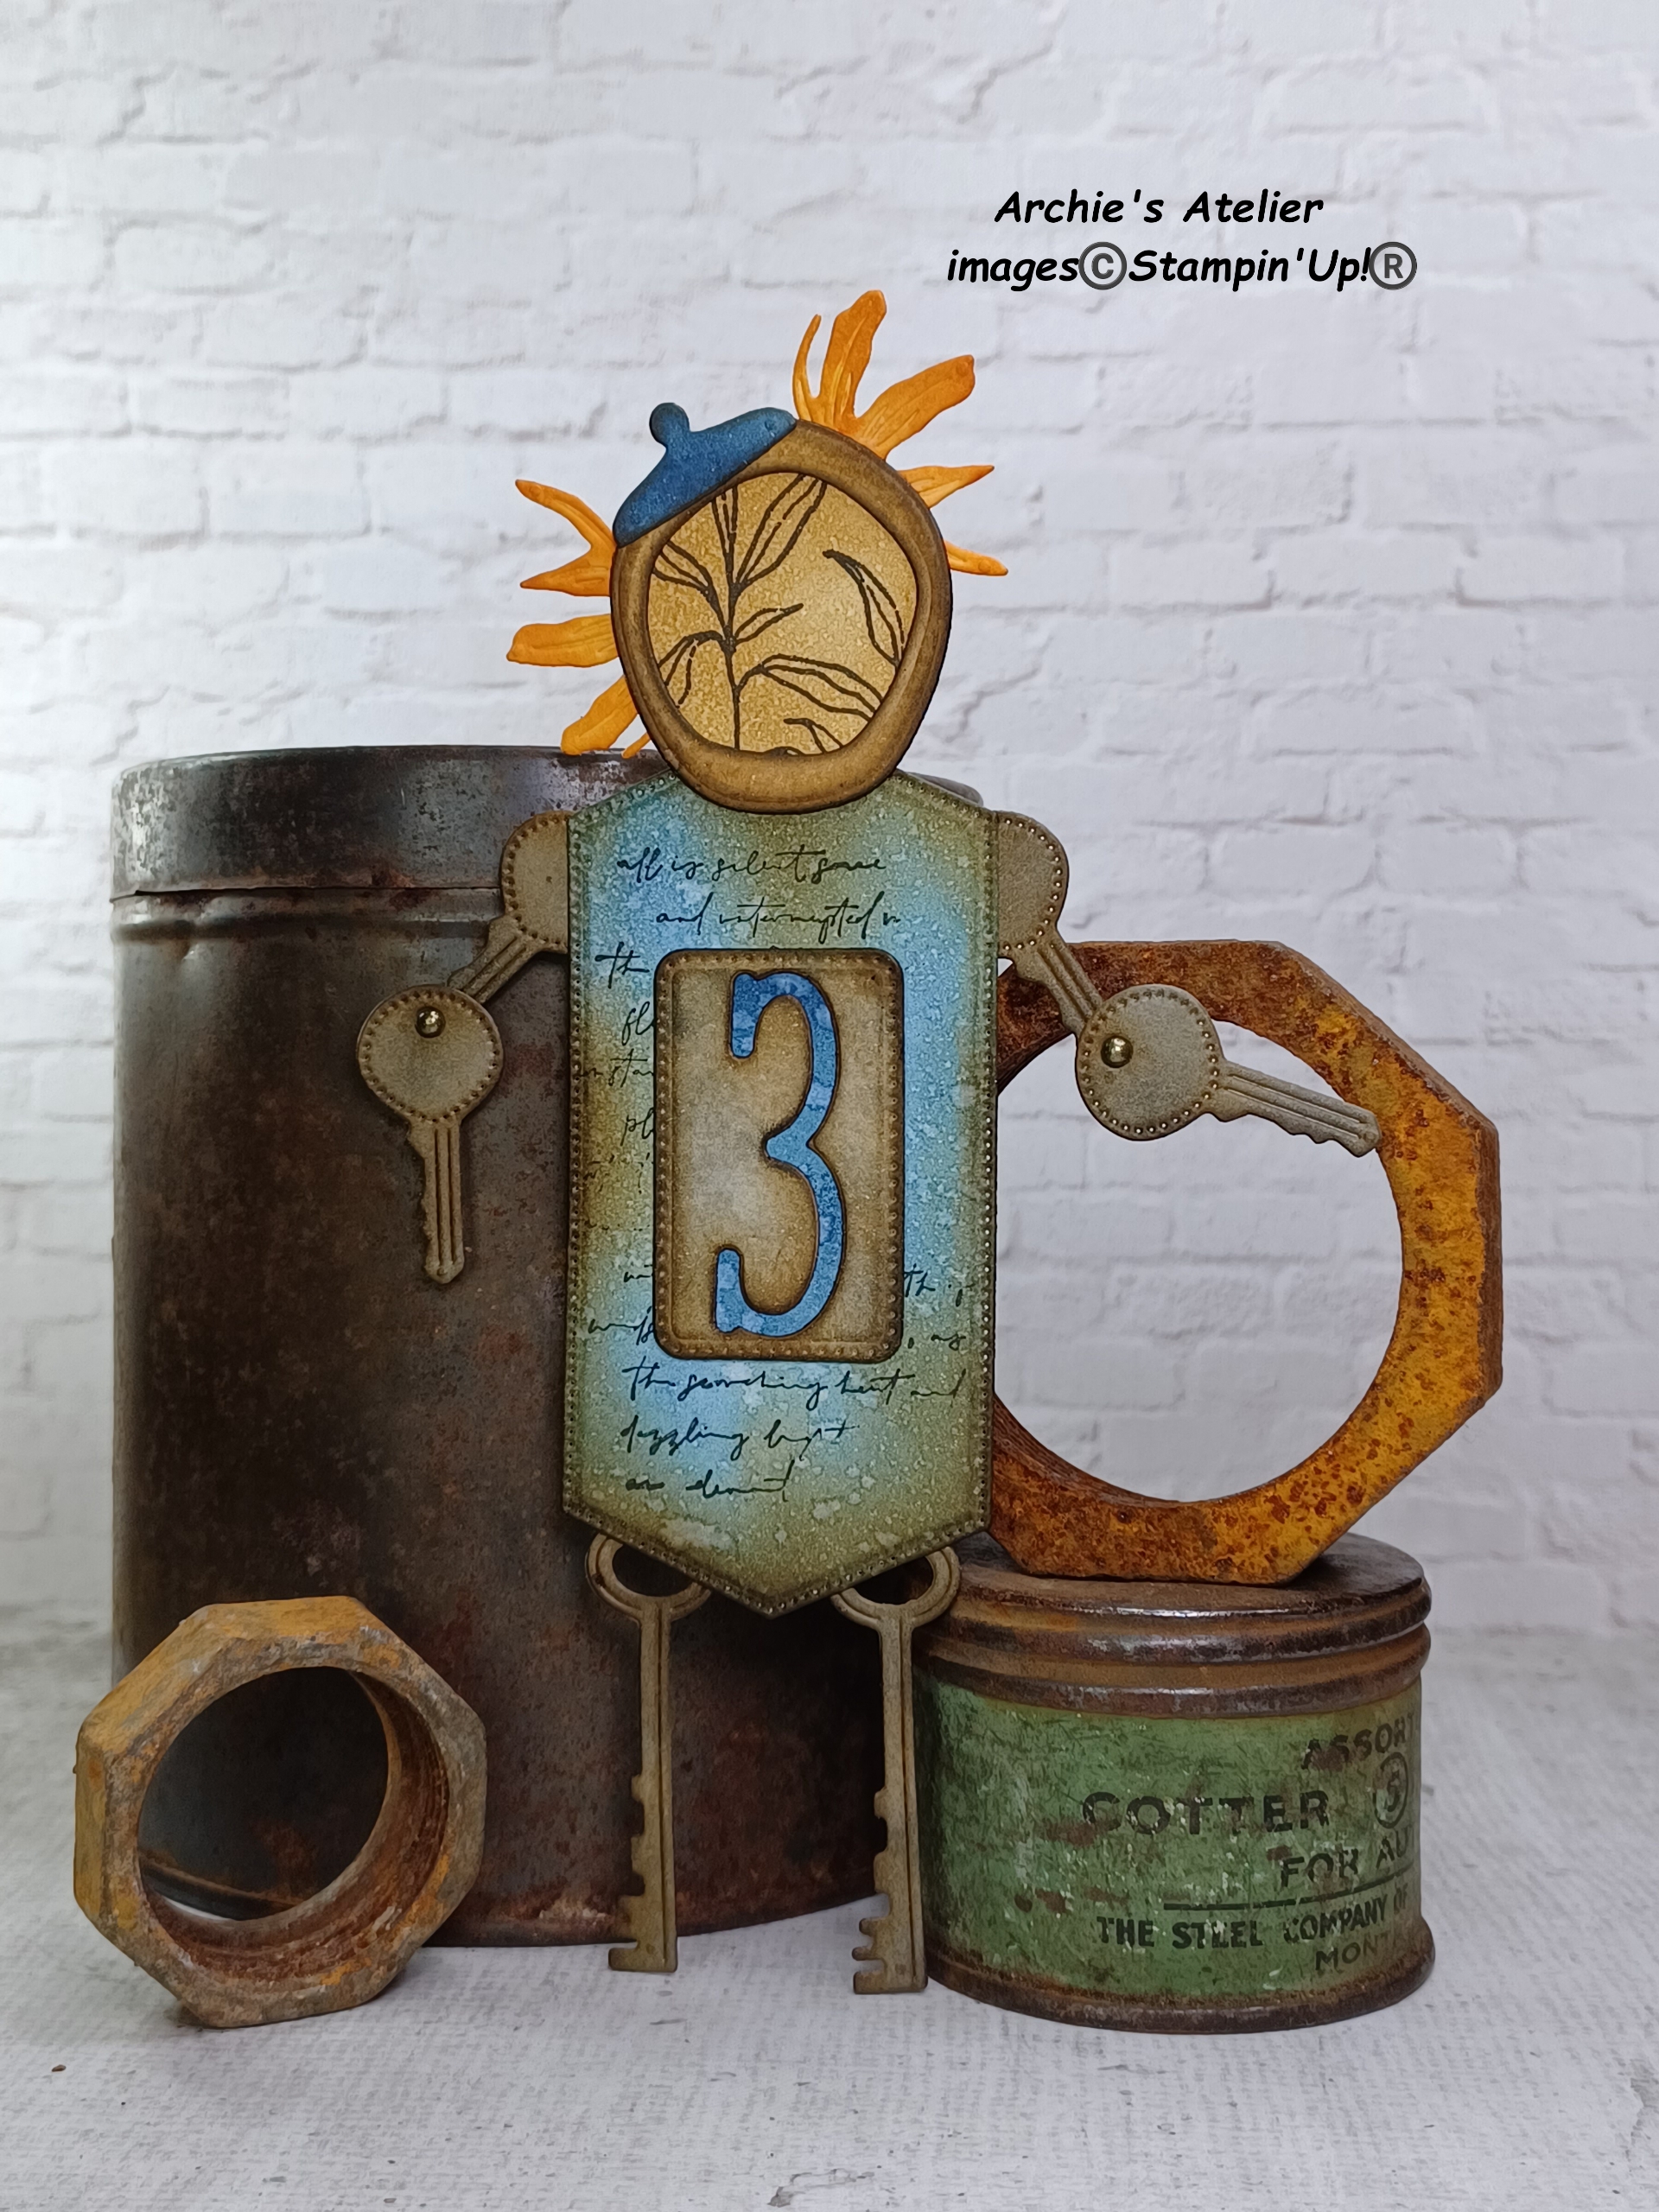
All head pieces were coloured using Pecan Pie ink refill (item 161669), and shaded with Early Espresso ink. All watercolour paper keys, and the small locks, were coloured initially with washes of Basic Gray ink, and then shaded with Pecan Pie ink, additional Basic Gray ink, and Early Espresso ink.
To colour the body pieces I used Pecan Pie ink and Pecan Pie ink refill; Misty Moonlight ink (item 153118); Pool Party ink refill (item 122933); Lost Lagoon ink (item 161678); Real Red ink (item 147084); Cherry Cobbler ink (item 147083); Old Olive ink (item 147090), and Mossy Meadow ink. All edges were sponged with Early Espresso ink.
To colour the "hair" I used Pumpkin Pie ink; Daffodil Delight ink refill (item 119672); Highland Heather ink refill (item 147167); Azure Afternoon ink refill (item 161668); Real Red ink; and Berry Burst ink (item 147143). The teapot lid hats were coloured using Misty Moonlight and Early Espresso inks.
Additional foliage was coloured using Old Olive and Mossy Meadow inks.
The Queen Bee wings were coloured with Pecan Pie ink, and then painted with my Wink Of Stella Glitter Brush (item 141897) for a little shimmer.
The numbers were coloured with Basic Gray and Early Espresso inks.
On the bodies of the Azure Afternoon flower doll and the number "5" doll I added a small panel of unbleached baking parchment embossed using the Distressed Tile 3D Embossing Folder (item 162189). On the Azure Afternoon flower doll I used an Everyday Arches die to cut the window opening in the Greetings Of The Season tag body base, and glued the embossed panel behind the window opening. To the back of the body tag die cut I glued a second Greetings Of The Season tag that I die cut from Basic Black cardstock (item 121045). On the number "5" doll the embossed panel was trimmed to fit behind the narrow Everyday Arches frame (cut by "nesting" two of the dies, holding the dies together with low-tack tape while I ran the dies and watercolour paper through the Stampin' Cut & Emboss Machine - item 149653).
Additional embellishments used:
- Adhesive-Backed Textured Dots (item 163338);

- Linen Thread (item 104199) - knotted around the Nested Essentials banner die cut on the Azure Afternoon flower doll;
- Black & Very Vanilla 3/8" Large Check Ribbon (item 161982) for the bow on the number "5" doll; and
- retired Rustic Metallic Adhesive-Backed Dots (item 159082).
The buttons on the Azure Afternoon flower doll and the winged "A" doll were from my stash.
Just a quick note about the basic tools and supplies I used to complete the dolls, in addition to the Stampin' Cut & Emboss Machine that was used for all die cutting and embossing:
- Take Your Pick Tool (item 144107) - the paper piercer, mini spatula, and tacky putty tips are definitely a great help for picking up and placing small die cuts; and
- for the main adhesive, Multipurpose Liquid Glue (item 110755).
To complete my doll projects I stamped a few paper bags from my collection - these bags, which I picked up at DeSerres, Michael's, and the dollar store, can hold the dolls until I find a home for them, or a bag with a doll or two in it can be tucked into a junk journal. I used Memento Tuxedo Black Ink (item 132708) to stamp the images on the bags before I applied Pecan Pie and Early Espresso inks using Small Blending Brushes. I spritzed the bags with water and used a heat gun (Heat Tool - item 159971) to dry the water - the drying crinkled the three larger bags, which just helped with the distressed look!. Here are a few project photos:


Thank you for visiting my blog! I had a lot of fun working on my dolls - certainly needed a good distraction again this week from the daily barrage of increasingly bad news!
Unfortunately Stampin' Up! advises that the following products I used this week are not currently available, but I have indicated below the date that Stampin' Up! expects the products to again be available for ordering:
- Alphabet À La Mode dies (item 160750) - week of March 17, 2025;
- Memento Tuxedo Black Ink Pad (item 132708) - week of March 17, 2025; and
- Everyday Arches dies (item 164629) - week of March 17, 2025.
If you are interested in purchasing any of the available Stampin’ Up!® products I have used in my projects, and you live in Canada and do not have a Stampin' Up! demonstrator, please do not hesitate to visit my online store found on my website https://archiesatelier.stampinup.net/ at your convenience, or simply click under the "Shop With Me" tab on the right sidebar of my blog, which will take you directly to my website and online store. I very much appreciate your business and would be very pleased to be your demonstrator! If you need any assistance please do not hesitate to contact me (lmccoyarchie@gmail.com) and I will try my best to help! The digital versions of the May 2024-April 2025 Annual Catalogue, January-April 2025 Mini Catalogue, and the companion (and digital-only) January 2025 Scrapbooking Brochure, are all available for you to access at your convenience on my website (https://archiesatelier.stampinup.net/). If visiting the online store don't forget to check out the exciting new Online Exclusives products, as well as all the retiring Last Chance Products - there are certainly some great bargains to be had but these retiring products are only available while supplies last!
Have fun creating!
Laurel
*It has come to my attention that quite often email correspondence from me is delivered to the recipient's spam or junk mail folder - if you have corresponded with me I have replied so be sure to check your spam or junk mail folder! Thank you!!
Don't make me come down there . . .

.webp)


Comments
Post a Comment