Let It Snow!
(at least in the snow globe)
Hello! Today I am sharing a few Christmas snow globe projects I worked on this week using a variety of Christmas (and non-seasonal) Stampin' Up! products from the September-December 2024 Mini Catalogue; the Online Exclusives line; and the May 2024-April 2025 Annual Catalogue, including:
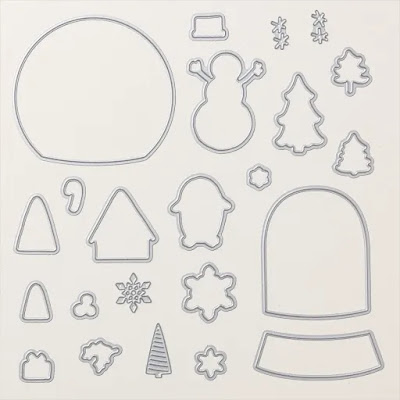
- Snowy Wonder Bundle (item 164125) - which includes the Snowy Wonder photopolymer stamp set (item 164334) and the co-ordinating Snowy Wonder dies (item 164124) - featured in the September-December 2024 Mini Catalogue as part of the Snowy Scenes Suite Collection (item 164130);
Snowy Wonder stamp set - 164334
Snowy Wonder dies - 164124
- Christmas Friends stamp set (item 164279) - from the September-December 2024 Mini Catalogue, and also available together with the co-ordinating Christmas Friends dies (item 164087) in the Christmas Friends Bundle (item 164088);
Christmas Friends stamp set - 164279
- Filled With Cheer stamp set (item 164362) - can't resist the melting but still happy snowman with his decorated tree and half-buried sled from this Online Exclusives stamp set;
- Yuletide Village stamp set (item 164310) - a stand-alone stamp set from the September-December 2024 Mini Catalogue;
Yuletide Village stamp set - 164310
- Sophisticated Sled stamp set (item 164340) - for the "Good Tidings" and "Let It Snow" sentiments - one of the Online Exclusives products, this stamp set is also available together with the co-ordinating Sophisticated Sled dies (item 164133) in the Sophisticated Sled Bundle (item 164134);
Sophisticated Sled stamp set - 164340
- Encircled In Nature dies (item 163628) - to die cut the slim pine branches - these dies are from the Online Exclusives line, and are also available together with the co-ordinating Encircled In Nature stamp set (item 163623) in the Encircled In Nature Bundle (item 163629);
Encircled In Nature dies - 163628
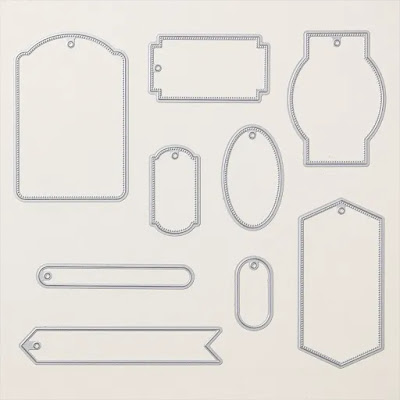
- Greetings Of The Season dies (item 164112) - to die cut "Happy Holidays" (ends torn) and Sophisticated Sled stamp set "Let It Snow" sentiment labels/tags - these dies are from the Online Exclusives line, and are also available together with the sentiment-only Greetings Of The Season stamp set (item 164325) in the Greetings Of The Season Bundle (item 164113);
Greetings Of The Season dies - 164112
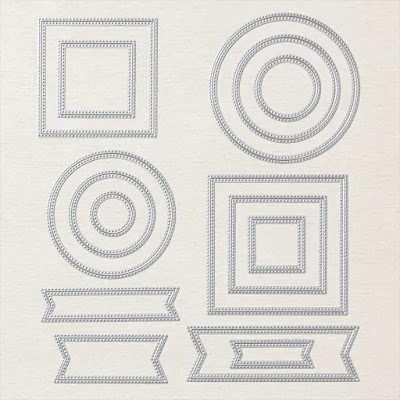
- banner die from the Stylish Shapes dies (item 159183) - from the Annual Catalogue - to die cut Snowy Wonder stamp set "Let It Snow" sentiment label;
Stylish Shapes dies - 159183
- Forever Plaid 3D Embossing Folder (item 164049) - featured in the September-December 2024 Mini Catalogue as part of the Reindeer Days Suite Collection (item 164052);
Forever Plaid 3D Embossing Folder - 164049
- So Swirly Embossing Folder (item 163791) - perfect for embossing the snowy ground in the globes - from the Annual Catalogue; and
Additional products used will be noted in the descriptions for each of the projects.
Just a quick summary of the basic tools and supplies I used to complete my projects this week:
- Paper Trimmer (item 152392) - for trimming cardstock and Designer Series Paper;
- stylus and scoreboard (Simply Scored Scoring Tool - item 122334) - for scoring decorative lines and card fold lines - to ensure crisp folds I also burnish all folded scored lines using my Bone Folder (item 102300);
- Stampin' Cut & Emboss Machine (item 149653) - for all die cutting and embossing;
- Paper Snips Scissors (item 103579) - these sharp little scissors make fussy cutting a whole lot easier! I used these scissors to fussy cut the Christmas Friends images since I do not have the co-ordinating dies. These scissors are also great for doing any necessary trimming of die cuts - i.e. shortening a pine branch!;
- Take Your Pick Tool (item 144107) - the paper piercer, mini spatula, and tacky putty tips are a great help for picking up and placing small embellishments; and
- for the main adhesive, Multipurpose Liquid Glue (item 110755).
To add shading to cardstock die cuts (including snow globes) I used Blending Brushes (item 153611) and Small Blending Brushes (item 160518) to apply Classic Stampin' Inks to the die cuts.
Small Blending Brushes - 160518
I used Stazon Jet Black Ink (item 101406) to stamp all sentiments, and all images for colouring. To colour the images - which were all stamped on watercolour paper - I applied Craft Stampin' Inks and Ink Refills, mixed with a little water, with small paint brushes.
Stazon Jet Black Ink - 101406
For all card bases I used Basic White Thick cardstock (item 159229).
On with the projects!
For my first project I began with a shadow box frame from Dollarama with an inside opening of 4 5/8" square. After removing the foam flower embellishment from the frame's inside panel I trimmed a piece of heavy weight cardboard to fit over the frame's inside panel, covering the cardboard panel with Basic Black cardstock (item 121045). After gluing the cardstock covered cardboard to the inside panel of the frame I trimmed and glued 1/2" wide strips of Basic Black cardstock to the inside sides of the frame edges - allowing for a scant 1/16" border of frame to show beyond the cardstock strips. For the snow globe's backing panel I trimmed a panel of Real Red cardstock (item 102482) that I had embossed using the Forever Plaid 3D Embossing Folder to 4 1/4" square. I shaded the edges of the embossed cardstock panel with Real Red ink (item 147084). Although not very visible I did add a few splatters to the embossed cardstock panel with my Basic Black Stampin' Write Marker (item 162481) by flicking the marker's brush tip against the marker lid.
Additional supplies used to complete the project:
- Pool Party ink (item 147107), Real Red ink, Mossy Meadow ink (item 147111), Crumb Cake ink (item 147116), and Basic Gray ink (item 149165) to colour the snow globe and image;
- Wink Of Stella Glitter Brush (item 141897) to add a little sparkle to the tree's star and baubles;
- Crumb Cake cardstock (item 120953) embossed using the Timber 3D Embossing Folder, over one inside panel of which I had dragged my Early Espresso ink pad (item 147114), for the die cut snow globe base. I shaded the die cut base with Crumb Cake and Early Espresso inks;
- Crumb Cake cardstock for the sentiment tag - shaded with Crumb Cake ink;
- after gluing the die cut base to the snow globe I used Linen Thread (item 104199) to tie the bow around the base, wrapping the Linen Thread a few times around the base before tying the bow. I spot glued the wrapped Linen Thread, and used a tiny dab of Multipurpose Liquid Glue to secure the bow's knot; and
- I used trimmed pieces from Foam Adhesive Sheets (item 152815) to attach the snow globe to the embossed Real Red cardstock panel. After securing the snow globe to the panel I used tiny dabs of Multipurpose Liquid Glue to secure the knotted ends of the Linen Thread bow to the cardstock panel.
Additional supplies used to complete this 5 1/4" x 4 3/8" top-fold card:
- 5" x 4 1/8" panel of Real Red cardstock (item 102482) embossed using the Forever Plaid 3D Embossing Folder - edges shaded with Real Red ink (I turned the "debossed" side of the cardstock to face up on the card front);
- Pool Party cardstock (item 122924) for the die cut globe - shaded with Pool Party ink (item 147107), and splattered with white acrylic paint and Wink Of Stella Glitter Brush (item 141897);
- Basic White Thick cardstock embossed using the So Swirly Embossing Folder for the snow - I used the round globe die to cut the bottom of the embossed cardstock so that it would align with the bottom of the die cut globe, and the edge die from the retired Gingerbread House dies (item 159718 - featured in the July-December 2022 Mini Catalogue) to cut the curving hills of the top of the embossed cardstock. I painted the completed snow cardstock piece with my Wink Of Stella Glitter Brush before gluing it to the die cut globe;
- for the base of the snow globe: two 1/2" wide strips trimmed from wood grain patterned paper from the Country Woods 12" x 12" Designer Series Paper (item 163393) - edges of the darker (top) strip shaded with Early Espresso ink (item 147114), and edges of the lighter (bottom) strip shaded with Crumb Cake ink (item 147116); and one 1/2" wide strip (middle of the three strips and glued over the top of the two wood grain patterned strips) trimmed from the Thoughtful Journey 6" x 6" Designer Series Paper (item 163303). On the bottom edge of the inside panel I added (overlapping) a 3/4" wide strip of the dark wood grain patterned paper, and a 1/2" wide strip of the lighter wood grain patterned paper;
- Basic White Thick cardstock for sentiment strip, die cut using the Greetings Of The Season dies but ends torn;
- Pecan Pie ink refill (item 161669), Crumb Cake ink, Real Red ink, and Basic Gray ink (item 149165) to colour the skating moose and caroling mouse images; and
- one small dot from the Adhesive-Backed Textured Dots (item 163338) added to the end of the sentiment strip.
Additional supplies used to complete this 5" square top-fold card:
- Misty Moonlight ink (item 153118), Crumb Cake ink (item 147116), Basic Gray ink (item 149165), Pool Party ink (item 147107), Mossy Meadow ink (item 147111), Real Red ink (item 147084), Daffodil Delight ink (item 147094), and Pumpkin Pie ink (item 147086) to colour the snow globe and image;
- Basic Gray ink, Real Red ink, Crumb Cake ink, and Pecan Pie ink refill (item 161669) to colour the caroling mouse image;
- Misty Moonlight ink to stamp the two large and two small snowflakes on watercolour paper - I added retired Pearl Basic Jewels (item 144219) to the centers of the snowflakes;
- Garden Green cardstock (item 102584) for the three die cut pine branches - one trimmed (cut using the Encircled In Nature dies) - shaded with Mossy Meadow ink;
- 3 1/2" x 1" wide strip of Crumb Cake cardstock (item 120953) embossed using the Timber 3D Embossing Folder inked with Early Espresso ink (item 147114) and shaded with Crumb Cake and Early Espresso inks for the snow globe base;
- two additional strips for the snow globe base trimmed from wood grain patterned paper from the Country Woods 12" x 12" Designer Series Paper (item 163393) - edges of strip with gray stripe shaded with Crumb Cake ink; and
- Crumb Cake ink to shade the edges of the trimmed and torn watercolour paper sentiment strip.
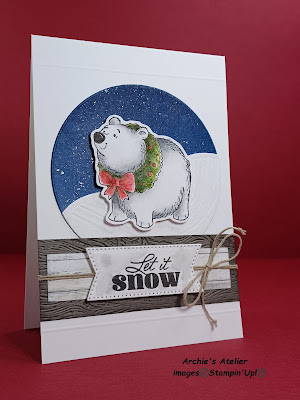
Before adding any additional elements to the front of this 5 3/8" x 3 3/4" top-fold card I placed the card front face down on the scoring board with the fold flush to the left edge of the scoring board and scored decorative horizontal lines at 1/2" and 4 7/8" (or 1/2" from fold and bottom edge). I used the following additional supplies to complete the card:
- Misty Moonlight cardstock (item 153081) for the globe - shaded heavily with Misty Moonlight ink (item 153118), and splattered using my Wink Of Stella Glitter Brush (item 141897);
- Basic White Thick cardstock embossed using the So Swirly Embossing Folder for the snow - I used the round globe die to cut the bottom of the embossed cardstock so that it would align with the bottom of the die cut globe, and the edge die from the retired Gingerbread House dies (item 159718 - featured in the July-December 2022 Mini Catalogue) to cut the curving hills of the top of the embossed cardstock. I painted the completed snow cardstock piece with my Wink Of Stella Glitter Brush before gluing it to the die cut globe;
- Basic Gray ink (item 149165), Mossy Meadow ink (item 147111), Real Red ink (item 147084), Cherry Cobbler watercolour pencil (Watercolour Pencils-Assortment 2 - item 149014), and gray and dark green coloured pencils to colour the wreath-wearing polar bear;
- Stampin' Dimensionals (item 104430) to attach the fussy cut polar bear to the snow globe;
- 3 3/4" x 1 1/4" strip of Pebbled Path cardstock (item 161722) embossed using the Timber 3D Embossing Folder inked with Basic Gray ink (item 149165), and shaded with additional Basic Gray ink for the globe base;
- 3 3/8" x 3/4" wide strip of wood grain patterned paper from Country Woods 12" x 12" Designer Series Paper (item 163393), centered over embossed cardstock globe base strip;
- Crumb Cake baker's twine (Baker's Twine Essentials Pack - item 155475) for bow tied around globe base;
Baker's Twine Essentials Pack - 155475: Crumb Cake, Very Vanilla, white, Gray Granite, and black
- Basic Gray ink to add colour wash to watercolour paper sentiment banner; and
- Mini Stampin' Dimensionals (item 144108) applied to back top and bottom edges of sentiment banner (placed to ensure that the Dimensionals would attach to the DSP strip rather than sit on top of the baker's twine).
And finally . . .
Additional supplies used to complete this 5" x 3 1/2" top-fold card:
- Pecan Pie ink refill (item 161669), Crumb Cake ink (item 147116), Pool Party ink (item 147107), Daffodil Delight ink (item 147094), Mossy Meadow ink (item 147111), Real Red ink (item 147084), and Basic Gray ink (item 149165) to colour the globe images. After colouring the images I shaded the watercolour paper globe with Pool Party ink, adding splatters with my Wink Of Stella Glitter Brush (item 141897);
- for the globe base a 3 1/2" x 3/4" wide strip of Pebbled Path cardstock (item 161722) embossed using the Timber 3D Embossing Folder inked with Basic Gray ink - edges of strip shaded with additional Basic Gray ink;
- Pool Party ink to add colour wash to torn watercolour paper sentiment strip; and
- one of the small dots from the Adhesive-Backed Textured Dots (item 163338) added to each end of the sentiment strip.
Thank you for visiting my blog! I had a lot of fun working on these snow globe projects - definitely the year of the Snow Globe!
Unfortunately Stampin' Up! advises that the Stazon Jet Black Ink (item 101406) is not currently available, but that it is expected to again be available for ordering the week of December 16, 2024😞.
If you are interested in purchasing any of the available Stampin' Up! products I have used in my projects, and you live in Canada and do not have a Stampin' Up! demonstrator, please do not hesitate to visit my online store found on my website https://archiesatelier.stampinup.net/ at your convenience, or simply click under the "Shop With Me" tab on the right sidebar of my blog, which will take you directly to my website and online store. I very much appreciate your business, and if you need any assistance please do not hesitate to contact me (lmccoyarchie@gmail.com) - I would be very pleased to be your demonstrator! The digital version of the May 2024-April 2025 Annual Catalogue is available for you to access at your convenience on my website (https://archiesatelier.stampinup.net/) - as is the digital version of the September-December 2024 Mini Catalogue, and the digital only September 2024 Scrapbooking Brochure - the companion brochure to the Mini Catalogue. When visiting my online store - and checking out the full range of Online Exclusives (including all products in the November 5, 2024, release) and the full selection of all-inclusive card and crafting kits available in the Kits Collection (kits make great gifts for fellow crafters too!) - don't forget to also check out the great deals on the Clearance Rack including:
- Trusty Toolbox 12" x 12" Designer Series Paper (item 162978) - $6.80;
- Hedgehog Builder Punch (item 157984) - $18.00;
- Ladybug Builder Punch (item 157698) - $18.00;
- Dragonflies Punch (item 154240) - $18.00; and
- Orchid Oasis 8 1/2" x 11" cardstock (24 sheets) - $5.50.
All Clearance Rack products are only available while supplies last!


.webp)
.webp)
.webp)
.webp)


.webp)
.webp)
.webp)


.webp)


.webp)


Comments
Post a Comment