From A Country Garden!
(more play with the Country Birdhouse and Country Flowers Bundles)


.jpg)
Country Birdhouse dies - 163400
(Bundle - 163401)

.jpg)
Country Flowers dies - 163410
(Bundle - 163411)
I think the Simply Zinnia dies (item 163479), Cheerful Daisies dies (item 161296), and the Garden Meadow Bundle (item 162741) - which includes the Garden Meadow stamp set (item 162736) and the co-ordinating Garden Meadow dies (item 162740) - and all of which I also used this week - are great complements for both the Country Birdhouse and Country Flowers Bundles. It's fun mixing in the larger scale flowers made using the Simply Zinnia and Cheerful Daisies dies!
.jpg)
Simply Zinnia dies - 163479
.jpg)
Cheerful Daisies dies - 161296
.jpg)
.jpg)
Garden Meadow dies - 162740
(Bundle - 162741)
For additional foliage I used the Encircled In Nature dies (item 163528), and the Around The Bend dies (item 160649) - both available as Online Exclusives:
.jpg)
Encircled In Nature dies - 163628
.jpg)
Around The Bend dies - 160649
For the die cut foliage I used Lemon Lime Twist cardstock (item 144245), Old Olive cardstock (item 100702), and Mossy Meadow cardstock (item 133676). The Lemon Lime Twist and Old Olive cardstock foliage was shaded with Old Olive ink (item 147090) and Mossy Meadow ink (item 147111), and the Mossy Meadow cardstock foliage with Mossy Meadow ink, applied with Small Blending Brushes (item 160518). Ink to shade other cardstock die cuts, and to shade edges of Designer Series Paper, was applied using a combination of Blending Brushes (item 153611) and Small Blending Brushes.
Just a quick note regarding the basic tools and supplies I used to complete my projects this week:
- Paper Trimmer (item 152392) - for trimming paper and cardstock - can also be used for scoring;
- stylus and scoreboard (Simply Scored Scoring Tool - item 122334) - for scoring card fold lines. To ensure crisp folds I also burnish all folded scored lines using my Bone Folder (item 102300);
- Stampin' Cut & Emboss Machine (item 149653) - for all die cutting and embossing;
- Paper Snips Scissors (item 103579) - these small sharp scissors are very handy for trimming die cuts (i.e. snipping off a few leaves or shortening stems);
- Take Your Pick Tool (item 144107) - the paper piercer, mini spatula, and tacky putty tips are a great help for picking up and placing small die cuts and embellishments; and
- for the main adhesive, Multipurpose Liquid Glue (item 110755).
The stamped and coloured images were stamped on watercolour paper using Stazon Jet Black Ink (item 101406), and watercoloured using the following Classic Stampin' inks:
- Pecan Pie (item 161665);
- Basic Gray (item 149165);
- Crumb Cake (item 147116);
- Misty Moonlight (item 153118);
- Pumpkin Pie (item 147086);
- Daffodil Delight (item 147094);
- Berry Burst (item 147143);
- Old Olive (item 147090), and
- Pool Party (item 147107).
The sentiments were also stamped using Stazon Jet Black Ink.
On with the projects!


For this project I used another of the 5 1/2" square (opening) shadow box frames picked up from Dollar Tree - but did not paint or sand the frame. To complete the project I used the following additional supplies:
- gold splattered text paper from the Nature's Sweetness Specialty Designer Series Paper (item 162616) for the 5 1/2" square back panel (glued to medium-weight cardboard) - edges shaded with Basic Gray ink;
- watercolour paper for the die cut daisies, and small flowers (Country Birdhouse dies) - daisies watercoloured with Daffodil Delight, Pumpkin Pie, and Crumb Cake inks, and the small flowers with Daffodil Delight ink;
- Daffodil Delight cardstock (item 119683) for the die cut flower blossoms, and top Zinnia flower die cut - shaded with Daffodil Delight ink;
- Crushed Curry cardstock (item 131199) for the bottom Zinnia flower die cut;
- Peach Pie cardstock (item 163799) for the two die cut star circle flower centers (Simply Zinnia dies) - edges shaded with Pumpkin Pie ink;
- Pecan Pie cardstock (item 161717) for die cut oval flower center (Simply Zinnia dies) - shaded with Pecan Pie ink;
- Crumb Cake baker's twine (Baker's Twine Essentials Pack - item 155475) for the bow - bow and ends secured with tiny dabs of Multipurpose Liquid Glue; and
- two large and three small of the Basic Gray dots from the recently retired Classic Matte Dots (item 158146) added to the centers of the small flowers.


For the second project I used a Dollar Tree easel frame with a 6 5/8" square opening, and I used a fine-grit sandpaper to slightly distress the frame edges. I used the following additional supplies to complete the project:
- watercolour paper for all die cut birdhouse pieces, including the "fence", which was cut using the Beach Day dies (item 162799) - I used Crumb Cake ink, Pecan Pie ink, Basic Gray ink, and Early Espresso ink (item 147114) to colour the birdhouse pieces;
.jpg)
Beach Day dies - 162799
- Flirty Flamingo cardstock (item 141416) for Zinnia flower top die cut layers - shaded with Real Red ink (item 147084);
- Poppy Parade cardstock (item 119793) for Zinnia flower lower die cut layers and blossoms - shaded with Real Red ink;
- Peach Pie cardstock (item 163799) for the die cut star circle flower centers (two used for each flower) - edges shaded with Pumpkin Pie ink (item 147086);
- Pecan Pie cardstock (item 161717) for die cut oval flower centers - shaded with Pecan Pie ink (item 161665);
- Daffodil Delight cardstock (item 119683) and Azure Afternoon cardstock (item 161719) for the small die cut flowers (all cut using the Country Birdhouse dies);
- Lost Lagoon patterned paper and Crumb Cake check patterned paper - both from Perennial Lavender Designer Series Paper (item 162593) for the background panels - glued to medium-weight cardboard. I used a just under 7" square panel of the Crumb Cake check patterned paper and a just under 7" x 3 1/2" panel of the Lost Lagoon patterned paper (glued over the Crumb Cake check patterned paper); and
- two large and six small Very Vanilla dots from the recently retired Classic Matte Dots (item 158146) used for centers of the small flowers.


- Crumb Cake check patterned paper from Perennial Lavender Designer Series Paper (item 162593) for the back panel - glued to medium-weight cardboard to fit the back opening of the frame;
- Misty Moonlight cardstock (item 153081) for the embossed circle. I embossed the cardstock panel using the Distressed Tile 3D Embossing Folder (item 162189) and then cut the circle using the 3" circle die from the Stylish Shapes dies (item 159183) - although die cutting after embossing does flatten the embossed panel a little, the edge of the die cut remains defined - if I embossed after die cutting I would loose definition in the stitched edge of the circle. You just have to decide what is most important to you for your project in deciding whether to emboss or die cut first!; and

Stylish Shapes dies - 159183
- Stampin' Dimensionals (item 104430) to attach bucket/plant/bird/flowers in basket to background panel.

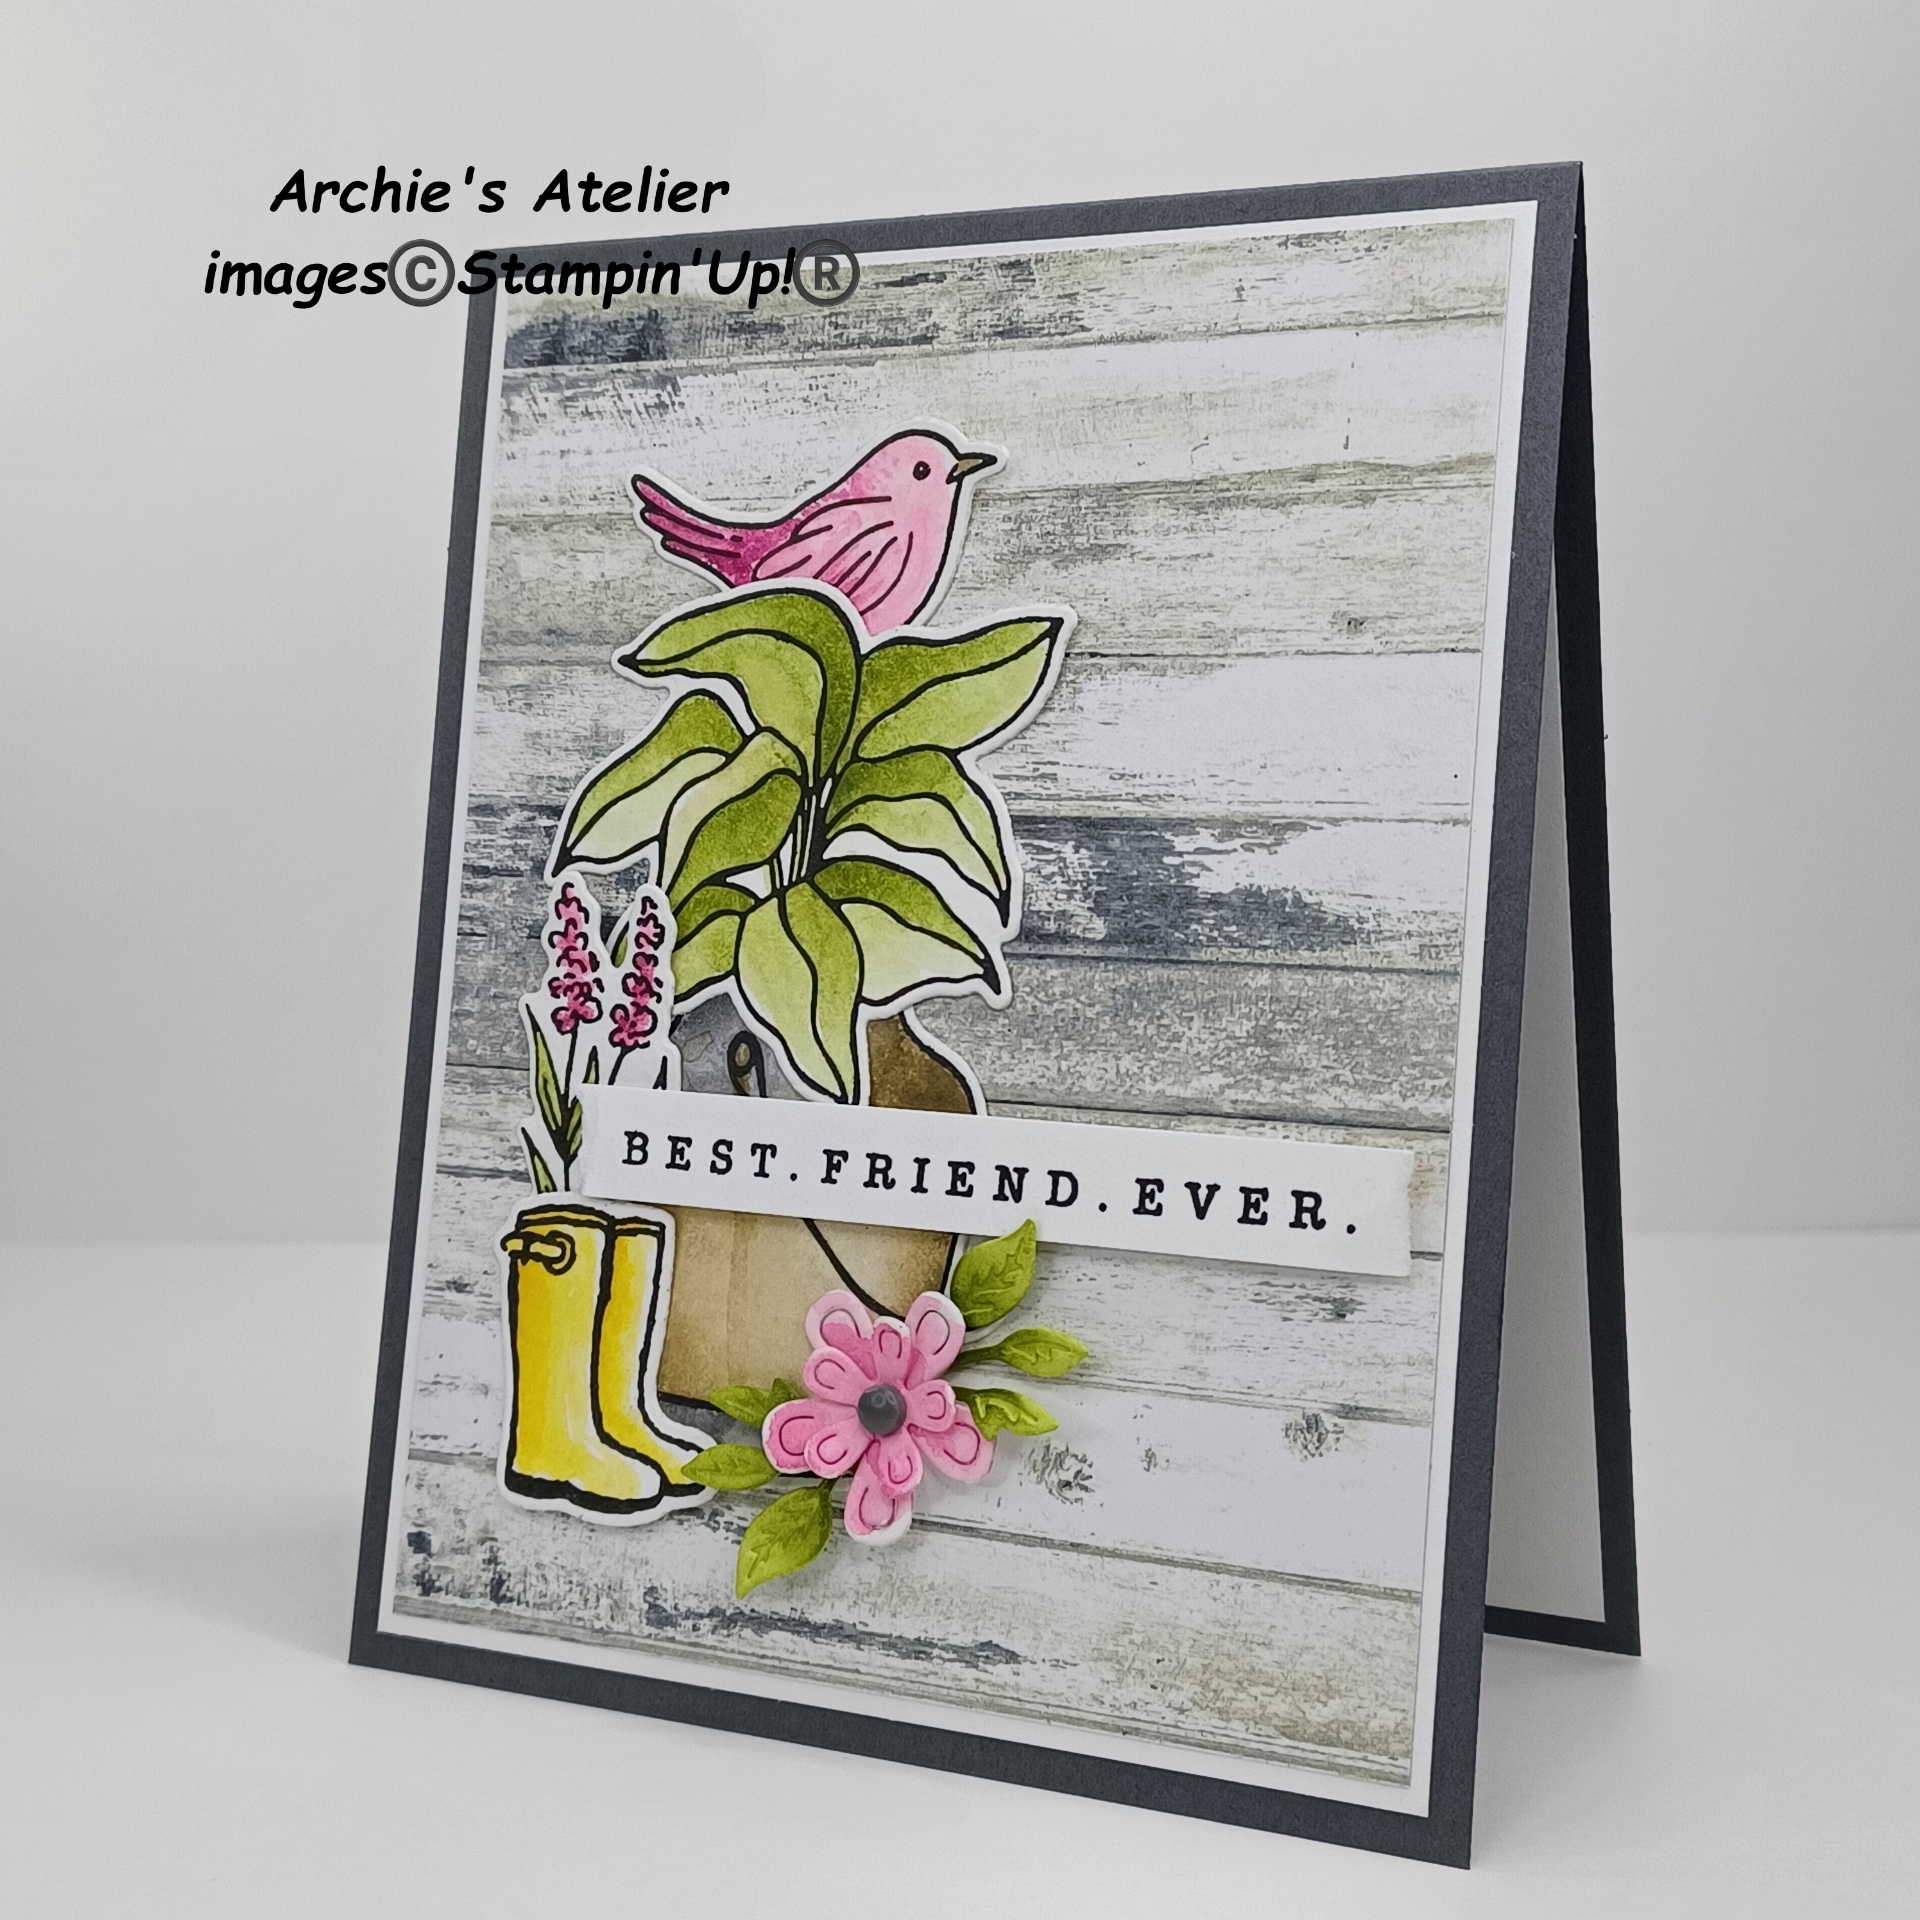


Additional supplies used to complete this 5" x 4" top-fold card:
- Basic Gray cardstock (item 121044) for the card base;
- Basic White Thick cardstock (item 159229) for the 4 3/4" x 3 3/4" front matting and inside panels, and the trimmed (ends torn) sentiment strip;
- watercolour paper for the two die cut flowers (cut using the Country Birdhouse dies);
- Smoky Slate/Basic Beige woodgrain patterned paper from Country Woods 12" x 12" Designer Series Paper (item 163393) for the card front's 4 5/8" x 3 5/8" panel, and 4 5/8" x 3/8" strip for inside panel;
- Mini Stampin' Dimensionals (item 144108) to attach sentiment strip; and
- one small Basic Gray dot from the recently retired Classic Matte Dots (item 158146) added to flower center.


Additional supplies used to complete this 5 1/2" x 3 1/2" top-fold card:
- Basic White Thick cardstock (item 159229) for the card base, and 5 1/4" x 3 1/4" panel;
- Basic Black cardstock (item 121045) for 5 3/8" x 3 3/8" matting panel;
- watercolour paper for the two die cut flowers (cut using the Country Birdhouse dies) - watercoloured with Daffodil Delight ink (item 147094) - and the sentiment flag. The sentiment flag was cut using the Nested Essentials dies (item 161597) from watercolour paper that had been watercoloured with Pumpkin Pie ink (item 147086). After die cutting the flag I stamped the sentiment;
.jpg)
Nested Essentials dies - 161597
- Black & Very Vanilla 3/8" Large Check Ribbon (item 161982) for the bow - secured to the top corner of sentiment flag with dab of Multipurpose Liquid Glue; and
- one large and one small of the Calypso Coral shaded dots from Ombre Matte Decorative Dots (item 161448) added to flower centers.
And finally . . .


Additional supplies used to complete this 3 1/2" square gift card:
- Basic White Thick cardstock (item 159229) for the card base;
- Basic Black cardstock (item 121045) for the 3 3/8" square matting panel;
- gold grid patterned paper from Nature's Sweetness Specialty Designer Series Paper (item 162616) for the 3 5/16" square panel;
- Mini Stampin' Dimensionals (item 144108) to attach bird to card front overlapping the tea pot; and
- three (one large and two small) of the Night of Navy shaded dots from Ombre Matte Decorative Dots (item 161448) added to card front.
Thank you for visiting my blog! I had a lot of fun working some more with both the Country Birdhouse and Country Flowers Bundles and am definitely looking forward to even more projects with these Bundles - lots of possibilities to explore!
If you are interested in purchasing any of the available Stampin' Up! products I have used in my projects, and you live in Canada and do not have a Stampin' Up! demonstrator, please do not hesitate to visit my online store found on my website https://archiesatelier.stampinup.net/ at your convenience, or simply click under the "Shop With Me" tab on the right sidebar of my blog, which will take you directly to my website and online store. I very much appreciate your business, and if you need any assistance please do not hesitate to contact me (lmccoyarchie@gmail.com) - I would be very pleased to be your demonstrator! The digital version of the May 2024-April 2025 Annual Catalogue is now available for you to access at your convenience on my website (https://archiesatelier.stampinup.net/). When visiting my online store don't forget to check out all the products now available as Online Exclusives, as well as some great deals on the Clearance Rack - items on the Clearance Rack are available only while supplies last! Stampin' Up! has also added two new all-occasion card-making kits to the Kits Collection: City Sights Kit (item 163885), and Hello Hollyhocks Kit (item 164458). Whether you follow the step-by-step instructions provided in these all-inclusive Kits to make the pre-designed card projects or use the Kit components to create projects of your own design you will certainly enjoy creating with these Kits! Be sure to check out these Kits - as well as the Stampin' Up! full selection of card-making and crafting kits - in my online store!
.jpg)
.jpg)
Have fun creating!
Laurel
*It has come to my attention that quite often email correspondence from me is delivered to the recipient's spam or junk mail folder - if you have corresponded with me I have replied so be sure to check your spam or junk mail folder! Thank you!!

Comments
Post a Comment