April Snowstorms Bring April Flowers!

Hello! Today I am sharing a few flower-themed projects I worked on this week combining current and retiring Stampin' Up! products. So far April has certainly been a strange month climate wise - from snow storms to days over 20 degrees Celsius - while April showers will bring May flowers I think that the April snowstorms will also bring April flowers!

Just a reminder that the Stampin' Up! Last Chance Promotion offering the retiring products from both the May 2023-April 2024 Annual Catalogue and the January-April 2024 Mini Catalogue started on April 9, and will run to April 30, 2024 - while many of the retiring products have been substantially discounted - including several that I have used in my projects - all retiring products will be available only while supplies last! At the end of the blog post I will provide a listing of the retiring products used including any applicable discounts.
A quick note regarding the basic tools and supplies I used to complete my projects this week:
- Paper Trimmer (item 152392) - for trimming paper and cardstock - can also be used for scoring;
- stylus and scoreboard (Simply Scored Scoring Tool - item 122334) - for scoring card fold lines. To ensure crisp folds I also burnish all folded scored lines using my Bone Folder (item 102300);
- Stampin' Cut & Emboss Machine (item 149653) - for all die cutting;
- Paper Snips Scissors (item 103579) - these small sharp scissors are very handy for trimming die cuts (i.e. snipping off a few leaves or shortening stems);
- Take Your Pick Tool (item 144107) - the paper piercer, mini spatula, and tacky putty tips are a great help for picking up and placing small die cuts and embellishments; and
- for the main adhesive, Multipurpose Liquid Glue (item 110755).
For the flowers and foliage I used the following dies:
- retiring Paper Florist (item 161284) - before assembling the flowers I scrunched the petal sections with my fingers - very therapeutic!;
.jpg)
Paper Florist dies - 161284
- retiring Dainty Delight (item 160674) - small half daisies and centers, and two lilac blooms used on the first project, and the full daisy on the bottle gift card;
.jpg)
- Simply Zinnia (item 163479) - blossoms and double-leafed stems, and "spiky" foliage;
.jpg)
Simply Zinnia dies - 163479
- retiring Meadow (item 155852) - wildflowers and profile butterfly;
.jpg)
Meadow dies - 155852
- retiring Notes of Nature (item 163203);
.jpg)
Notes of Nature dies - 163203
- retiring Lazy Days (item 161342) - ivy and rounded tip leafy sprig;
.jpg)
Lazy Days dies - 161342
- retiring Natural Prints (item 158800) - tall "wavy" leafy stem; and
.jpg)
Natural Prints dies - 158800
- Delicate Forest (item 162679) - left curving leafy stem.
.jpg)
Delicate Forest dies - 162679
For the wildflowers (frame project and Thank You card) and two profile butterflies (Fresh Freesia card) all cut using the Meadow dies, and the two small half daisies and centers from the frame project cut using the Dainty Delight dies I used watercolour paper - watercolouring the die cuts with Classic Stampin' inks/ink refills. For all other die cuts I used cardstock - shading with Classic Stampin' inks applied with Small Blending Brushes (item 160518) - all colours will be noted in the project details. For foliage I used Granny Apple Green cardstock (item 146990), Soft Seafoam cardstock (item 146988), Old Olive cardstock (item 100702), and Garden Green cardstock (item 102584), shading with Old Olive ink (item 147090) and Mossy Meadow ink (item 147111). For the "Just a little note to say hello" card I cut the two foliage pieces from Soft Seafoam cardstock using the retiring Notes of Nature dies and shaded with Pool Party ink (item 147107). I added splatters to the watercoloured wildflower die cuts using my Basic Black Stampin' Write Marker (item 162481) by flicking the marker's brush tip against the lid.
On with the projects!


I started this project with an unfinished and glass-less wood frame from Dollarama with outside dimensions of 8 1/2" x 6 5/8" - opening measures 7" x 5 1/8". I painted the frame with Early Espresso ink refill (item 119789) - applying the ink refill with a small sponge. Over a piece of medium weight cardboard cut to fit the frame opening I glued a piece of Pecan Pie grid patterned paper from the Nature's Sweetness 12" x 12" Designer Series Paper (item 162616). Using the largest die from Perennial Postage dies (item 162607) I cut a panel from watercolour paper. I tore the top of the panel and applied Pecan Pie ink (item 161665) using one of the Blending Brushes (item 153611) - adding additional splatters by flicking a paint brush used to mix some Pecan Pie ink refill (item 161669) with water. I glued the panel at an offset angle to the DSP backing panel, and then built up my flower arrangement. I have learned the hard way to first lay out such an arrangement and take a quick reference photo before starting to glue the various pieces - although not always a guarantee of a successful end result it can help - provided you remember to refer to the photo of course!!😏
.jpg)
Perennial Postage dies - 162607
Additional supplies used to complete the project:
- Coastal Cabana cardstock (item 131297) for the two large flowers and three blossoms - shaded with Lost Lagoon ink (item 161678);
- Daffodil Delight cardstock (item 119683) for the two circle stamen centers for the smaller flower - edges shaded with Daffodil Delight ink (item 147094);
- Early Espresso cardstock (item 119686) for the three die cut strips used for the center of the large flower (curled around a tooth pick and spot glued and then ends ruffled with my fingers), and the two perforated circle centers for the smaller flower - I used one of the Mini Stampin' Dimensionals (item 144108) to attach the second center on top of the first center;
- Highland Heather cardstock (item 146986) for the two lilac die cuts - shaded with a very light sponging of Misty Moonlight ink (item 153118);
- Daffodil Delight, Old Olive, Mossy Meadow, and Pecan Pie inks to watercolour the die cut wildflower stem and center, and the two small half daisies and centers;
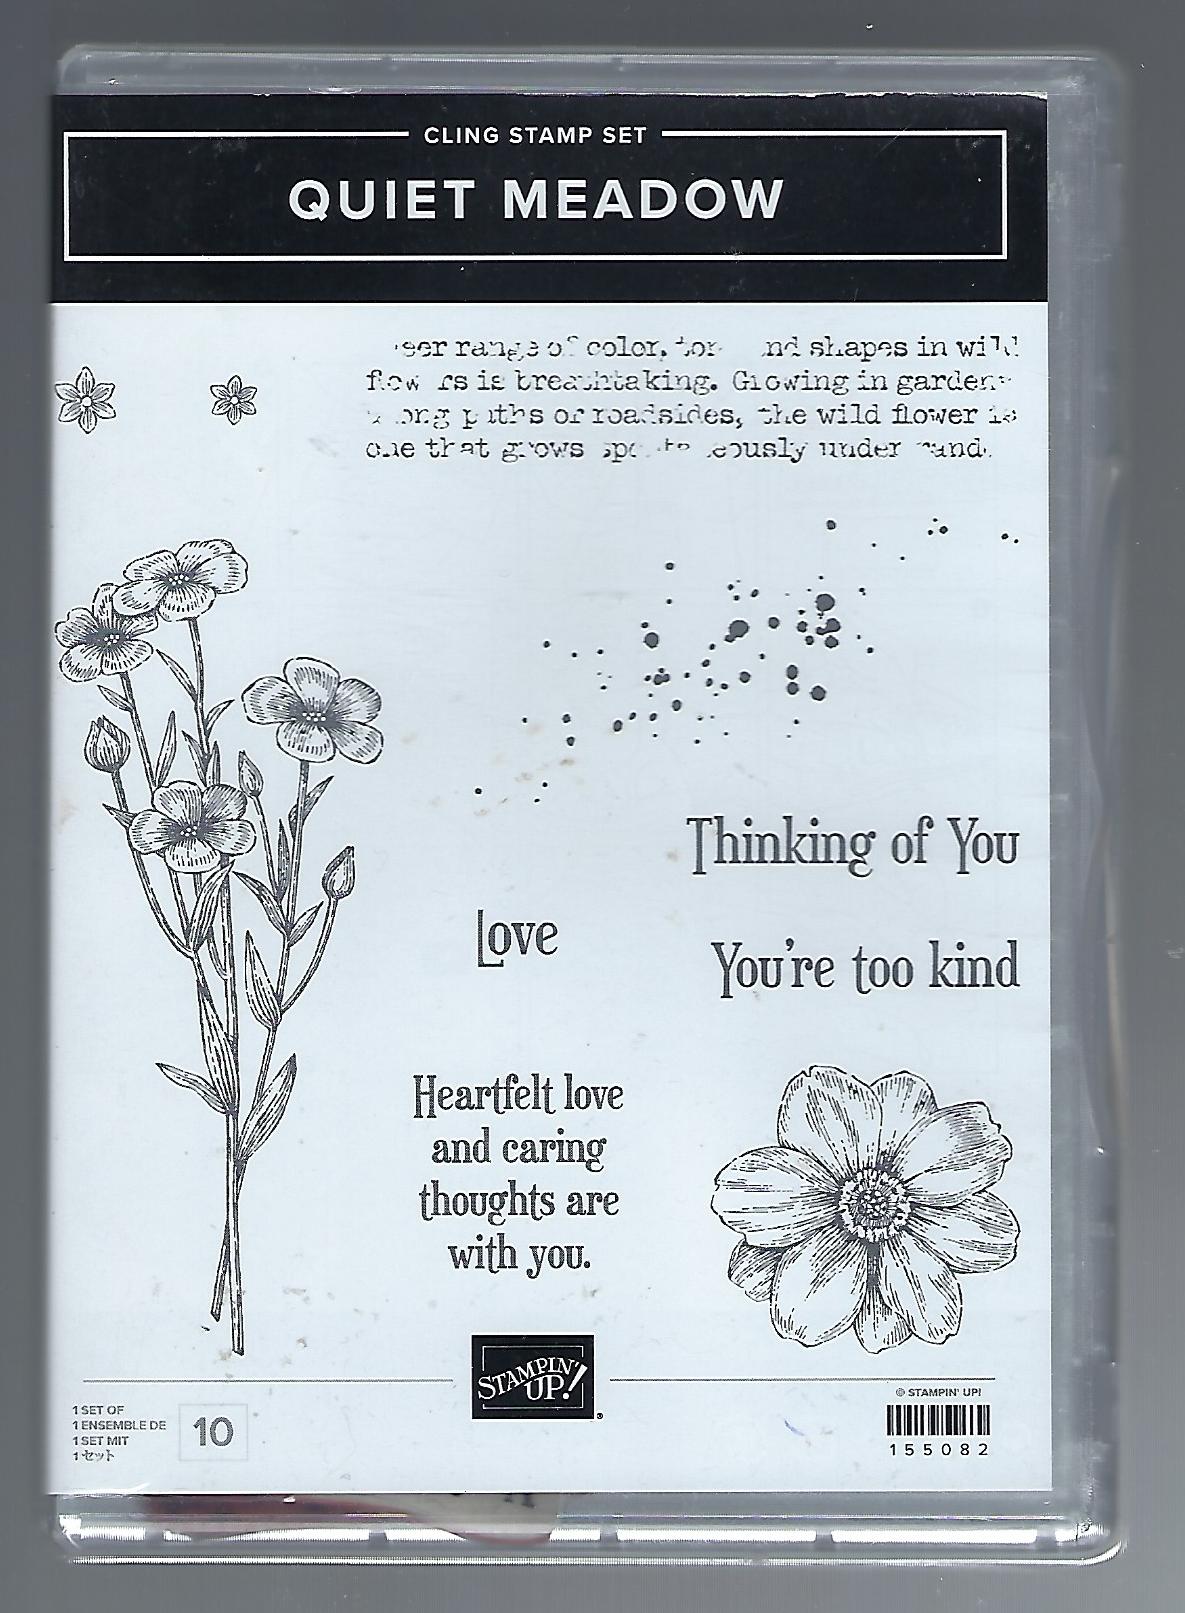
- one of the Paper Butterfly Accents (item 162612) coloured with Pool Party ink (item 147107) and Daffodil Delight ink - applied carefully with Small Blending Brushes. I found - also the hard way - that it is easier to colour these butterflies before removing them from their sheet - they are quite delicate and can easily be damaged if you get too enthusiastic with the ink blending! I stamped over the butterfly using Pool Party ink and the splatter stamp from the retiring Quiet Meadow stamp set (item 155082); and
- two large and one small of the Pool Party dots from the Rainbow Adhesive-Backed Dots (item 162758) added to the backing panel.
A few cards . . .


Additional supplies used to complete this 5 1/4" square top-fold card:
- Pecan Pie cardstock (item 161717) for the card base;
- Basic Black cardstock (item 121045) for the 5" square matting panels (front and inside), and circle frame (cut using circle dies from Stylish Shapes dies - item 159183 - and deliberately cut to be an uneven frame);

Stylish Shapes dies - 159183
- retiring Very Vanilla Thick cardstock (item 144237) for 4 7/8" square inside panel;
- Pecan Pie grid patterned paper from Nature's Sweetness 12" x 12" Designer Series Paper (item 162616) for 4 3/4" panel;
- Stazon Jet Black Ink (item 101406) to stamp "Thank You" from retiring Gorgeously Made stamp set (item 161193) on watercolour paper;

- retiring Tailor Made Tags dies (item 155563) to cut sentiment tag;
.jpg)
- Pecan Pie ink (item 161665) to colour torn sentiment tag - applied with one of the Small Blending Brushes;
- Mossy Meadow ink (item 147111), Old Olive ink (item 147090), Daffodil Delight ink (item 147094), Pumpkin Pie ink (item 147086), Highland Heather ink refill (item 147167), Pecan Pie ink, and the retiring Sweet Sorbet ink (item 159216) to watercolour die cut wildflowers - single broad leaf cut from Old Olive cardstock (item 100702) using retiring Paper Florist dies and shaded with Mossy Meadow ink;
- Crumb Cake baker's twine from Baker's Twine Essentials Pack (item 155475) for bow tied around flower stems - twine wrapped around the stems a few times before bow tied - I glued the flowers together at the base before wrapping the twine and tying the bow - ends of twine secured with tiny dabs of Multipurpose Liquid Glue; and
- two small and two large of the Flirty Flamingo dots from Rainbow Adhesive-Backed Dots (item 162758) added to Basic Black cardstock circle frame and DSP panel.


Additional supplies used to complete this 5" x 4" top-fold card:
- Pretty Peacock cardstock (item 150880) for the card base;
- Basic White Thick cardstock (item 159229) for the 4 7/8" x 3 7/8" matting panel, and 4 3/4" x 3 3/4" inside panel;
- Daffodil Delight cardstock (item 119683) for the stamen circle flower, and Pecan Pie cardstock (item 161717) for the perforated circle flower center - both cut using the retiring Paper Florist dies - I shaded the edges of the perforated circle with Pecan Pie ink (item 161665);
- the retiring Vintage Bottle Punch (item 158689) to punch three bottles from watercolour paper - I watercoloured the bottles with Pool Party ink (item 147107), and used Pool Party ink and the splatter and fractured text stamps from the retiring Quiet Meadow stamp set (item 155082) to stamp over the coloured bottles. I actually punched, coloured and stamped four bottles - the fourth bottle I used on the next card;
- Stazon Jet Black Ink (item 101406) to stamp on watercolour paper the sentiment from the retiring Notes of Nature stamp set (item 162630) - sentiment label cut using the label die from the Cheerful Daisies dies (item 161296) and watercoloured using Pool Party and Pecan Pie inks with additional Pecan Pie ink sponged around the edges;

.jpg)
- Pretty Peacock/Lost Lagoon patterned paper from the retiring Masterfully Made 12" x 12" Designer Series Paper (item 161192) for the 4 5/8" x 3 5/8" panel, and the 3/4" x 3 1/4" inside panel strip;
- Linen Thread (item 104199) for the bow - ends secured with tiny dabs of Multipurpose Liquid Glue; and
- two small and two large of the Pool Party dots from Rainbow Adhesive-Backed Dots (item 162758) for the card front, including one large dot for the flower center.


In addition to the fourth punched, coloured, and stamped watercolour paper bottle I used the following supplies to complete this 5" x 2 3/4" top-fold gift card:
- Basic White Thick cardstock (item 159229) for the card base;
- Basic White cardstock (item 159276) for the daisy, which was cut using the retiring Dainty Delight dies - I used Daffodil Delight ink (item 147094) to shade the center of the flower;
- Garden Green cardstock (item 102584) for the flower stem, which was cut using the retiring Natural Prints dies - shaded with Mossy Meadow ink (item 147111);
- Lemon Lime Twist patterned paper from the retiring Masterfully Made 12" x 12" Designer Series Paper (item 161192) for the 3 3/4" x 1 3/4" panel;
- Linen Thread (item 104199) for the bow tied around the neck of the bottle before the bottle and flower were glued to the card front - the Linen Thread was wrapped a few times around the neck before the bow was tied and the ends were secured with tiny dabs of Multipurpose Liquid Glue; and
- one of the large Pool Party dots from Rainbow Adhesive-Backed Dots (item 162758) for the flower center.


- Basic Black cardstock (item 121045) for the card base, 2 3/8" square (cut using the Stylish Shapes dies - item 159183), small perforated circle flower center (cut using the retiring Paper Florist dies), and the 1 3/4" x 1/16" strip for the inside panel;
- Basic White Thick cardstock (item 159229) for the 4 1/4" x 3 1/4" front panel, trimmed sentiment strip, and 3 7/8" x 2 7/8" inside panel;
- Poppy Parade cardstock (item 119793) for the flower petals;
- Wild Wheat cardstock (item 161725) for the stamen circle center and small scalloped circle flower center - both cut using the retiring Paper Florist dies;
- Memento Tuxedo Black Ink (item 132708) to stamp the "Happy Birthday" sentiment from the retiring Waves of Inspiration stamp set (item 158833) - the strip was trimmed and the edges then scraped with the blade of my craft knife;

- Pumpkin Pie/Crushed Curry/Sweet Sorbet patterned paper from the retiring Masterfully Made 12" x 12" Designer Series Paper (item 161192) for the front panel's 2 1/8" square, and the inside panel's 2 1/2" x 1/2" strip; and
- one small white dot from the retiring Classic Matte Dots (item 158146) for the flower center.


- Fresh Freesia cardstock (item 155613) for the petals of one of the large flowers, and the three buds - all cut using the retiring Paper Florist dies;
- Blackberry Bliss cardstock (item 133675) for the petals of one of the large flowers, and for the front panel's 4 3/4" square and 4 1/8" square matting panels; and the inside panel's 4 3/4" square matting panel;
- Basic White Thick cardstock (item 159229) for the 4 5/8" square inside panel;
- Daffodil Delight cardstock (item 119683) for the two stamen circle flower centers, and Basic Gray cardstock (item 121044) for the two perforated circle flower centers - all cut using the retiring Paper Florist dies;
- Lost Lagoon cardstock (item 133679) for the two seven-leafed stems (tucked under the Fresh Freesia flower), and bud stems - all cut using the retiring Paper Florist dies;
- Pretty Peacock cardstock (item 150880) for the two curving leafy stems - cut using the Delicate Forest dies (item 162679);
- Fresh Freesia text/floral patterned paper from the retiring Masterfully Made 12" x 12" Designer Series Paper (item 161192) for the front panel's 4 5/8" square panel;
- Lost Lagoon text/floral patterned paper from the retiring Masterfully Made 12" x 12" Designer Series Paper for the front panel's 4" square panel, and the inside panel's 4 5/8" x 1 11/16" strip;
- watercolour paper for the two die cut profile butterflies cut using the retiring Meadow dies (item 155852) - I used Lost Lagoon ink (item 161678) and Basic Gray ink (item 149165) to colour the wings and body - ink applied with Small Blending Brushes - then lightly spritzed with water (Stampin' Spritzers - item 126185) and blotted dry with paper towel. I glued the two die cut profiles together just along the edge of the body so that I could gently pull up the top wing for a little more dimension;
- one of the Mini Stampin' Dimensionals (item 144108) to attach each of the perforated circle flower centers; and
- three small and one large of the Fresh Freesia dots, and one small of the Pool Party dots from Rainbow Adhesive-Backed Dots (item 162758) added to the card front - including one small Fresh Freesia dot and the small Pool Party dot added to flower centers.
And finally . . .


Additional supplies used to complete this 4" x 5" top-fold card:
- Pretty Peacock cardstock (item 150880) for the card base;
- Pool Party cardstock (item 122924) for the petals of one of the flowers, and the front panel's 3 3/8" x 4 3/8" matting panel - the edges scraped with the blade of my craft knife;
- Coastal Cabana cardstock (item 131297) for the petals of one of the flowers, the blossom (cut using the Simply Zinnia dies - item 163479), the front panel's 3 1/8" x 4 1/8" matting panel (edges scraped with the blade of my craft knife), and the inside panel's 3 3/4" x 4 3/4" matting panel;
- Daffodil Delight cardstock (item 119683) for the two stamen circle flower centers, and Pecan Pie cardstock (item 161717) for the two perforated circle flower centers - all cut using the retiring Paper Florist dies. I sponged Pecan Pie ink (item 161665) around the edges of the two perforated circles;
- Basic White Thick cardstock (item 159229) for the 3" x 4" stamped panel - stamped using Pool Party ink (item 147107) and the fractured text and splatter stamps from the retiring Quiet Meadow stamp set (item 155082) - and the 3 5/8" x 4 5/8" inside panel; and
- one of the Paper Butterfly Accents (item 162612) - coloured using Pool Party ink, Granny Apple Green ink (item 147095), and Basic Gray ink (item 149165), and stamped using Pool Party ink and the splatter stamp from the retiring Quiet Meadow stamp set.
Using an envelope punch board I made the envelope from a piece of the Pretty Peacock patterned paper from the retiring Masterfully Made DSP.
The following are the retiring products I used for my projects this week, together with any discount applicable during the Last Chance Promotion:
- Quiet Meadow stamp set (item 155082);
- Notes of Nature stamp set (item 162630);
- Gorgeously Made stamp set (item 161193);
- Waves of Inspiration stamp set (item 158833);
- Sweet Sorbet ink (item 159216);
- Very Vanilla Thick cardstock (item 144237);
- Masterfully Made 12" x 12" Designer Series Paper (item 161192) - 30% ($11.90);
- Classic Matte Dots (item 158146) - 40% ($5.85);
- Vintage Bottle Punch (item 158689) - 50% ($15.00);
- Lazy Days dies (item 161342) - 20% ($37.60);
- Dainty Delight dies (item 160674) - 50% ($24.50);
- Meadow dies (item 155852) - 50% ($26.00);
- Paper Florist dies (item 161284) - 50% ($25.50); and
- Tailor Made Tags dies (item 155563).
Thank you for visiting my blog! I certainly had a lot of fun working on these projects!
If you are interested in purchasing any of the available Stampin' Up! products I have used in my project, and you live in Canada and do not have a Stampin' Up! demonstrator, please do not hesitate to visit my online store found on my website https://archiesatelier.stampinup.net/ at your convenience, or simply click under the "Shop With Me" tab on the right sidebar of my blog, which will take you directly to my website and online store. I very much appreciate your business, and if you need any assistance please do not hesitate to contact me (lmccoyarchie@gmail.com) - I would be very pleased to be your demonstrator! The digital versions of both the May 2023-April 2024 Annual Catalogue, and the January-April 2024 Mini Catalogue are available for you to access at your convenience on my website (https://archiesatelier.stampinup.net/). When visiting my online store don't forget to check out all the products now available as Online Exclusives, as well as some great deals on the Clearance Rack! Remember that all retiring products will be available only while supplies last!
Have fun creating!
Laurel
*It has come to my attention that quite often email correspondence from me is delivered to the recipient's spam or junk mail folder - if you have corresponded with me I have replied so be sure to check your spam or junk mail folder! Thank you!!

Comments
Post a Comment