A Grassy Grove Bundle Mini Album!

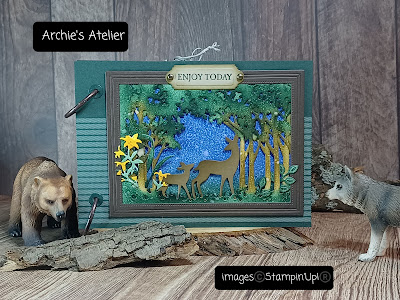
Hello! Today I am sharing a mini album project I worked on this week featuring the Stampin' Up! Grassy Grove Bundle (item 157845), which includes the Grove dies (item 157844) and the Grassy Grove stamp set (item 157836). The dies and the stamp set can of course be purchased individually but, when purchased together using the Bundle item number there is the 10% Bundle Savings! Since my album has a camping theme I thought the Campology stamp set (item 152553) would be a great complement to the Grove dies, and, although the Campology stamp set has been around for a while it is new to me!


The following are the additional dies that I used in my project:


- Mini Pocket Envelope (item 159167) - the "Explore" tag holder pocket envelope, and "Happy Trails" sentiment oval

- Tailor Made Tags (item 155563) - the tags for the mini pocket envelope, "You Brighten My Path" sentiment tag and top edge torn tree tag, and all hole reinforcers

- Stylish Shapes (item 159183) - for the die cut square photos, inside of bathing beauty😼 cardstock photo frame, and die cut square and circle Campology stamp set images

- Fabulous Frames (item 159163) - for the cardstock frame for the Grove dies forest die cuts, "Enjoy Today" sentiment label, and the cardstock curvy top and bottom for the tent trailer photo (the top and bottom of the smaller frame were trimmed from the die cut frame and glued to the back of the photo's cardstock mat)

- Aspen Tree (item 159798) - for the small leaves and leaf "clusters"

- Honeybee Blooms (item 157951) - for the flower stems and tall grass die cuts

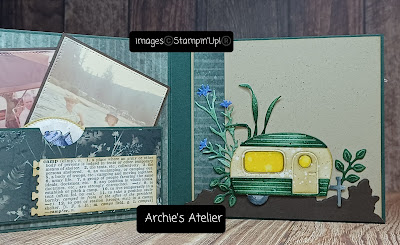
- Blossoming Happiness (item 158823) - the spiral notebook edge die used to cut the edge of the large camp dictionary definition

- Tree Lot (from July 1- August 31 2022 Sale-A-Bration - item 159938) - I just needed to use the trailer die for this project!

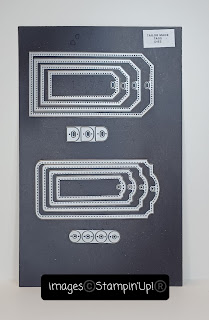
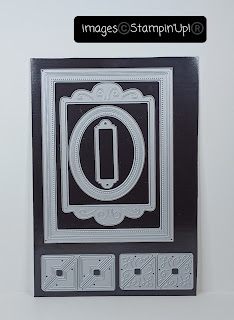
- Scalloped Contours (item 155560) - for the outside of the cardstock frame on the last page - for the inside frame opening and for the watercoloured lantern and mat I used the Stitched Rectangles dies (item 151820).
From watercolour paper (Fluid 100 5" x 7" Watercolour Paper - item 149612) I die cut the forest frames, flower stems, grass, aspen leaves and leaf "clusters", and small leaf sprigs. For the watercoloured Campology stamp set images I used Stazon Jet Black Ink (item 101406) to stamp the images on watercolour paper. I also used watercolour paper for the background for the cover's forest - after sponging on Starry Sky ink (item 159212) and Evening Evergreen ink (item 155576) I lightly spritzed the panel with water (Stampin' Spritzers - item 126185) and blotted with paper towel - I also used this water splattering technique on the forest, leaves, and leaf "clusters" die cuts.
I used the following Stampin' Up! Classic Inks to colour the watercolour paper die cuts:
- Evening Evergreen (item 155576);
- Soft Suede (item 147115);
- Starry Sky (item 159212);
- Mango Melody (item 147093), and a little Pumpkin Pie (item 147086) to darken the lantern's flame; and
- Basic Gray (item 149165).
For the cover I used two forest die cuts - when layering them I staggered them slightly and tucked the deer, flower stems, grass, and leaf sprigs between the layers.


I used the following additional supplies to complete the project:
- Evening Evergreen cardstock (item 155574) - for the base pages of the album (3 at 6" x 4 1/4" - including covers, and for the one flip-out page, 11" x 4 1/4", scored at 6"), page hole reinforcers, mini envelope pocket, base for the bottom pocket on the center of the flip-out page (5 1/2" x 2 1/4" - scored on the side and the bottom edges at 1/4" to give the pocket a little more depth to allow for a few inserts), the Scalloped Contours and Stitched Rectangles frame, tent trailer photo mat and Fabulous Frames curvy frame sections, and the lid and bottom of the box. For the base of the box a 10" x 8 1/4" piece scored on all four sides at 1 1/2"; and for the lid an 8 1/16" x 6 5/16" piece scored on all four sides at 1/2";
- Early Espresso cardstock (item 119686) - for the frames for the forest die cuts, photo mats, frame for the bathing beauty photo, die cut ground for the trailer die cut and flower stem on the insert tag, insert tag hole reinforcers, and matting panel for the embossed panel on the back cover;
- Crumb Cake cardstock (item 120953) for the sentiments and Campology stamp set images (stamped using Memento Tuxedo Black Ink - item 132708 - except for the "Enjoy Today" sentiment, which was stamped using Evening Evergreen ink), bathing beauty photo frame mat (the edges of which I "ruffled" by scraping the blade of my craft knife along the edges), embossed back cover panel (embossed using the Timber 3D Embossing Folder - item 156406);
- Soft Suede cardstock (item 115318) for the die cut deer;
- Soft Suede ink to sponge the edges of the die cut deer, tags, sentiment pieces, all Campology stamp set images, the camp definitions cut from dictionary pages, and the embossed Crumb Cake cardstock panel;
- Basic Black Stampin' Write Marker (item 100082) to add splatters by flicking the brush tip against the marker lid;
- Rustic Metallic Adhesive-Backed Dots (item 159082) - two added to the "Enjoy Today" sentiment label;
- Linen Thread (item 104199) - for the tags, the bow on the box, and for the flower stem bows (for these bows I used a single strand of the thread);
- Foam Adhesive Strips (item 152815) - to attach the framed panel to the lid of the box;
- Evening Evergreen patterned paper from the 2021-2023 In Colour 6" x 6" Designer Series Paper Assortments (item 159254);
- Boughs of Holly 12" x 12" Designer Series Paper (item 159600); and
- additional Evening Evergreen coloured patterned paper from Pretty Prints 12" x 12" Designer Series Paper (item 159245).
For the basic adhesive I used Multipurpose Liquid Glue (item 110755); for all die cutting and embossing the Stampin' Cut & Emboss Machine (item 149653); for paper trimming the Paper Trimmer (item 152392) and Paper Snips Scissors (item 103579); and score board and stylus (Simply Scored Scoring Tool - item 122334) and Bone Folder (item 102300) for paper scoring and burnishing fold lines respectively.
I also used two 1" binder clips I found at Dollarama; a 2-hole punch that was a real find at a local thrift store; old dictionary cut outs of "camp" definitions; a 1" circle punch to cut the thumb notch in the top edge of the pocket; and, for the box, a brown with white dots ribbon from my stash - the brown hue was a pretty close match to Early Espresso!


Thank you for visiting my blog! I had a lot of fun working on this mini album and box!
If you are interested in purchasing any of the available Stampin' Up! products I have used in my project, and you live in Canada and do not have a Stampin' Up! demonstrator, please do not hesitate to visit my online store found on my website https://archiesatelier.stampinup.net/ at your convenience, or simply click under the "Shop With Me" tab on the right sidebar of my blog, which will take you directly to my website and online store. I very much appreciate your business! You can browse the PDF versions of the July-December 2022 Mini Catalogue and the May 2022-April 2023 Annual Catalogue anytime on my website.
Have fun creating!
Laurel

Just making sure this bag will be big enough to hold my treats for the camping trip!
Comments
Post a Comment