A Few Poppy Projects!
(featuring the Painted Poppies stamp set and Poppy Moments dies)

High on a bright and sunny bed
A scarlet poppy grew
And up it held its staring head,
And thrust it full in view.
. . .
Although within its scarlet breast
No sweet perfume was found,
It seemed to think itself the best
Of all the flowers round.
. . .
excerpts from "The Poppy" by Jane Taylor
Hello! Today I am sharing a few projects I worked on this week using the Stampin' Up! Painted Poppies stamp set (item 151599) and Poppy Moments dies (item 151594). Although I have had the Poppy Moments dies for quite a while, and have used them for several projects, I only recently added the Painted Poppies stamp set to my collection!


Just a quick summary of the Stampin' Up! tools I used to help complete my projects:
- Stampin' Cut & Emboss Machine (item 149653) for all die cutting and embossing;
- Paper Trimmer (item 152392) for trimming paper and cardstock;
- scoring tool and stylus (SImply Scored Scoring Tool - item 122334) for paper/cardstock scoring;
- Bone Folder (item 102300) to burnish all score lines;
- Paper Snips Scissors (item 103579) - for fussy cutting;
- stamping platform (Stamparatus - item 146276);
- a heat gun (Heat Tool - item 129053) for heat embossing; and
- for the main adhesive, Multipurpose Liquid Glue (item 110755).
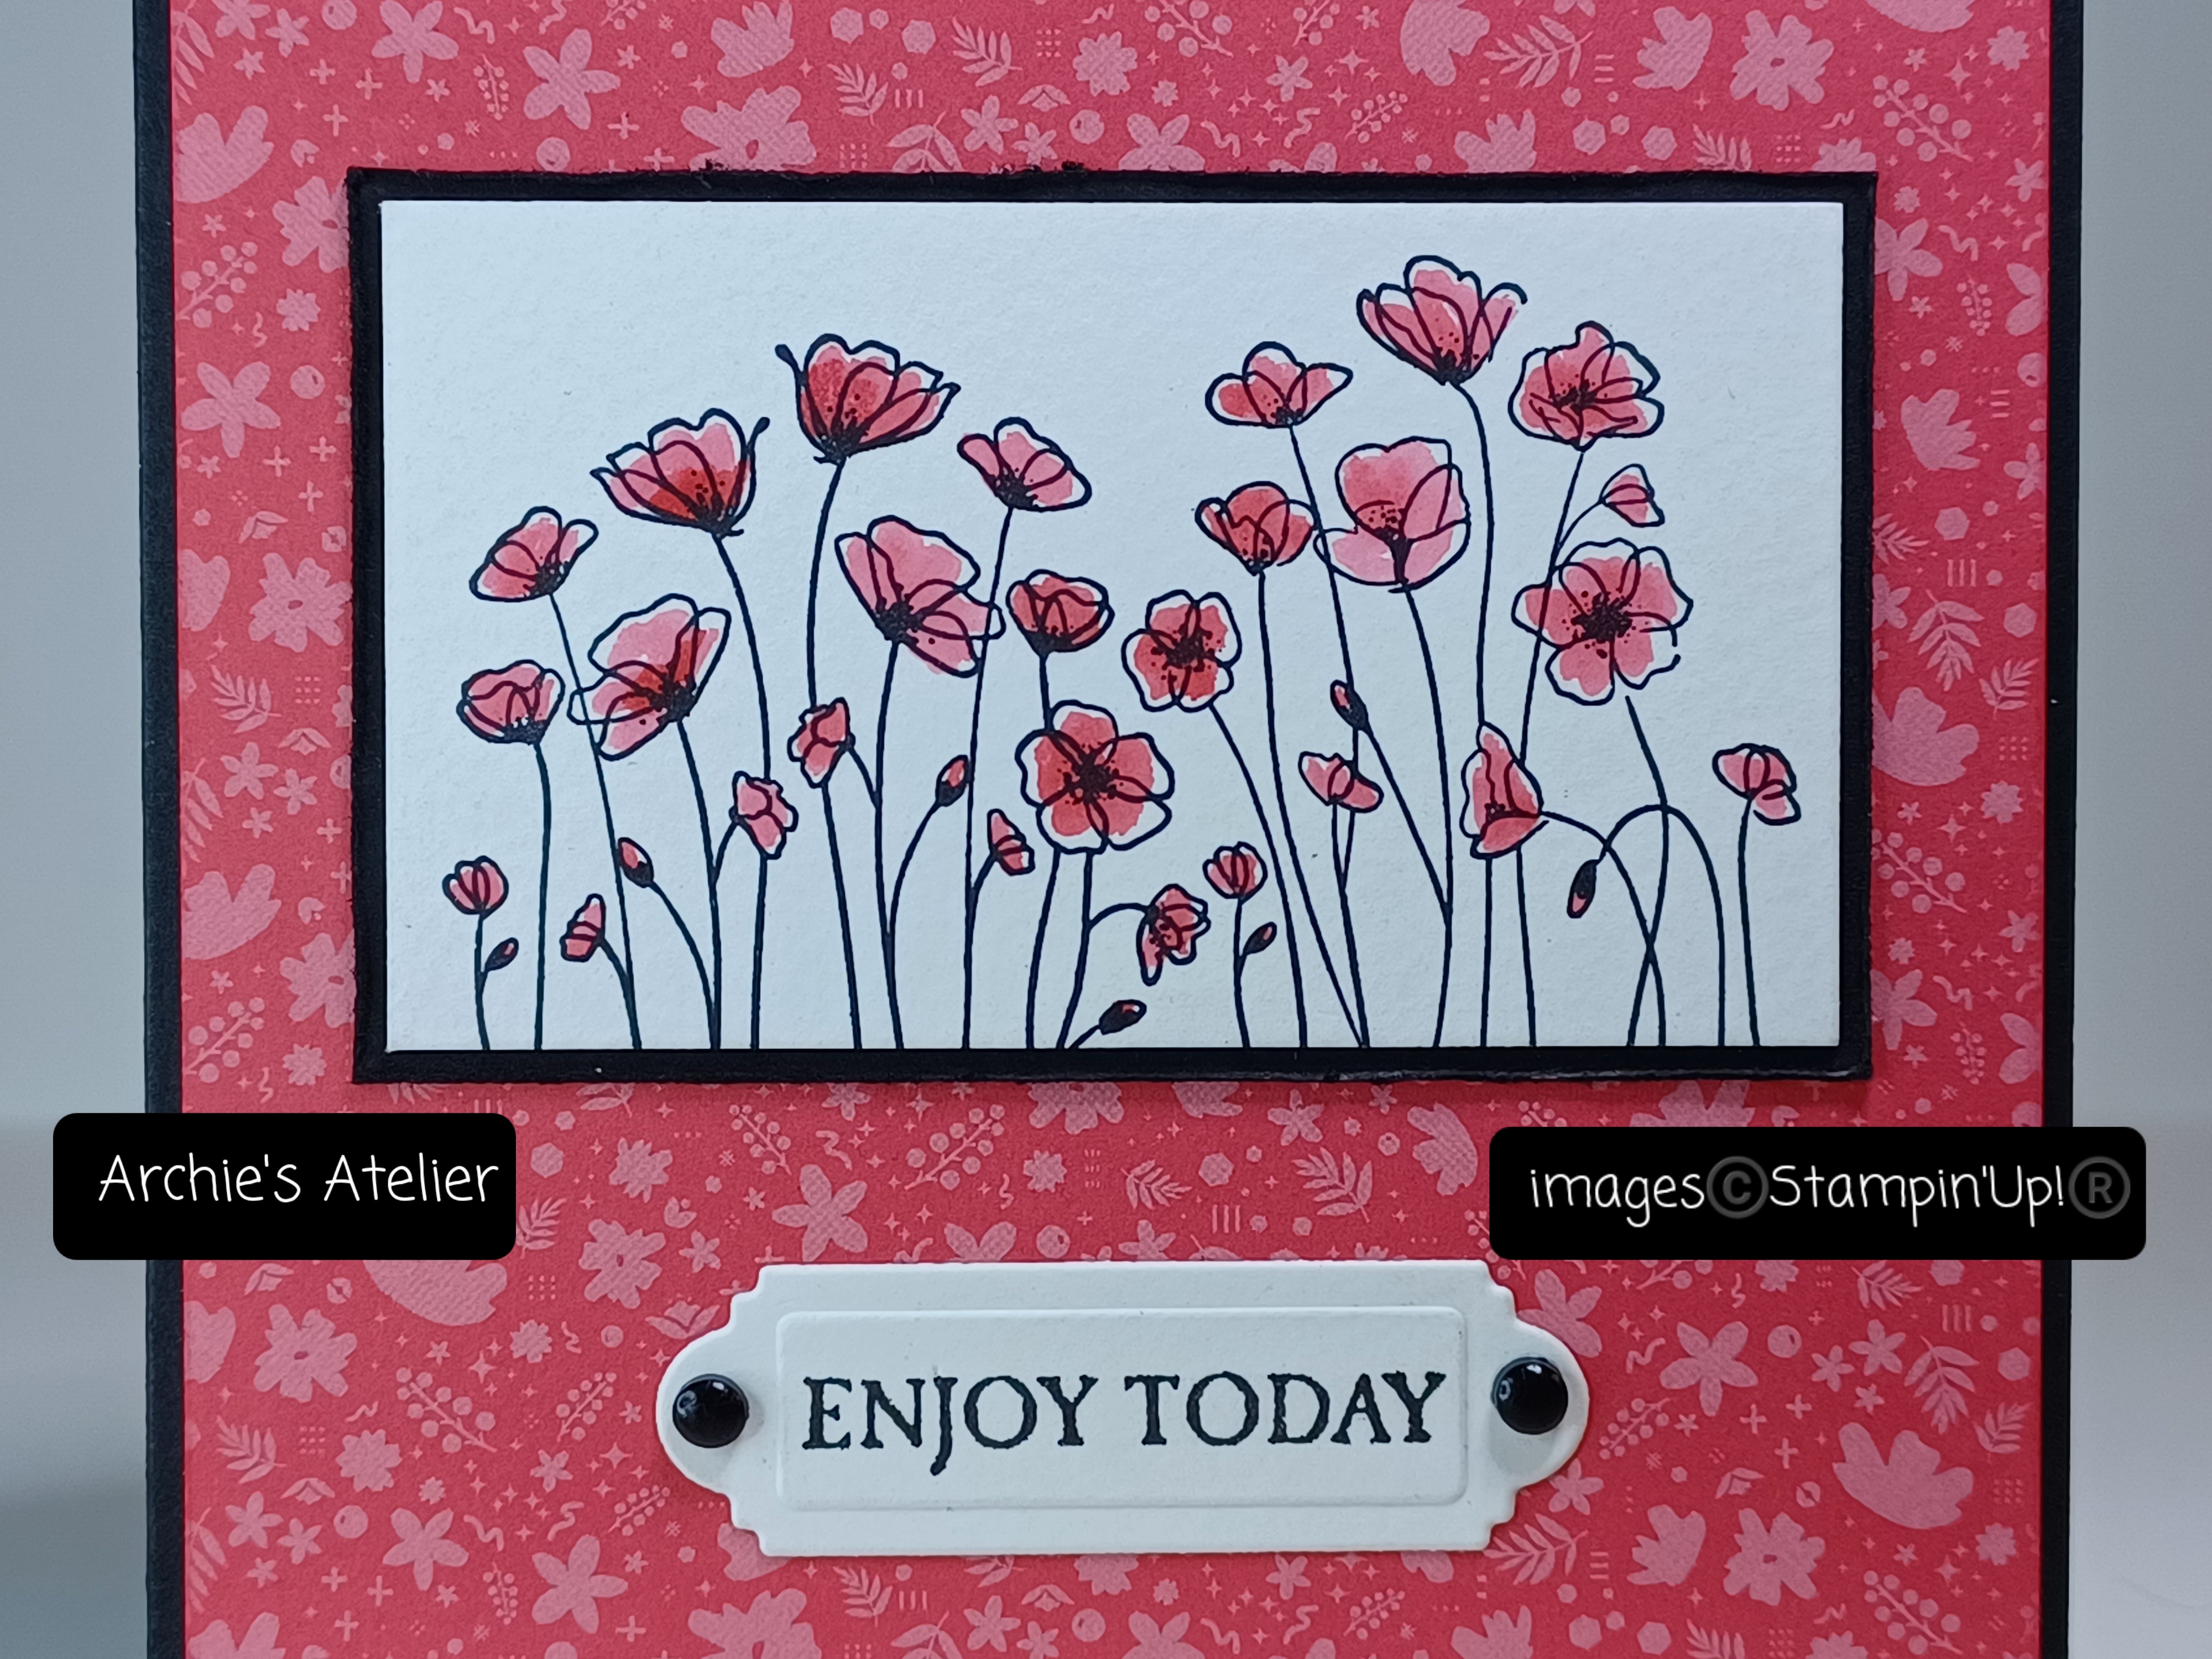
All coloured images were stamped on watercolour paper (Fluid 100 5" x 7" Watercolour Paper - item 149612) using Stazon Jet Black Ink (item 101406), and coloured using Stampin' Up! inks.
To make card envelopes I used an envelope punch board, and ribbons from my stash for the bows.


- Basic White Thick cardstock (item 159229) for the card base;
- Basic White cardstock (item 159276) for the embossed panel - embossed using the Timeworn Type 3D Embossing Folder (item 156505);
- Orchid Oasis cardstock (item 159267) for the front matting panel and inside sentiment strip;
- Nature's Harvest stamp set (item 156495) for the sentiment - which was stamped using Stazon Jet Black Ink;
- Sweet Sorbet ink (item 159216), Old Olive ink (item 147090), and Starry Sky ink (item 159212) to colour the image - I used a paintbrush with a little water to apply the Sweet Sorbet ink to the flowers, the Old Olive and Starry Sky inks were sponged on and then lightly (and very carefully!) spritzed with water (Stampin' Spritzers - item 126185) and blotted dry with paper towel - if you let the water sit on the ink for a couple of minutes before blotting you get the larger lighter splotches;
- Stylish Shapes dies (item 159183) to cut the image circle;
- Stampin' Dimensionals (item 104430) to adhere the image circle to the front panel;
- 2022-2024 In Colour Matte Decorative Dots (item 159186) - two of the Orchid Oasis shaded dots added to the front panel; and
- Orchid Oasis patterned paper from the 6" x 6" Designer Series Paper ASsortments - 2022-2024 In Colour (item 159253) for the envelope.


For this 4 1/2" x 4 1/2" side-fold card I used the following additional supplies:
- Basic White Thick cardstock (item 159229) for the card base;
- Basic Black cardstock (item 121045) for the front matting panel and the two die cut flower centers;
- Sweet Sorbet ink (item 159216) to colour the stamped and fussy cut flower;
- Basic Black Stampin' Write Marker (item 100082) to add the splatters to the flower by flicking the brush tip against the marker lid;
- Old Olive ink (item 147090) to colour the die cut leaves (sponging and then spritzing with water - Stampin' Spritzers - item 126185) and the watercolour paper panel - for the panel I applied the ink using a small roller - rolling (and re-inking) twice and rolling from opposite ends;
- Peaceful Moments stamp set (item 151595) for the sentiment - which was stamped on the watercolour paper panel using Stazon Jet Black Ink;
- Classic Matte Dots (item 158146) - one large and two small of the Basic Black dots added to the front panel;
- black baker's twine (Baker's Twine Essentials Pack - item 155475) - threaded through the flower's center button (from my stash!) - I secured the ends of the baker's twine at the back of the button with dabs of Multipurpose Liquid Glue; and
- for the envelope I used a piece from the Black & White 12" x 12" Designer Series Paper (item 159861).


For this 4" x 4" side-fold card I used the following additional supplies:
- Basic White Thick cardstock (item 159229) for the card base;
- Old Olive ink (item 147090) for the watercolour paper frame - again I applied the ink using a small roller - rolling vertically and horizontally;
- Sweet Sorbet cardstock (item 159268) for the frame (outside edges trimmed to allow for a very narrow border to show beyond the watercolour paper frame), and for the envelope;
- Stylish Shapes dies (item 159183) to cut the two rectangular frame openings;
- Sweet Sorbet ink (item 159216) to colour the flowers, and to stamp the envelope (using the large splatter stamp) - I stamped the piece of cardstock after it was cut to size for the envelope but before I did any scoring/cutting with the envelope punch board;
- Grassy Grove stamp set (item 157836) for the sentiment - stamped using Stazon Jet Black Ink; and
- 2022-2024 In Colour Matte Decorative Dots (item 159186) - three of the Sweet Sorbet shaded dots added to the watercolour paper frame.


For this 4" wide x 3 9/16" tall side-fold card I used the following additional supplies:
- Basic Black cardstock (item 121045) for the card base, and image matting panel (I "ruffled" the edges of the matting panel by scraping the blade of my craft knife along the edges);
- Basic White cardstock (item 159276) for the sentiment label and the inside panel;
- Campology stamp set (item 152553) for the sentiment - stamped using Stazon Jet Black Ink;
- Fabulous Frames dies (item 159163) to cut the sentiment label;
- Classic Matte Dots (item 158146) - two of the large Basic Black dots added to the sentiment label;
- Stazon Jet Black Ink to stamp the poppy image on the inside panel; and
- Sweet Sorbet patterned paper from the 6" x 6" Designer Series Paper Assortments - 2022-2024 In Colour (item 159253) for the front panel and for the strip (which is the reverse side of the front panel sheet and was a leftover strip after trimming the front panel) added to the bottom of the inside panel.
I did cheat - I used the same envelope that I made for the previous card!


For each of these cards I stamped the flowers on house shapes that I die cut from watercolour paper using the house die from the Gingerbread House dies (item 159718). To colour the images I used Sweet Sorbet ink (item 159216) for the flowers, Old Olive ink (item 147090) for the "grass" and stems, and Basic Gray ink (item 149165) for the sky, and, on "Always Remember", the edges and bottom of the house. I sponged on the Old Olive and Basic Gray inks and, for the Basic Gray ink, lightly spritzed with water (Stampin' Spritzers - item 126185) then blotted with paper towel. For additional "grass" I added some ink with a paintbrush. On "Always Remember", using the small splatter stamp and Basic Gray ink, I stamped around the edges and through the center of the house. For each card I added strips of watercolour paper that I had coloured using Old Olive and Sweet Sorbet inks, spritzed with water and blotted with paper towel. For both cards on the Old Olive inked strips I stamped the flower image using Old Olive ink; for "Always Remember" on the Sweet Sorbet inked strip I stamped the flower image using Sweet Sorbet ink. For both cards I embossed a Basic Black cardstock (item 121045) panel using the Brick & Mortar 3D Embossing Folder (item 149643).
The "Always Remember" and "Remember" sentiments (the same Always Remember sentiment from the Peaceful Moments stamp set - item 151595) were stamped on watercolour paper strips using VersaMark Ink (item 102283) and heat embossed using black embossing powder (Stampin' Emboss Powders - Basics - item 155554). The complete sentiment was stamped and embossed in both cases but I just cut off the "Always" for the "Remember" card.
Additional supplies used for the 5" wide x 2 7/8" tall side-fold "Always Remember" card:
- Gray Granite cardstock (item 146983) for the card base;
- Stylish Shapes dies (item 159183) to cut a watercolour paper circle that had been sponged with Starry Sky ink (item 159212) and splattered using Craft Stampin' Ink White Refill (item 101780). I had intended this for another project that had not worked out so I cut the circle in half to use on this card;
- Basic Gray ink to sponge around the edges of the trimmed and torn at one end sentiment strip;
- Gray Granite baker's twine (Baker's Twine Essentials Pack - item 155475) - wrapped around the house shape before it was adhered to the front panel using Stampin' Dimensionals (item 104430) - I secured the ends of the baker's twine with little dabs of Multipurpose Liquid Glue;
- 2022-2024 In Colour Matte Decorative Dots (item 159186) - Starry Sky and Orchid Oasis shaded dots added to the Old Olive inked strips; and
- Black & White 12" x 12" Designer Series Paper (item 159861) for the envelope - no bow added this time!
To the end of the sentiment strip I added a tiny staple.
Additional supplies used for the 4 1/8" tall x 2 11/16" wide top-fold "Remember" card:
- Basic Black cardstock (item 121045) for the card base;
- watercolour paper for the front matting panel and inside panel;
- white baker's twine (Baker's Twine Essentials Pack - item 155475) wrapped around the front panel - the ends of the twine secured with dabs of Multipurpose Liquid Glue; and
- Matte Black Dots (item 154284) - two of the large dots added to the front panel.
And finally . . .
For my last project - which will be an insert in a junk journal - I used the Mini Pocket Envelope dies (item 159167). The dimensions for the envelope - designed to hold a gift card - are 2 3/8" x 4". For the Basic Black cardstock (item 121045) bow I cut the die cut bow ends into two pieces so that the bow center wrap-around portion would be right side up. After die cutting the bow section, but before gluing the ends to the back of the center, I slightly curled the cardstock using my bone folder. I glued the assembled bow to a paper clip. To the Basic Black cardstock die cut tag I glued the trimmed and inked sentiment strip (I stamped and embossed the "Always Remember" sentiment from the Peaceful Moments stamp set - item 151595 on a strip of watercolour paper using VersaMark Ink - item 102283 - and black embossing powder - Stampin' Emboss Powders - Basics - item 155554). After cutting off the "Always" portion of the sentiment I sponged the sentiment strip with Soft Suede ink (item 147115). Through the tag hole I tied a small length of Linen Thread (item 104199) - the ends of which I secured to the bow center with a dab of Multipurpose Liquid Glue.


My envelope holds a photocopy of a family photograph, which I sponged lightly with Crumb Cake ink (item 147115). Using the Fabulous Frames dies (item 159163) I cut the oval frame from watercolour paper. I sponged the die cut frame with Soft Suede ink, dabbed on some VersaMark Ink with a sponge and then heat embossed using gold embossing powder (Stampin' Emboss Powders - Metallics - item 155555). While the embossing powder was still warm I dabbed the frame with a sponge - attempting to remove some of the embossing as I was trying to achieve the look of an aged frame that had lost some of the gold leafing - I have to experiment with this technique a little more! I glued the framed photo to a piece of Basic Black cardstock that I then matted with a very slightly larger piece of Kraft Paper. For additional embellishment I added four of the Rustic Metallic Adhesive-Backed Dots (item 159082). Looking forward to making more of these mini pocket envelopes for my junk journals!
Thank you for visiting my blog! I had a lot of fun working on these projects!
If you are interested in purchasing any of the available Stampin' Up! products I have used in my projects, and you live in Canada and do not have a Stampin' Up! demonstrator, please do not hesitate to visit my online store found on my website https://archiesatelier.stampinup.net/ at your convenience, or simply click under the "Shop With Me" tab on the right sidebar of my blog, which will take you directly to my website and online store. I very much appreciate your business! You can browse the PDF versions of the July-December 2022 Mini Catalogue and the May 2022-April 2023 Annual Catalogue anytime on my website.
Have fun creating!
Laurel

Comments
Post a Comment