Valentine projects using Sale-A-Bration products! 

Hello!  Since Valentine's Day is only a few days away today I am sharing a few Valentine cards (and a treat holder!) I made this week using some of the Stampin' Up! Sale-A-Bration stamp sets and papers.  Sale-A-Bration runs until February 28, 2022, and is a great opportunity to get some exciting free products while stocking up on your papercrafting supplies!

Sunshine & Rainbows 6" x 6" Designer Series Paper (item 158126)
There are certainly lots of colours to choose from in this paper pack! There are the brighter more intense colours like Magenta Madness, Mango Melody, Granny Apple Green, Flirty Flamingo, and Bermuda Bay - and there are also the softer more pastel colours like Pool Party, Soft Sea Foam, So Saffron, and Petal Pink - and all are fun to play with!  There are also lots of patterns even if you don't like rainbows!

After watching Natasha Foote's December 27, 2020, You Tube video  "Creating an Easy Floating Element in Cardmaking" (https://www.youtube.com/watch?v=ASzxapE_Irg&t=5s) and Lisa Curcio's March 15, 2021, You Tube video "Try a Floating Element Card Technique For New and Happy Greeting Cards" (https://www.youtube.com/watch?v=w4nyr-cbX38&t=1421s) I was anxious to try the "floating" technique.  For both of my simple cards I began by adhering strips of the DSP to an acetate base (Window Sheets - item 142314) using double-sided tape (Tear & Tape Adhesive - item 154031).  The acetate with the DSP attached was then cut using dies - for the circle I used the Layering Circle dies (item 151770), and for the heart I used the larger of the two heart dies included with the Bouquet of Love Hybrid Embossing Folder (item 157641).  I also cut out from the circle the stitched heart using the smaller of the two heart dies included with the Bouquet of Love Hybrid Embossing Folder (item 157641).  To create the "floating" effect the acetate bases were attached to the cardstock using foam tape that is adhered to the back of the acetate shape and only behind the DSP strips - the narrow Foam Adhesive Strips (item 141825) worked great for this! For my circle card I glued the Poppy Parade cardstock (item 119793) stitched heart (also cut using the Bouquet of Love Hybrid Embossing Folder stitched heart die) directly to the Basic White Thick cardstock (item 159229) card base after attaching the acetate circle.  To complete the 4" x 4" card I added one large and one small of the Matte Black Dots (item 154284) to both the upper left corner and lower right corner, and glued the sentiment panel to the circle.  The "You make my heart Happy" sentiment, from the Sale-A-Bration stamp set Catching Butterflies (item 158108), was stamped in Stazon Jet Black Ink (item 101406) on a 2 5/16" x 1/2" strip of Basic White Thick cardstock (item 159229) - I trimmed the cardstock strip after stamping as I certainly don't have the required eye-hand co-ordination to stamp anything reasonably straight on such a small piece of cardstock!

For the heart card I used Mango Melody cardstock (item 146989) for the card base (3 1/2" x 3 3/8").  I attached the acetate heart shape to a Basic Black cardstock (item 121045) panel (3 3/8" x 3 1/4"), and to the top of the heart I glued a button from my stash through which I threaded some black baker's twine (Baker's Twine Essentials Pack - item 155475).

For this small milk carton treat holder I used Pool Party cardstock (item 122924) measuring 7" x 10 1/2" - scored on the 7" side at 2", 5", and 6 1/2"; and scored on the 10 1/2" side at 2 1/2", 5", 7 1/2", and 10",  I cut the DSP mat panels 1/16" smaller than the cardstock panels.  Before assembling the carton I glued the DSP panel to the front panel of the carton and cut out the 1 7/8" circle window using the Layering Circle dies (item 151770).  I glued the rest of the DSP mat panels to the sides and back panels, and the two top panels (front and back).  After adhering the acetate (Window Sheets - item 142314) panel to the inside of the front panel I glued the carton together. To keep the carton closed I have used two pastel binder clips that I picked up at Dollarama.  I used the Pierced Blooms dies (item 154312) to cut the flower, flower center, and leaves:  So Saffron cardstock (item 105118) for the flower; Basic White cardstock (item 159276) for the flower center; and Pool Party cardstock (item 122924) for the leaves.  I also added three of the Opal Rounds (item 154289) - one to the center of the flower and the other two on the front panel for a little sparkle.  This little milk carton holds quite a few of these little pastel candy hearts I picked up at Dollar Tree:

For this 4 1/4" x 4 1/4" Basic White Thick cardstock (item 159229) the 4 1/8" x 4 1/8" Granny Apple Green DSP panel is from the Sunshine & Rainbows DSP pack - the two "corners" (Granny Apple Green and white foliage pattern) are from the Sale-A-Bration Friendly Hello 12" x 12" Designer Series Paper (which is part of the Friendly Hello Stamp Set + Friendly Hello 12" x 12" Designer Series Paper set - item 159990 - offered for free with a $120.00 CDN [before taxes] purchase).
The double Polished Pink cardstock (item 155710) heart was cut using the two heart dies included with the Bouquet of Love Hybrid Embossing Folder (item 157641). I embossed the 3 1/4" x 3 1/4" Basic White Thick cardstock (item 159229) panel using the Painted Texture 3D Embossing Folder (item 154317).  I cut the leaves from Granny Apple Green cardstock (item 146990) using the Pierced Blooms dies (item 154312).  The red button is from my Dollarama stash.  (Yes, I do like to shop at Dollarama and Dollar Tree!) The scalloped edging that I glued along the inside edge of the front panel (and which makes the front of the card slightly larger than the back of the card) was cut from Basic White Thick cardstock using the scallop edge die from the Scalloped Contours dies (item 155560).  The Granny Apple Green DSP strip that I have glued to the inside of the front panel to cover the edge of the scallop edging is from the 6" x 6" Designer Series Paper Assortments - Brights - item 155228.  I think Polished Pink, Granny Apple Green, and white makes for a very happy colour combination - and what could be better to lift spirits on a very dull mid-winter day?  

Catching Butterflies stamp set (item 158108)
I made two cards using this very sweet stamp set:
Although I don't have any of the Stampin' Blends alcohol markers (yet!) to colour the images for both cards I did use some alcohol markers I do have in colours that I thought matched quite closely with the colours of the cardstock I was using.  I stamped the images on Basic White cardstock (item 159276) using Memento Tuxedo Black Ink (item 132708).  

For my first card I used the Stitched So Sweetly dies (item 151690) to cut the image panel before adhering it to a Basic Black cardstock (item 121045) panel.  I used Magenta Madness cardstock (item 153080) for the base of the 5 1/4" x 4 1/8" card.  I used a 5 1/8" x 4" Basic Black cardstock (item 121045) panel to mat the two pieces of Sunshine & Rainbows DSP (with a 1/16" separation between the two DSP panels).  Under the broad striped DSP panel I added a Magenta Madness cardstock scalloped edging, cut using the scallop edge die from the Scalloped Contours dies (item 155560),  The "Collecting sweet thoughts of you" sentiment was stamped in Stazon Jet Black Ink (item 101406), and the Magenta Madness cardstock circle and the Basic Black cardstock scalloped circle were cut using the Layering Circle dies (item 151770).  To the sentiment circle I added a small black baker's twine (Baker's Twine Essentials Pack - item 155475) bow, and as additional embellishments to the front of the card I added two large and four small Matte Black Dots (item 154284).  To the inside of the card I glued a Basic White Thick cardstock (item 159229) panel, to the bottom of which I glued a strip of the Sunshine & Rainbows DSP and a narrow strip of Basic Black cardstock (item 121045).

I used Basic White Thick cardstock (item 159229) for the base of my second card (5 9/16" x 3 3/4").  After being trimmed, the image panel was adhered to a 3 3/4" x 2 11/16" Basic Black cardstock (item 121045) panel, which was then glued to a 5 1/8" x 3 7/16" Real Red cardstock (item 102482) panel.  The "You make my heart happy" sentiment was stamped on the Real Red cardstock panel using Stazon Jet Black Ink (item 101406).  Before adhering the Real Red cardstock panel to the card base I wrapped black baker's twine (Baker's Twine Essentials Pack - item 155475) around the panel above the sentiment.  After tying the bow I secured each end with a little drop of Multipurpose Liquid Glue (item 110755),  I cut all the little Real Red cardstock hearts using the small heart die from the Birds & More dies (item 152721).  To the bottom of the inside panel I added a narrow Basic Black cardstock strip and one of the small Real Red cardstock hearts.

And finally . . .
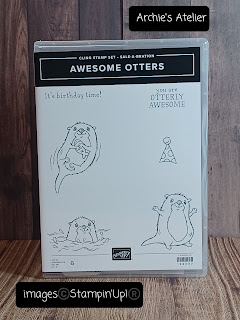
Awesome Otters stamp set (item 158087)
For my last two cards I used another very cute stamp set, Awesome Otters.  (I understand that this set has been very popular!)  To colour the images for both of these cards I used the Watercolour Pencils (Early Espresso and Basic Gray from Assortment 1 - item 141709; and Balmy Blue and Flirty Flamingo from Assortment 2 - item 149014).  I stamped the images on watercolour paper using Stazon Jet Black Ink (item 101406).
I used Balmy Blue cardstock (item 146982) for the base of this 5 1/2" x 3 13/16" top-fold card.  I used the scallop edge die from the Scalloped Contours dies (item 155560) to cut the scalloped edge along the bottom edge of the card front.  Using the larger of the two heart dies included with the Bouquet of Love Hybrid Embossing Folder (item 157641) I cut a heart window in a 4 1/2" x 3 9/16" Balmy Blue DSP (6" x 6" Designer Series Paper ASsortments - Subtles - item 155229) panel.  After gluing the image panel to the back of the DSP panel, I glued the DSP panel to an Early Espresso cardstock (item 119686) 4 5/8" x 3 11/16" panel, which was then glued to the card front.  The "You make my heart happy" sentiment, from the Catching Butterflies stamp set (item 158108), was stamped using Stazon Jet Black Ink (item 101406) on a piece of Balmy Blue cardstock, which was then cut using the larger label die included with the Bouquet of Love Hybrid Embossing Folder (item 157641).  To embellish the sentiment label I added two small Early Espresso cardstock flowers, cut using the small flower die included with the Bouquet of Love Hybrid Embossing Folder.  To the center of each flower I added one of the small white Classic Matte Dots (item 158146).  Around the card front, under the Early Espresso cardstock panel, I wrapped and tied a Linen Thread (item 104199) bow.  To the inside of the card I added an Early Espresso cardstock panel topped by a 4 3/4" x 3 1/2" Basic White Thick cardstock (item 159229) panel, along the bottom of which I glued a strip of the Balmy Blue DSP and an Early Espresso cardstock stitched heart (cut using the smaller of the two heart dies included with the Bouquet of Love Hybrid Embossing Folder).

I used Early Espresso cardstock (item 119686) for the base of this 4" x 4" card.  The image circle and Early Espresso cardstock mat circle were cut using the Layering Circle dies (item 151770).  The "you are otterly awesome" sentiment was stamped using Stazon Jet Black Ink (item 101406) on a piece of Pool Party cardstock (item 122924), which was closely trimmed and then matted with Early Espresso cardstock to provide for an approximately 1/16" border.  The hearts were cut from Flirty Flamingo cardstock (item 141416):  the small hearts using the small heart die from the Birds & More dies (item 152721); and the stitched heart using the smaller of the two heart dies included with the Bouquet of Love Hybrid Embossing Folder (item 157641).  I used a 3 7/8" x 3 7/8" panel of Sunshine & Rainbows DSP for the front of the card.  The sentiment panel and the stitched heart were adhered using Mini Stampin' Dimensionals (item 144108).  The leaves were cut from Bermuda Bay cardstock (item 131197) using the Pierced Blooms dies (item 154312).  To the inside of the card I glued a 3 7/8" x 3 7/8" Pool Party cardstock panel, which was embellished with two strips of the Sunshine & Rainbows DSP, and a small heart "flower" - Flirty Flamingo cardstock heart, and Bermuda Bay cardstock leaves.

Thank you for visiting my blog!  If you are interested in purchasing any of the available Stampin' Up! supplies I have used in these projects, and you reside in Canada and do not have a Stampin' Up! demonstrator, please do not hesitate to visit my online store on my website https://archiesatelier.stampinup.net/, or simply click under the "Shop With Me" tab on the right sidebar of my blog, which will take you directly to my website and online store.  I certainly appreciate your business!

Have fun creating and Happy Valentine's Day!

Laurel

A supervisor's job is never done!


Comments