A Few Sale-A-Bration Projects!

Hello! Since Stampin' Up! Sale-A-Bration started January 4, 2022 (and runs until February 28, 2022) I am sharing a few projects today that feature a few of the Sale-A-Bration products (as well as a few of the new products from the January-June 2022 Mini Catalogue, which also launched on January 4, 2022).
Simply Marbleous 6" x 6" Designer Series Paper (item 158128)

For this 4 1/2" x 4 1/2" card I used Basic Gray cardstock (item 121044) for the card base, and the Basic Gray Simply Marbleous Designer Series Paper for the decorative front mat, from which I cut the heart opening using the larger of the two heart dies included with the new Bouquet of Love Hybrid Embossing Folder (item 157641). Using the larger heart die with the embossing folder (the larger heart die "snaps" into the embossing folder and using the die and embossing folder together allows you to cut and emboss simultaneously) I cut a embossed heart out of Real Red cardstock (item 102482). After gluing the Simply Marbleous panel to a Basic Black cardstock (item 121045) panel I glued the inset Real Red cs heart to the underlying Basic Black panel and then glued the Basic Black panel to the front of the card base. To complete the front of the card I added a bow cut from Basic Black cardstock using the Pierced Blooms dies (item 154312) to the center of which I glued a gray button from my stash and one of the large Matte Black Dots (item 154284). For the interior of the card I stamped the "Thinking of you with all my heart" sentiment (from the Peaceful Moments stamp set - item 151595) in Memento Tuxedo Black Ink (item 132708) on Basic White Thick cardstock (item 159229), which I then cut using the large heart die. I glued the sentiment heart to a Basic Gray doily (Heart & Home Doilies - item 157956 from the new Mini Catalogue - the doilies are Basic Gray, Misty Moonlight, and Cinnamon Cider and Basic White on the reverse side). For a decorative strip I cut the label from Real Red cardstock using the smaller of the two label dies included with the Bouquet of Love Hybrid Embossing Folder and added two small Matte Black Dots (item 154284).
One side of the Simply Marbleous DSP has the "swirly" pattern as I used in my first card, and the other side has a "marbled" pattern. For my next two cards I used the Pool Party Simply Marbleous DSP.


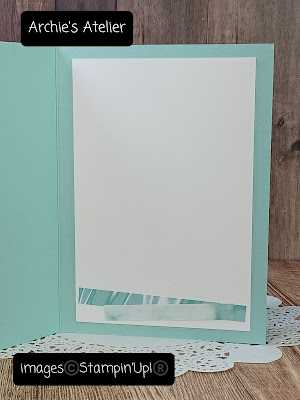
For this 4" x 4 1/2" card I used Pool Party cardstock (item 122924) for the base; Basic Gray cardstock (item 121044) for the mat under the "marbled" Pool Party Simply Marbleous DSP top panel. The embossed heart (cut using the larger heart die included with the embossing folder) was cut from Polished Pink cardstock (item 155710). Before gluing the embossed heart to the marble panel I added two strips of patterned paper from the 6" x 6" Designer Series Paper Assortments: the bottom (darker) panel is Bermuda Bay from the Brights Assortment (item 155228) and the top (lighter) panel is Pool Party from the Subtles Assortment (item 155229). The "Hello" sentiment, from the Forever Fern stamp set - item 152559, was stamped in Memento Tuxedo Black Ink (item 132708) on Basic White Thick cardstock (item 159229) that was then cut using the larger of the two label dies included with the Bouquet of Love Hybrid Embossing Folder. The teal and pink buttons are from my stash. I used DMC embroidery floss #964 - an amazingly close match to Pool Party! - to tie the bow on the pink button.
To the interior Basic White Thick cardstock panel I added a strip of the Bermuda Bay DSP and a thin strip of the marble Pool Party Simply Marbleous DSP and a small Polished Pink cardstock heart (cut using the smaller of the two heart dies included with the Bouquet of Love Hybrid Embossing Folder).

For this 4 1/8" x 5 3/4" card I also used Pool Party cardstock (item 122924) for the card base. For the decorative panel I cut one sheet of the Pool Party Simply Marbleous DSP into six 1" wide strips and glued the strips (overlapping them and alternating "swirly" and "marbled" sides) onto Basic White cardstock (item 159276). The trimmed panel (3 7/8" x 5 1/2") was then glued to a Basic White Thick cardstock (item 159229) panel, which was then glued to the front of the card base. The flower, leaves, and stem, were cut using the Pierced Blooms dies (item 154312): for the flower I used Polished Pink cs (item 155710); Poppy Parade cs (item 119793); and Basic White Thick cs (item 159229). The center of the flower was cut from Pool Party cs using the circle hole re-enforcer die from the Tailor Made Tags dies (item 155563). I also added three more of the Pool Party circle hole re-enforcers around the base of the stem. I used Granny Apple Green cs (item 146990) to cut the leaves and stem. The "my friend" sentiment (from the Easter Friends stamp set - item 157737 - from the new Mini Catalogue) was stamped on Basic White Thick cs (item 159229) using Memento Tuxedo Black Ink (item 132708) and then cut using the Tailor Made Tags dies (item 155563). To "dot" the "i" in friends I added one of the center holes from the Pool Party circle hole re-enforcers.
To the interior Basic White Thick cs (item 159229) panel I just added two strips of the Pool Party Simply Marbleous DSP - alternating the "swirly" and "marbled" sides.
I made envelopes for each of these cards using an envelope punch board and some retired DSP from my stash that I thought would co-ordinate. Sometimes I almost have more fun making and decorating the envelopes than I have making the cards!!
Daffodil Afternoon 12" x 12" Designer Series Paper (item 158127)
Flip Top Gift Box and Gift Card

As a quick summary, my 5" x 11 1/2" piece of Basic Black cardstock (item 121045) was scored as follows:
- on the 11 1/2" side at 3 1/2"; 4 1/2"; 8" and 9"' and
- on the 5" side at 1" and 4".


I used the Daffodil Afternoon DSP for the decorative panels for the front, back, sides, and top of the box, and Crushed Curry DSP from the 6" x 6" Designer Series Paper Assortments - Regals (item 155227) for the flap panels and for the base of the top panel. I glued the Crushed Curry DSP outside flap panel on before die cutting the edge and the inside panel was separately die cut and adhered after the flap edge was die cut. I used the scalloped edge die from the Scalloped Contours dies (item 155560) to cut the flap edge.


To accompany the gift box (which measuring 3" high x 1" deep x 3" wide is a perfect size to hold a small gift for any occasion!) I made a 2 3/4" x 3 1/2" gift card and co-ordinating envelope.


And finally . . .
For my last project I made a small gift bag with co-ordinating gift card and envelope.


After the bag was assembled, on the front and back of the bag I cut two holes approximately 3/4" from each end and approximately 1/2" from the top to accommodate the bag handles. For the handles I used some "vanilla" wired jute twine that I found at Dollarama - very easy to manipulate and to cut!

I used Very Vanilla Thick cs (item 144237) for the base of the 2 3/4" x 3 1/4" gift card. I used Evening Evergreen cs (item 155574) and Petal Pink cs (item 146985) for the mats for the Daffodil Afternoon DSP panel. The Petal Pink cs panel was embossed using the Tasteful Textile 3D Embossing Folder (item 152718). The "Thank You" sentiment (from the new Grassy Grove stamp set - item 157836) was stamped in Memento Tuxedo Black Ink (item 132708) on Very Vanilla Thick cs (item 144237) and the label was cut using the Stitched So Sweetly dies (item 151690). The Daffodil Afternoon DSP co-ordinating envelope was made using an envelope punch board and was also embellished with Daffodil Afternoon DSP and two strips of Petal Pink cs.
I enjoyed working on these projects using these very pretty designer series papers! The Simply Marbleous DSP and Daffodil Afternoon DSP are a few of the free Sale-A-Bration selections that are available with qualifying orders (to select either Simply Marbleous or Daffodil Afternoon your qualifying order must be $60.00 CDN before taxes and shipping).
Thank you very much for visiting my blog! If you are interested in purchasing any of the available Stampin' Up! products that I have used in these projects, and you reside in Canada and do not have a Stampin' Up! demonstrator, I would be pleased to have you visit my online store, available on my website https://archiesatelier.stampinup.net/ (or you can click under the "Shop With Me" tab on the right sidebar of my blog). The January-June 2022 Mini Catalogue and the Sale-A-Bration catalogue can also be viewed online on my website!
Have fun creating!
Laurel

Comments
Post a Comment